
A backyard can become one of your dog’s favorite places to relax, sniff the breeze, watch birds, and spend time beside you. But when your yard is not fully fenced, creating that freedom safely takes a little planning. The best dog tie out ideas backyard spaces use thoughtful placement, comfortable materials, shade, and plenty of clear room so your dog can enjoy being outdoors without the setup taking over the entire landscape.
A tie-out works best for supervised outdoor time rather than as permanent confinement. Think of it as a practical way to let your dog lounge beside you while you garden, enjoy coffee on the patio, or work outdoors. Keeping the tether away from furniture, steps, fences, plants, grills, and other obstacles can also help reduce tangling.
You are reading: 19 Dog Tie Out Ideas Backyard Setups For Safe And Stylish Outdoor Time
The good news is that a functional setup does not have to look industrial. From discreet ground anchors hidden beside landscaping to beautiful pergola-style trolley systems, there are plenty of ways to blend dog-friendly features into a backyard you genuinely enjoy looking at. These ideas combine comfort, practicality, and visual appeal so you can adapt them to your dog’s size, activity level, and personality.
Dog Tie Out Ideas Backyard Setups For Comfortable Outdoor Time
Cedar Post Trolley Run Along A Grassy Side Yard
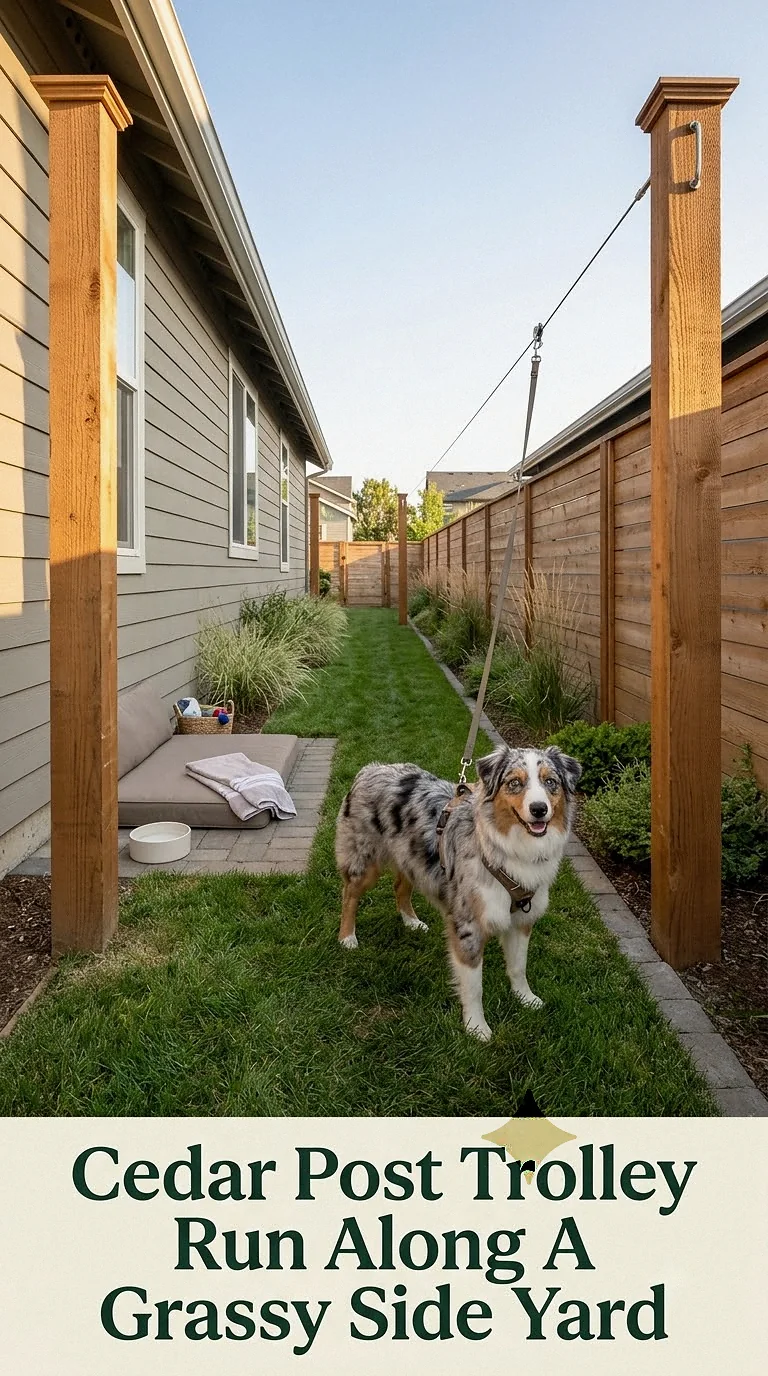
A long, narrow side yard is an ideal location for a streamlined trolley setup. Install sturdy cedar posts at opposite ends and run an elevated line between them, allowing the tether attachment to travel along the length of the space.
Cedar gives the structure a warmer, more intentional appearance than exposed metal posts. It also looks beautiful beside black fencing, gravel pathways, and simple greenery.
Keep the dog’s travel path as open as possible. Avoid placing garden furniture, pots, hoses, or decorative objects within reach of the moving tether.
Natural grass provides a comfortable surface for lounging, although a combination of grass and compacted fine gravel can make high-traffic areas easier to maintain. Add a shaded resting spot and a stable water bowl near the center of the dog’s accessible zone.
Modern Black Post Tie Out With Minimal Landscaping
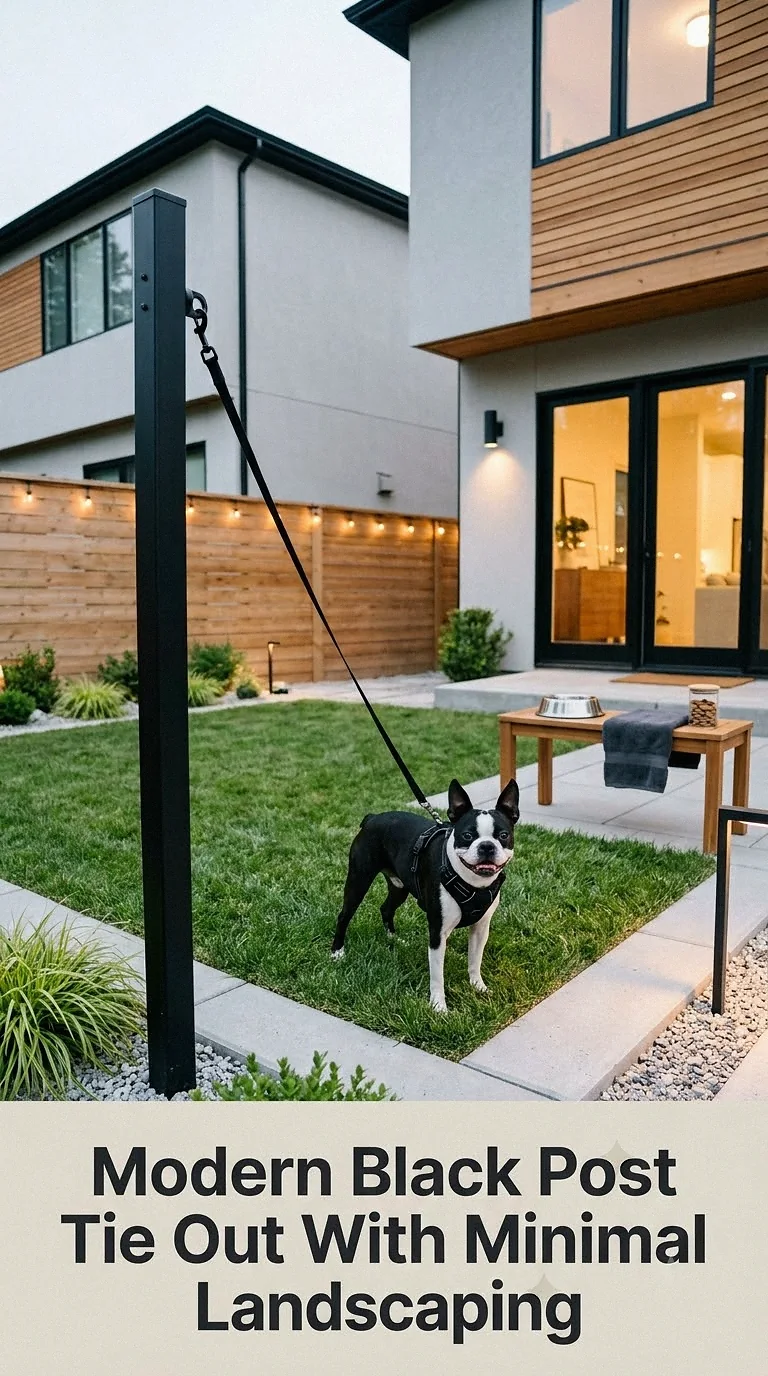
For a contemporary backyard, turn the containment system into part of the landscape design. A powder-coated black post paired with a discreet rotating attachment can look surprisingly elegant beside modern patios and simple planting beds.
Position the post in an open section of lawn where the tether can rotate without wrapping around nearby objects. Surrounding the area with low ornamental grasses or a clean gravel border visually connects the dog zone with the rest of the yard.
Keep decorative landscaping outside the dog’s full reach rather than placing plants directly around the anchor.
This design works especially well with white siding, charcoal fencing, concrete pavers, and minimalist outdoor furniture. A matching black water bowl stand can make even the practical accessories feel coordinated.
Shaded Pergola Tie Out Lounge With Outdoor Dog Bed
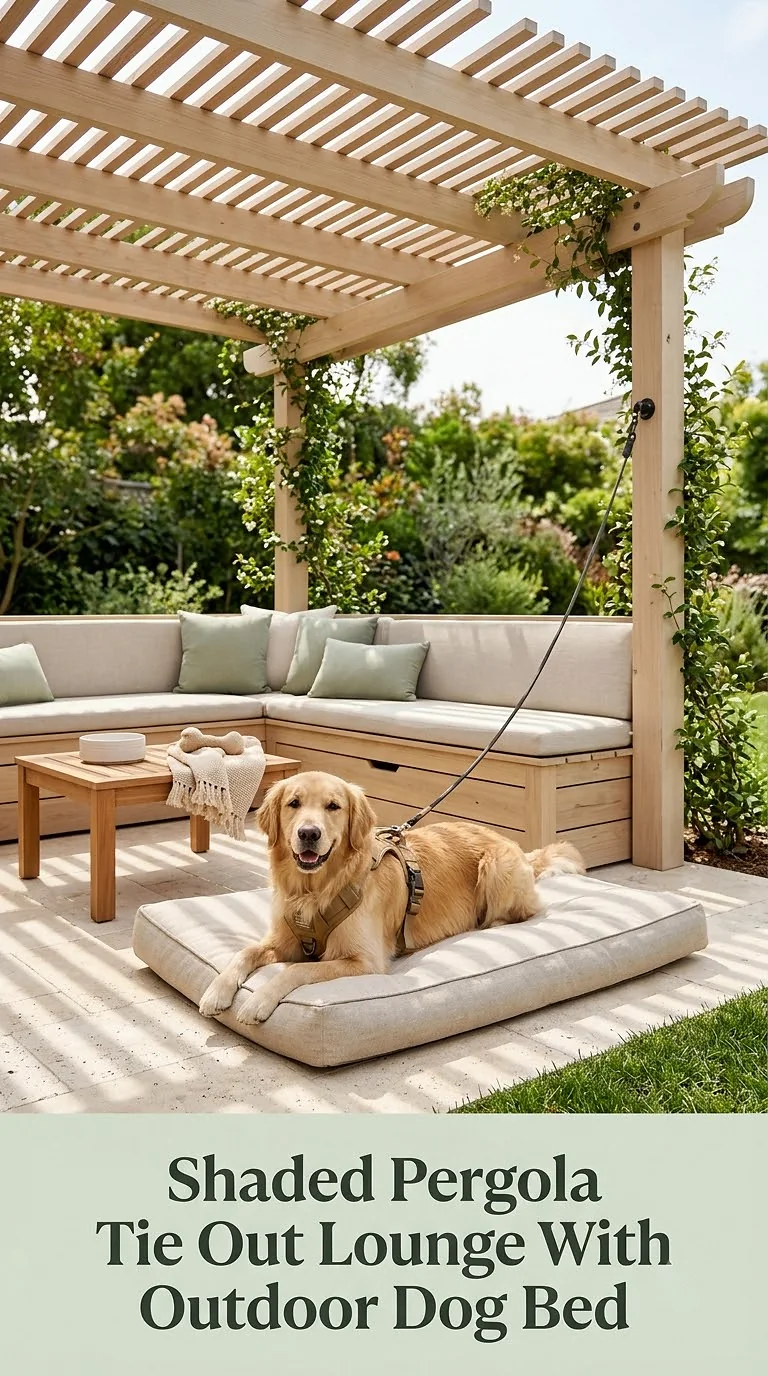
A small pergola can turn an ordinary tie-out location into a beautiful backyard retreat. Choose a simple wood structure with an open center and position the tether attachment where your dog has plenty of unobstructed movement.
Underneath, create a comfortable resting zone with a washable outdoor dog bed, water bowl, and perhaps a cooling mat during warm weather.
A slatted pergola is attractive, but remember that sunlight moves throughout the day. Adding a retractable shade panel or outdoor fabric canopy can create more dependable coverage.
Style the surrounding area with neutral planters, warm wood tones, and simple pavers. Keep anything your dog could wrap the tether around beyond the accessible radius.
The finished space can feel more like an outdoor lounge than a utility area.
Cottage Garden Ground Anchor With A Clear Grass Circle
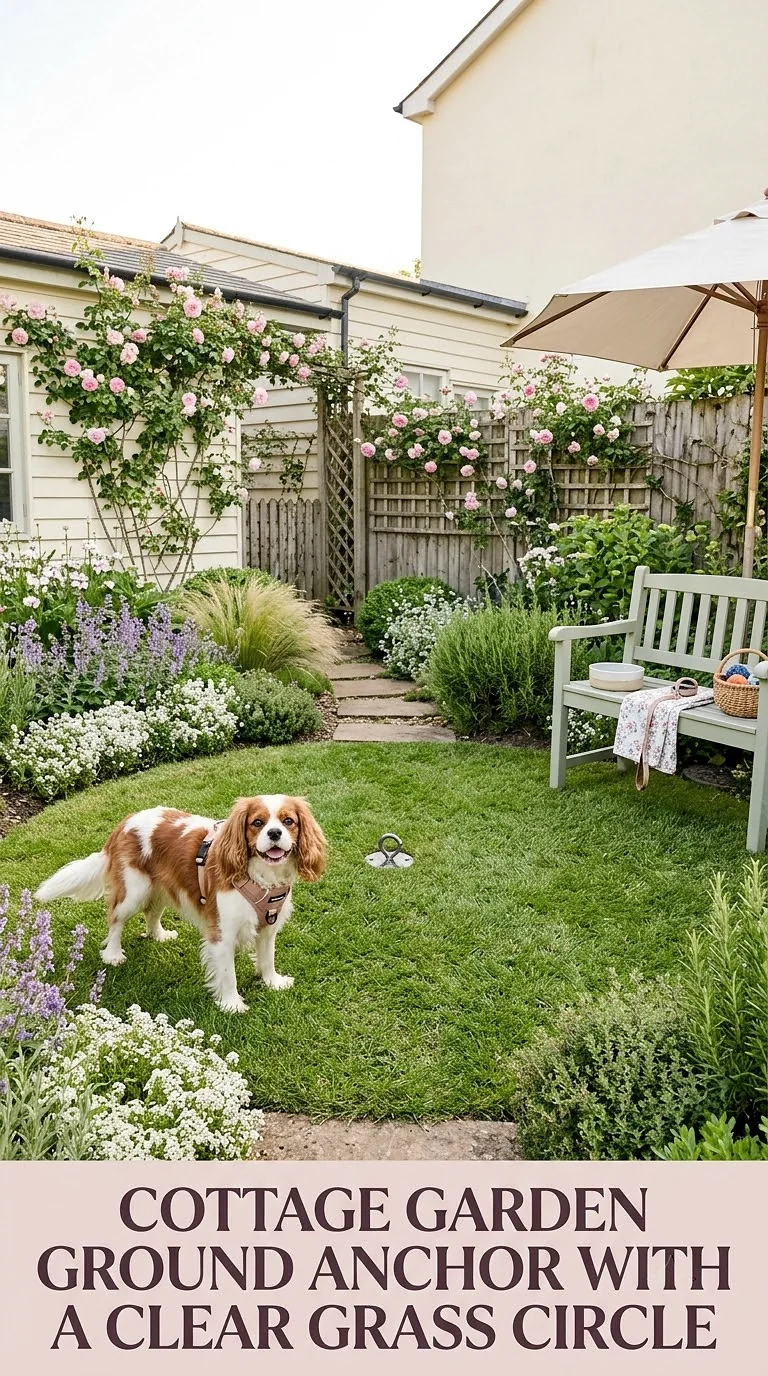
A ground anchor can disappear almost completely into a romantic cottage-style backyard when it is positioned thoughtfully.
Instead of placing the anchor among flower beds, create a generous circle of open lawn nearby. The surrounding garden can still feature roses, hydrangeas, lavender-like foliage, or other attractive plants, but they should remain beyond the dog’s tether range.
This layout allows the dog zone to feel integrated into the garden without placing delicate landscaping directly in the path of running paws.
Use a low-profile anchor with a freely rotating connection so the line is less likely to twist. A soft neutral outdoor mat beneath a nearby shade tree or canopy creates a cozy resting area without making the garden look overly pet-focused.
Covered Patio Tie Out With A Wall-Mounted Swivel
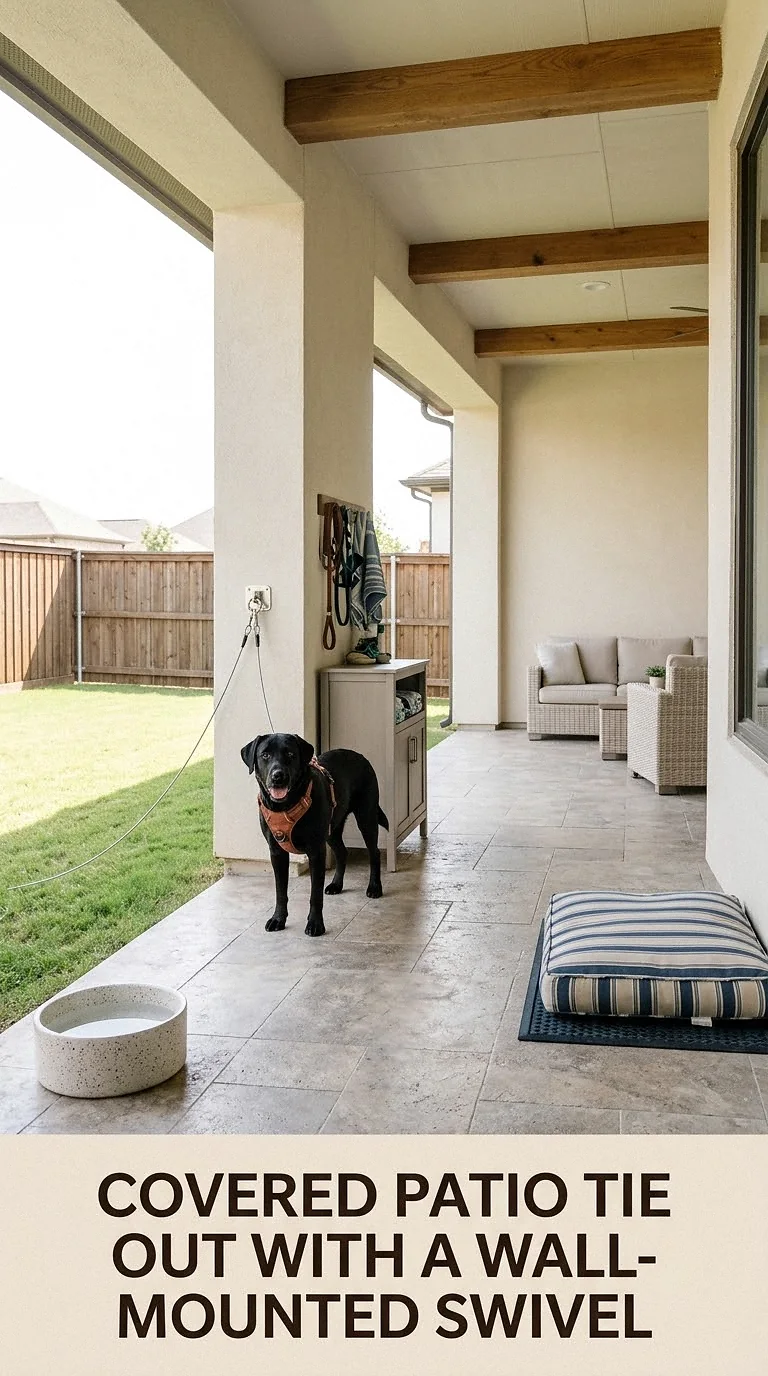
If your dog loves staying close while you relax on the patio, a discreet wall-mounted swivel may offer a compact solution.
The best placement is along an open exterior wall where the dog’s accessible area does not cross stairs, doorways, furniture, cooking equipment, or walking paths. Before installation, make sure the mounting location and hardware are appropriate for the wall material and the forces your dog may create.
A covered patio offers the advantage of built-in shade and easy access to water.
Keep the styling simple with a washable outdoor rug outside the tether path, a raised water station, and a comfortable bed positioned within reach. This idea is particularly useful when you want a small dog-friendly outdoor zone without adding a visible post in the lawn.
Freestanding Wooden Tie Out Post For A Fence-Free Yard
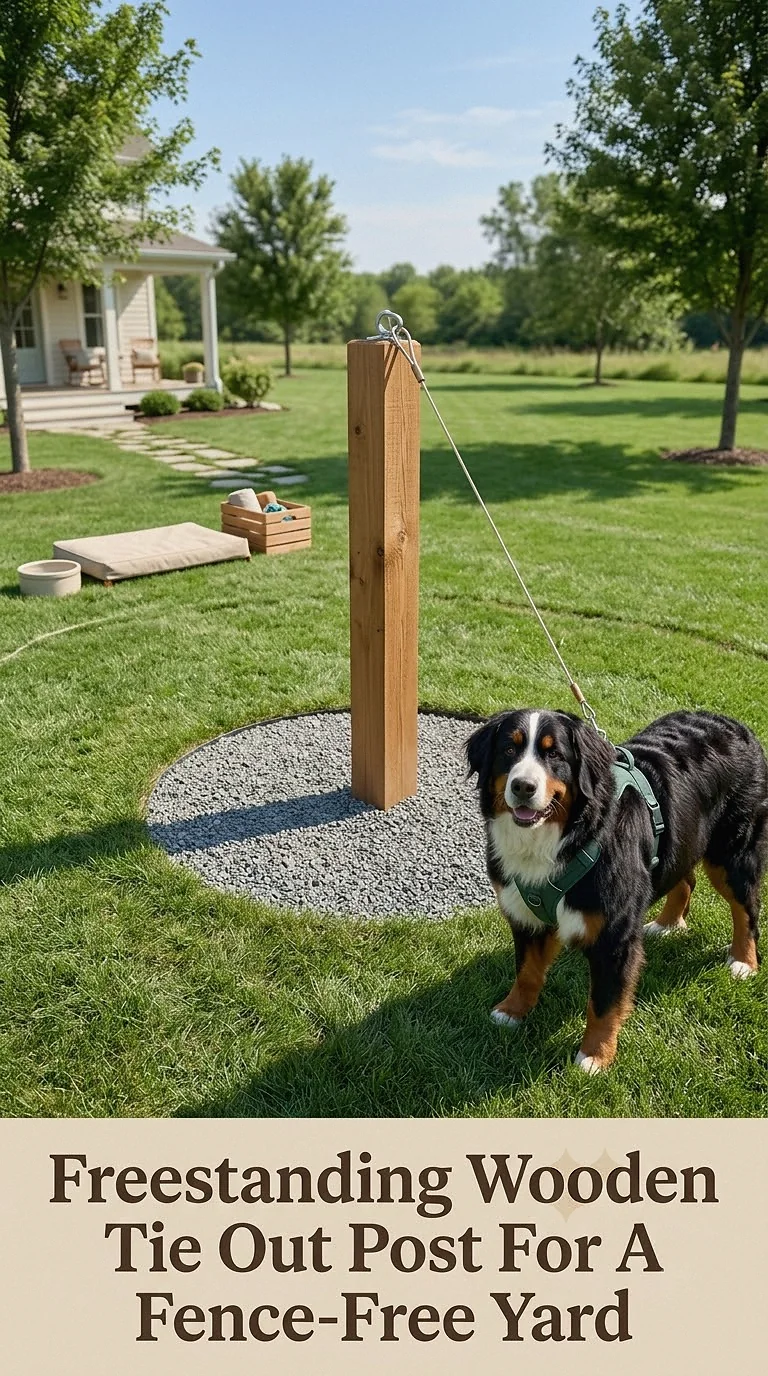
When you do not want to attach equipment to your home or existing structures, a dedicated freestanding post can create a clean focal point.
Choose a substantial wood post and install it securely according to the requirements of your specific system and soil conditions. Staining it to match your deck, fence, or pergola makes the post feel like part of the landscaping.
Place it in a broad, obstacle-free section of the backyard. Before deciding on the final position, measure the full reach of the tether in every direction.
You can add a small hook high on the post for storing the line when it is not being used. A nearby weatherproof storage box can hold toys, waste bags, towels, and other outdoor dog supplies while keeping the area organized.
Backyard Shade Sail Tie Out Zone With Cooling Grass
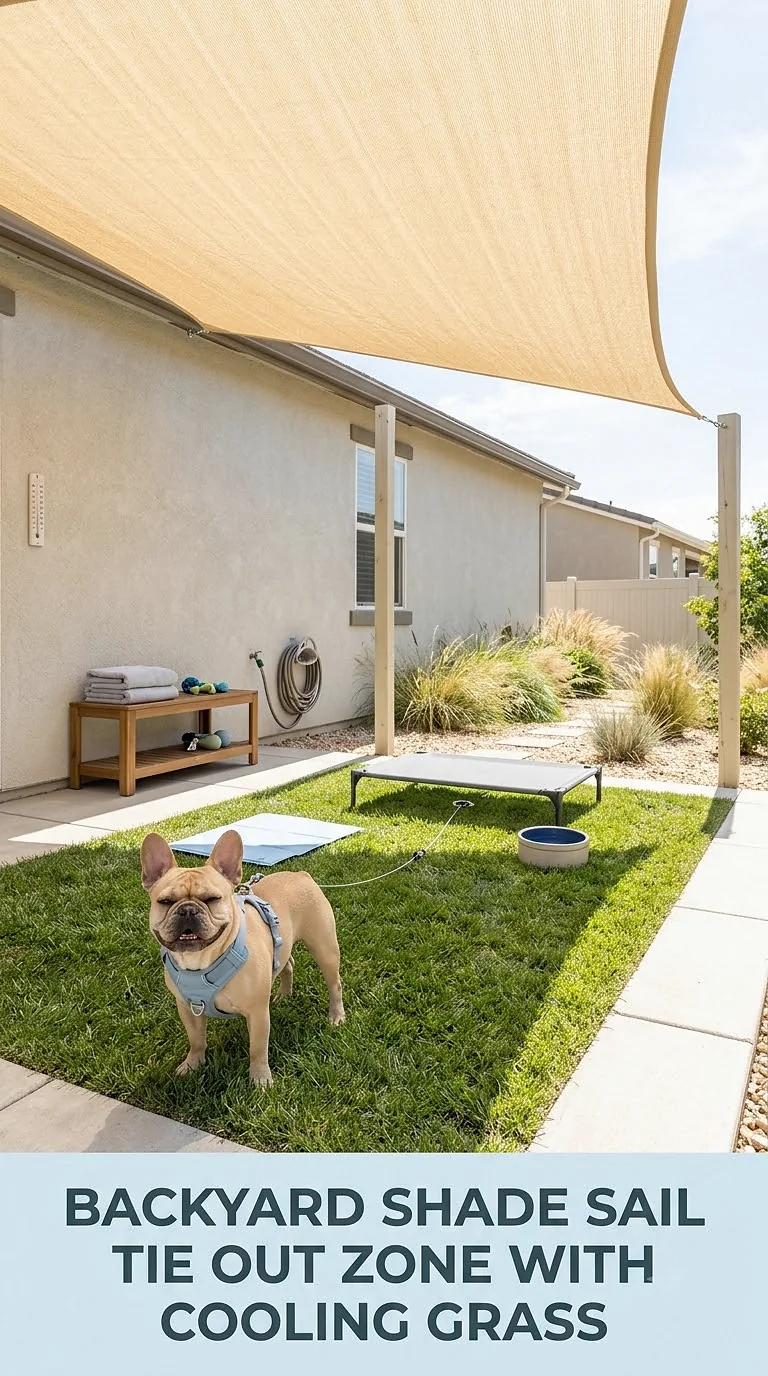
A shade sail can transform an exposed lawn into a comfortable supervised dog area without requiring a full roof.
Stretch an outdoor shade sail between appropriately installed posts or existing suitable structures, then position the tie-out so your dog can remain underneath the covered area while still moving comfortably.
Natural grass is particularly inviting because it creates a softer resting surface. If one section becomes worn from repeated activity, stepping stones or a small patch of durable landscaping material near the human walking path can reduce muddiness.
Place fresh water where it cannot easily be knocked over or wrapped by the tether.
Read more : Top 10 Meanest Dogs
Choose neutral sand, cream, taupe, or muted green fabric if you want the shade structure to blend gently into the surrounding garden.
Rustic Farmhouse Tie Out Station With Timber Posts
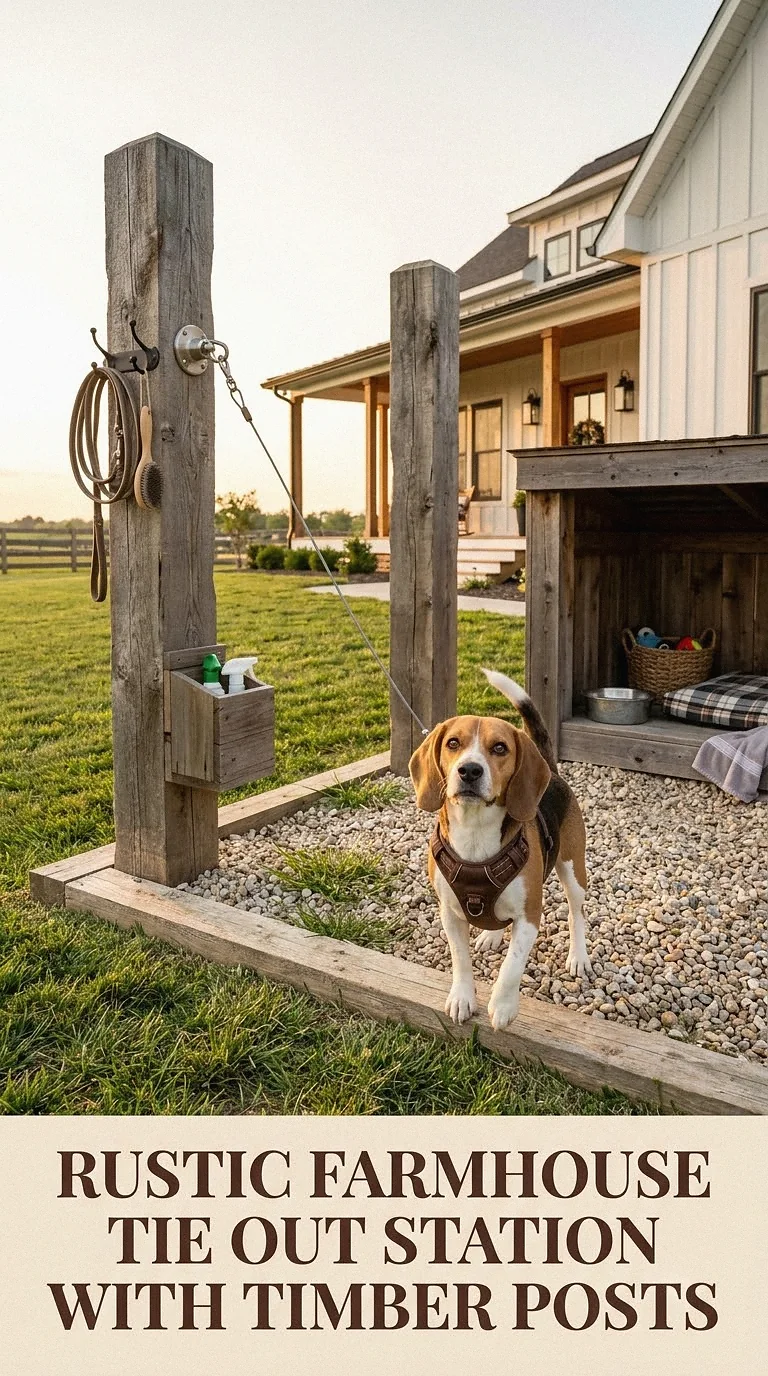
A farmhouse-inspired setup works beautifully in larger yards where practical structures already feel at home.
Use substantial timber posts, dark hardware, and a simple running line to create a system that resembles a small agricultural structure rather than temporary dog equipment.
Keep the dog’s movement area open, grassy, and easy to inspect. Avoid placing the trolley through areas containing wheelbarrows, raised beds, fencing corners, or garden tools.
Nearby, a covered water station made from weather-resistant wood can echo the same rustic style. You could also add a simple wooden storage bench outside the dog’s reach for leashes and outdoor supplies.
The combination of warm timber, black hardware, and natural greenery creates a relaxed backyard look while keeping the functional equipment visually cohesive.
Small Backyard Corner With Compact Rotating Anchor
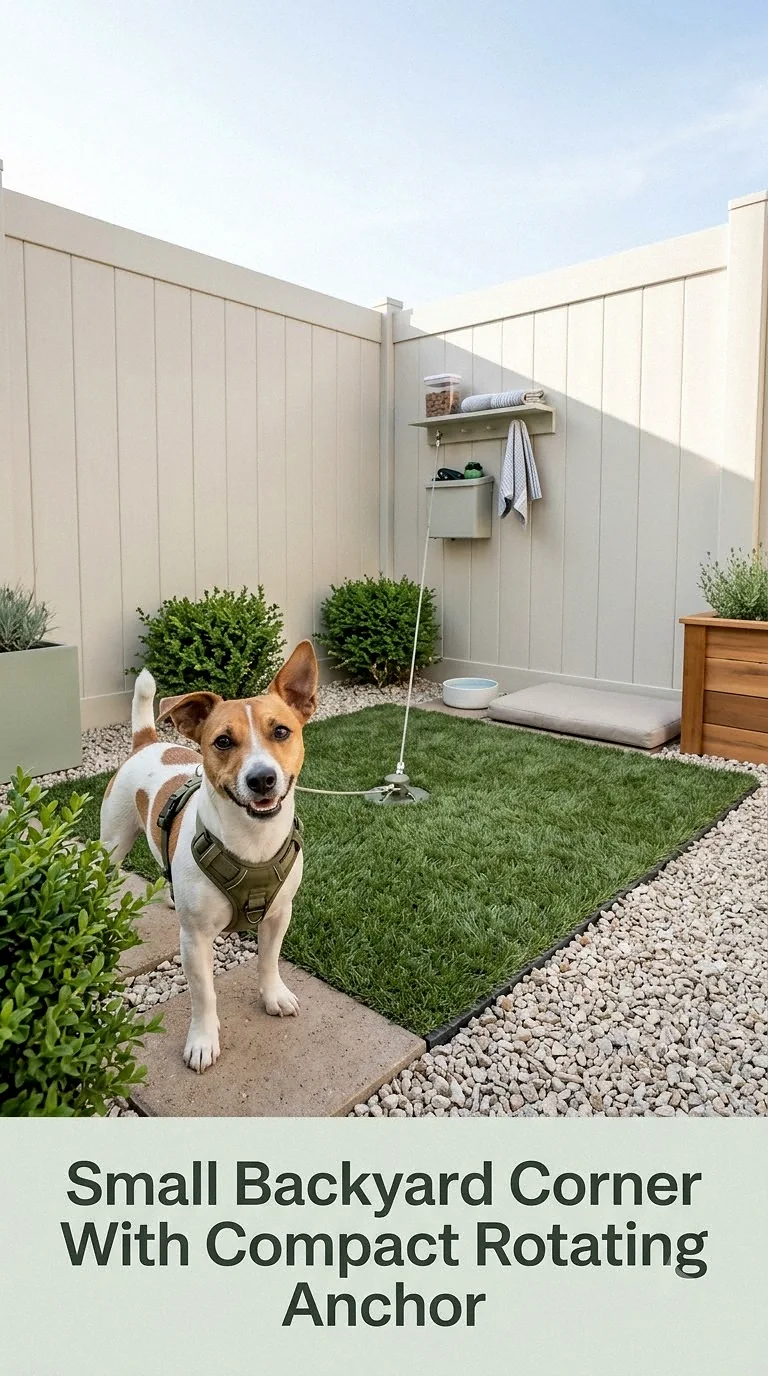
Limited square footage requires careful planning, but a tie-out can still work without dominating a tiny backyard.
Instead of automatically placing the anchor in the exact center, map the dog’s total reach first. Sometimes positioning a rotating anchor slightly off-center provides better usable space while keeping the line away from fences, steps, and patio furniture.
Choose compact accessories and avoid filling the area with unnecessary decor.
A slim water bowl, foldable outdoor bed, and wall-mounted supply basket can keep the setup tidy. Use simple paving or easy-to-maintain grass beneath the most frequently used section.
For very small yards, shorter supervised sessions and additional walks are especially important because the tie-out area itself may not provide enough room for meaningful exercise.
Elevated Backyard Trolley Between Two Shade Trees
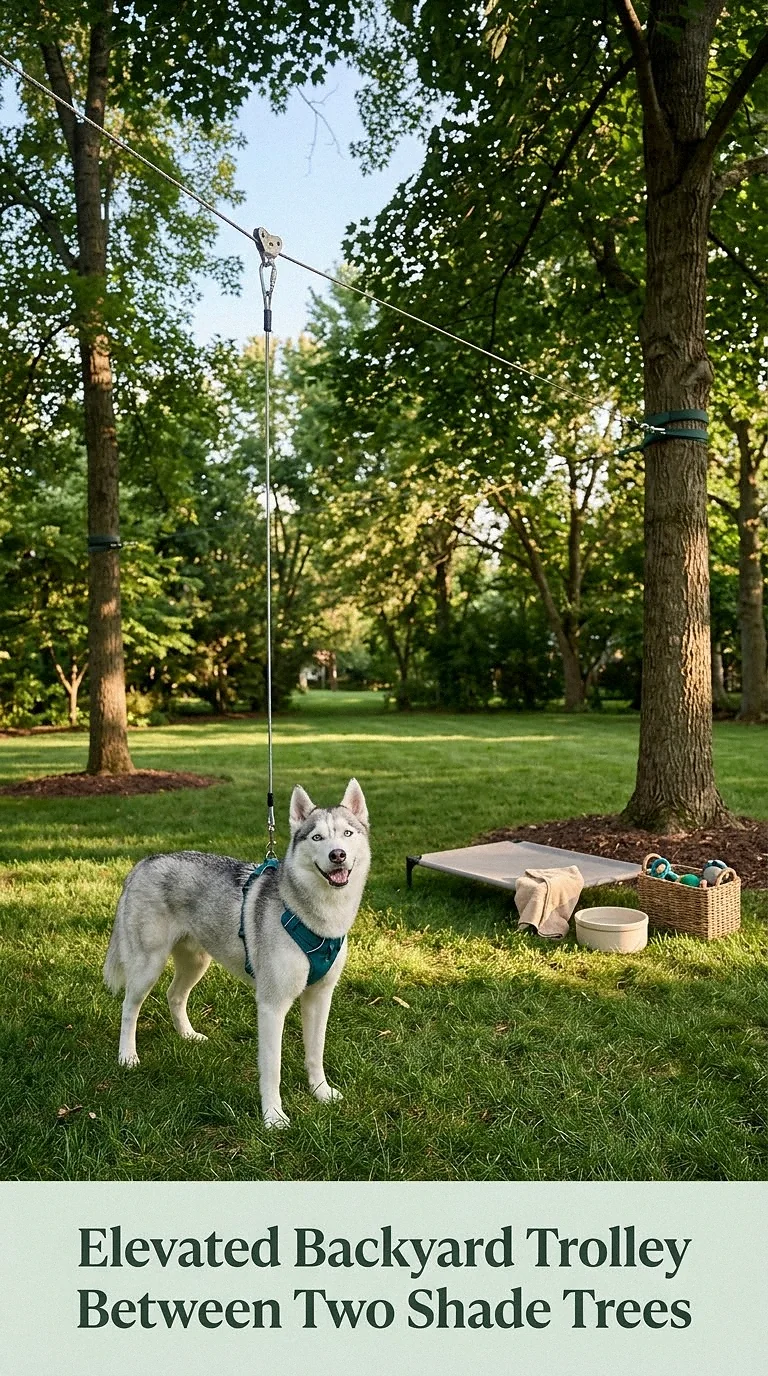
Two appropriately located mature trees can create an attractive natural corridor for a running tether system, provided the hardware and installation method will not damage the trees.
The biggest advantage is visual simplicity. The overhead line is relatively unobtrusive, while the surrounding canopy creates a peaceful woodland atmosphere.
Keep the dog’s route between the trees completely clear. Remove fallen branches, garden edging, loose tools, low furniture, and anything else that could catch the tether.
Because tree shade shifts and may not cover the entire route continuously, include a dependable shaded resting location as well.
A bed in muted green or brown tones, paired with a sturdy water bowl, helps the dog station blend beautifully into a natural backyard.
Gravel And Grass Tie Out Zone For Muddy Backyards
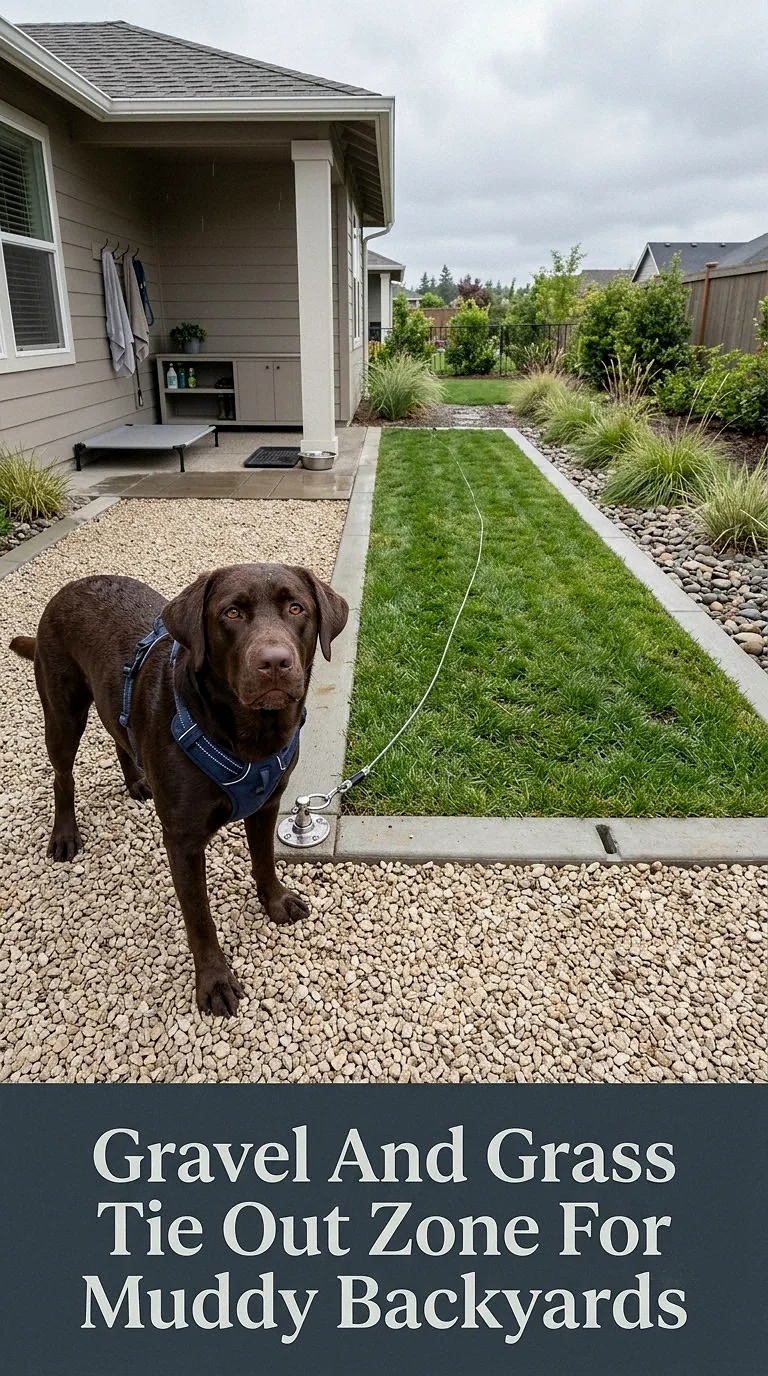
If your dog’s favorite outdoor path turns into mud after every rainstorm, create a mixed-surface tie-out zone.
Keep a generous section of grass for comfortable sniffing and lounging, then add a carefully edged gravel or permeable pathway in high-traffic spots used by people.
Choose smooth, paw-friendly material rather than sharp or uncomfortable stone. Whatever surface you select should remain comfortable for your individual dog and suitable for your local climate.
A gravel strip beneath the human access route can make cleaning easier while preserving the softer grass area for the dog.
The finished space can look beautifully landscaped when the stone color coordinates with your patio or home exterior. Add a simple shade canopy and washable water station to complete the setup.
Deck-Side Tie Out Lounge With Built-In Storage Bench
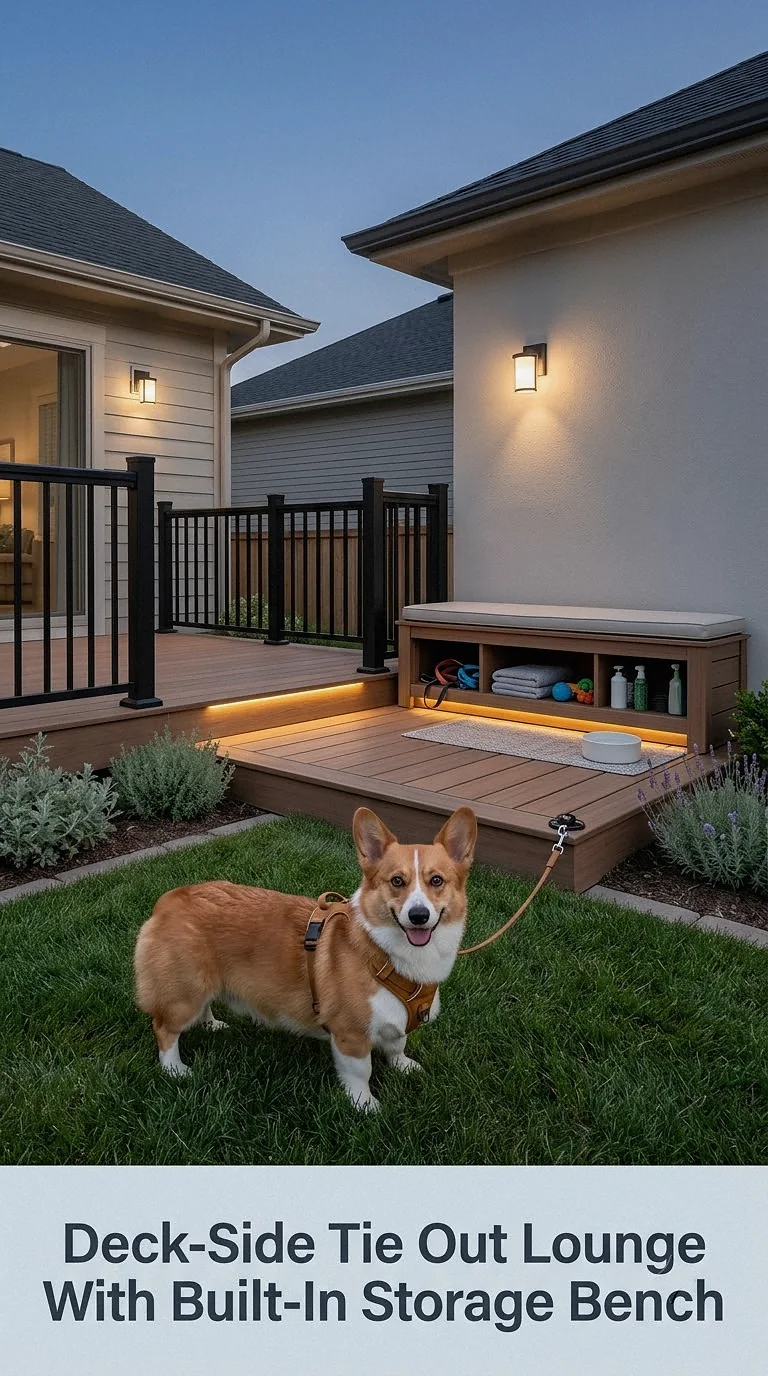
A deck can become an organized dog-friendly hangout when storage and containment are planned together.
Position the tie-out attachment in an open area beside the deck rather than where the line could wrap around railings, stairs, chairs, or table legs.
Then use a weather-resistant storage bench outside the dog’s tether radius to hold outdoor toys, grooming towels, spare leashes, and waste bags.
A neutral bed or cooling mat can sit in a shaded section within reach, creating an inviting place for your dog to settle while the family uses the deck.
Repeating colors from your outdoor furniture makes everything feel intentional. For example, pair warm wood decking with cream textiles and matte black hardware for a polished but practical backyard look.
Portable Spiral Stake Setup For Flexible Backyard Use
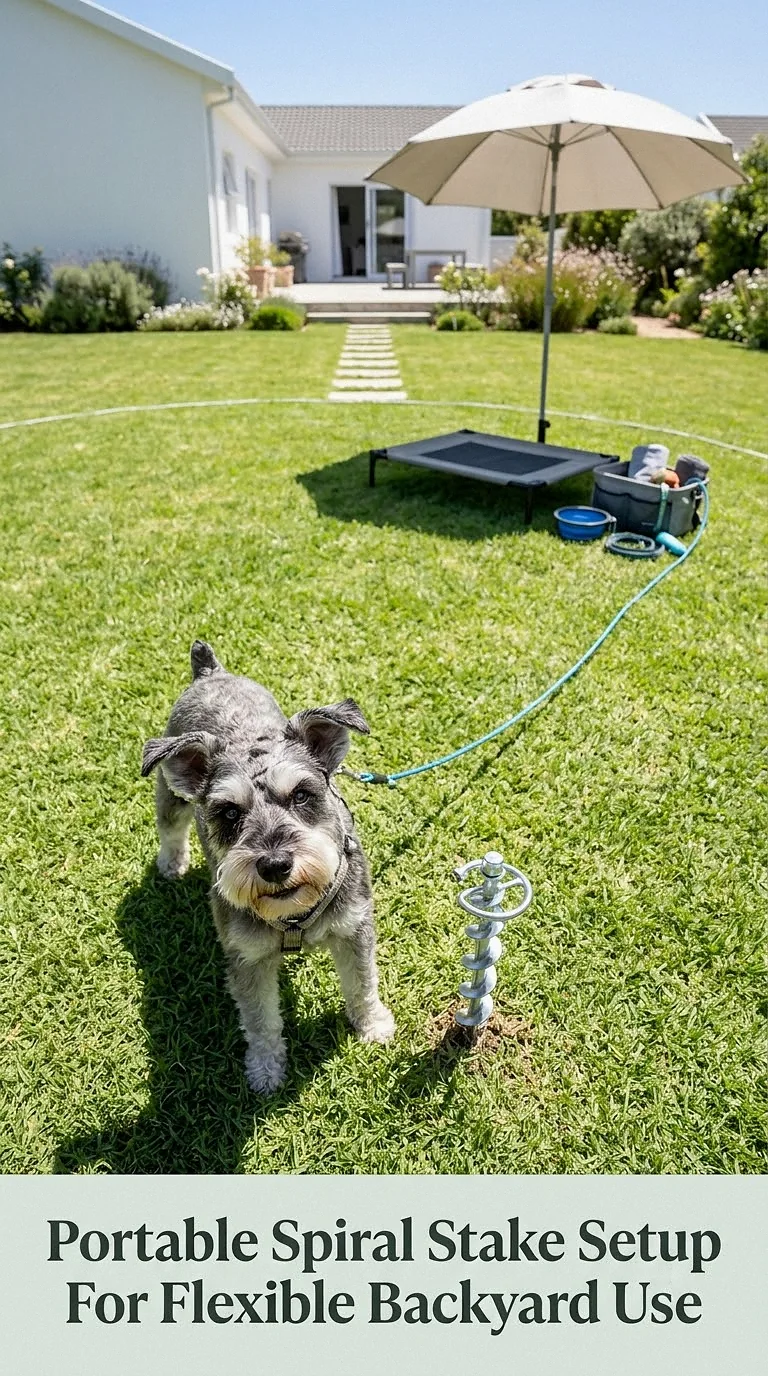
A portable ground stake is convenient when you do not want a permanent installation or occasionally need to move the dog area.
The key is choosing a location carefully every time you use it. Look for firm ground with enough open space for the entire tether radius and no nearby fences, branches, furniture, garden ornaments, or other obstacles.
This flexible arrangement works well when you want to follow seasonal shade. During one part of the year, the best spot might be beside the patio; during another, it could be under a canopy farther across the lawn.
Store the stake, line, and harness together in a weatherproof basket or outdoor cabinet so the equipment is easy to inspect and set up whenever needed.
White Vinyl Pergola Dog Station With Neutral Accessories
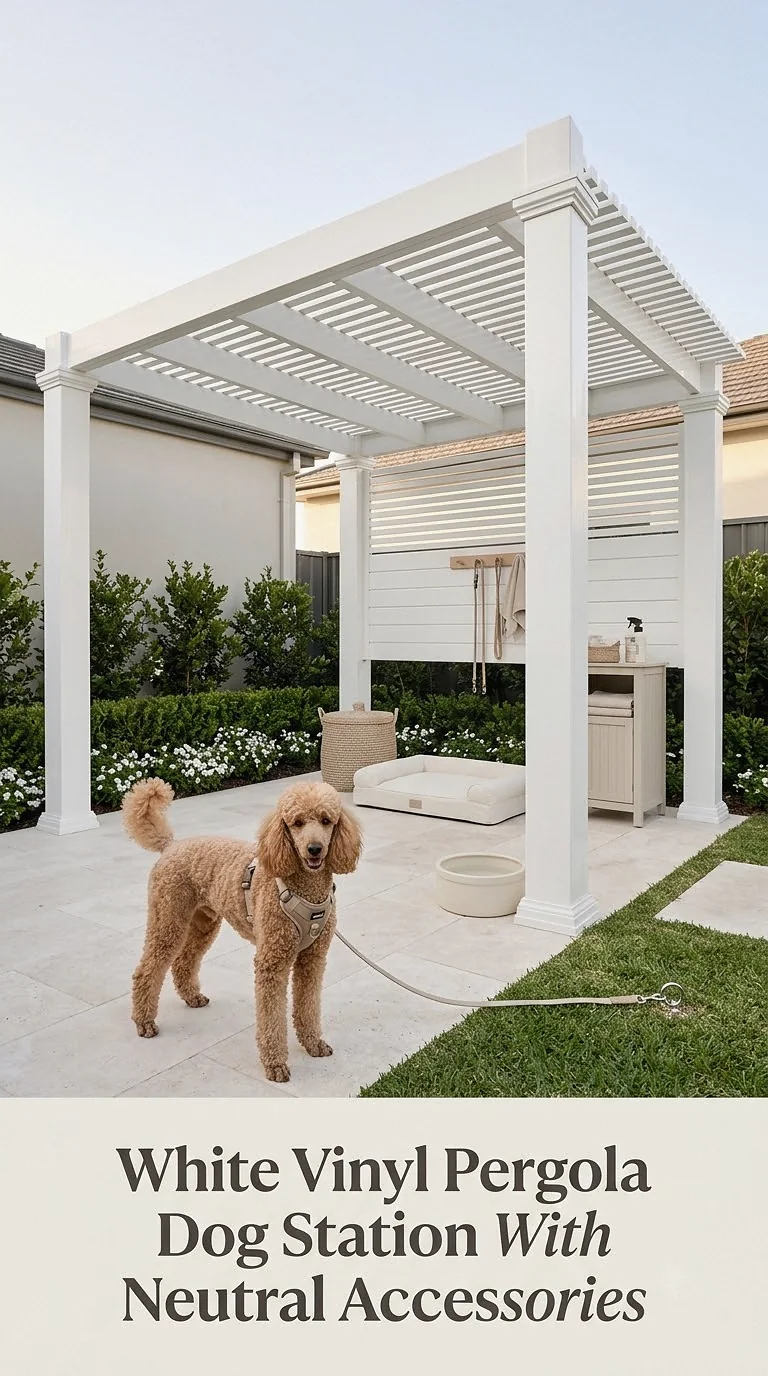
For a bright, polished backyard, a white pergola creates a beautiful framework for a supervised tie-out station.
The crisp structure works especially well beside white fencing, pale stone pavers, and soft green landscaping. Keep the center open so the tether has a clear travel path.
Read more : 17 Dog Surprise Gift Ideas For Cozy, Joyful Celebrations
Instead of filling the space with decorations, rely on a few functional pieces: a washable beige outdoor dog bed, a sturdy water bowl, and a small toy basket positioned safely outside the tether route.
A fabric shade panel can help create consistent shelter beneath an open-roof pergola.
This is an attractive option when you want the dog area to coordinate with a carefully designed patio or garden rather than feeling like an afterthought.
Budget DIY Tie Out Area With Simple Wood Post And Mulch Border
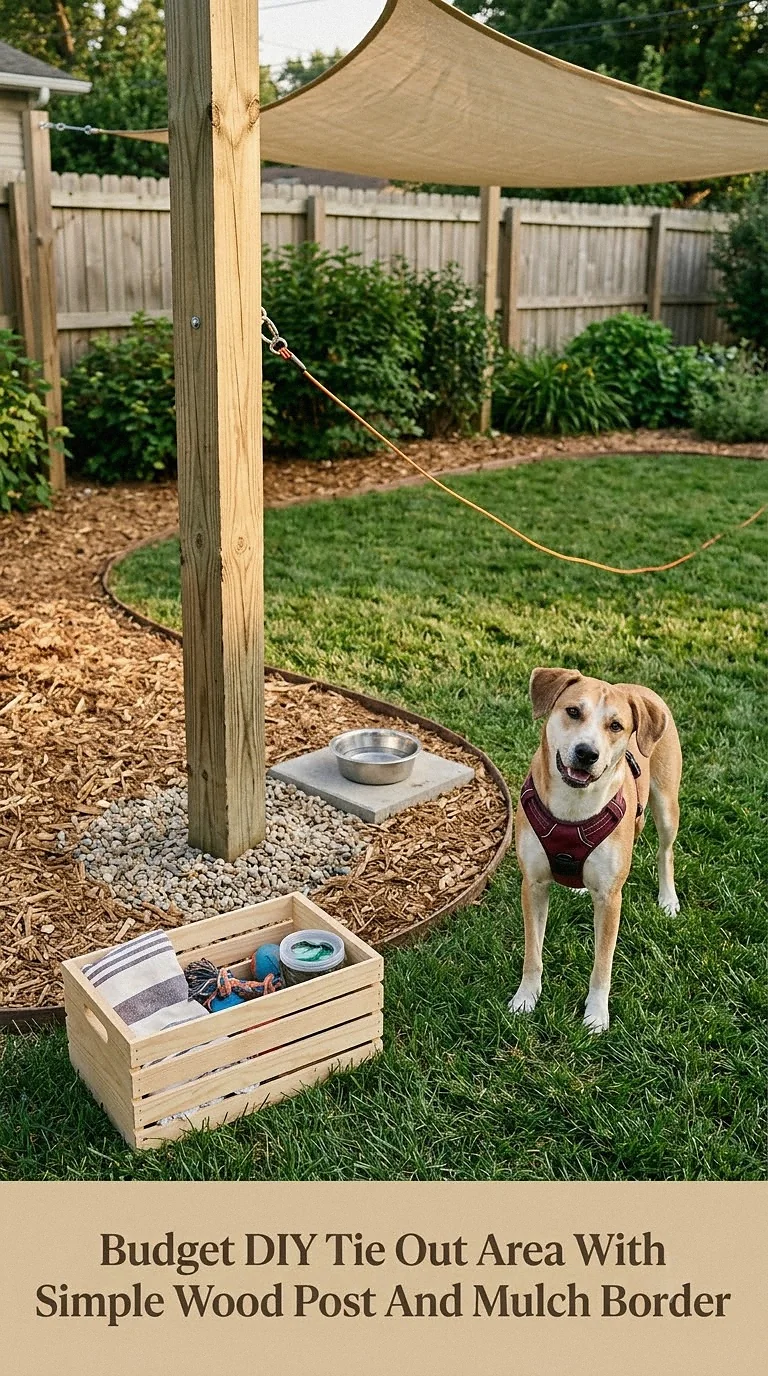
A comfortable backyard setup does not require an elaborate renovation.
A securely installed wood post can create a straightforward anchor point, while an inexpensive landscape border gives the area a more finished appearance. Keep the dog’s actual movement space open rather than surrounding the post with objects.
If you use mulch elsewhere in the design, keep it outside the dog’s main running and resting area unless you know the specific material is appropriate for pets.
Use existing shade whenever possible, or add an affordable freestanding canopy that is securely anchored.
Repurpose a sturdy outdoor container for toys and accessories, and choose washable bowls rather than decorative pieces that are difficult to clean. Careful placement often matters more than expensive materials.
Large Backyard Overhead Run With Separate Resting Zone
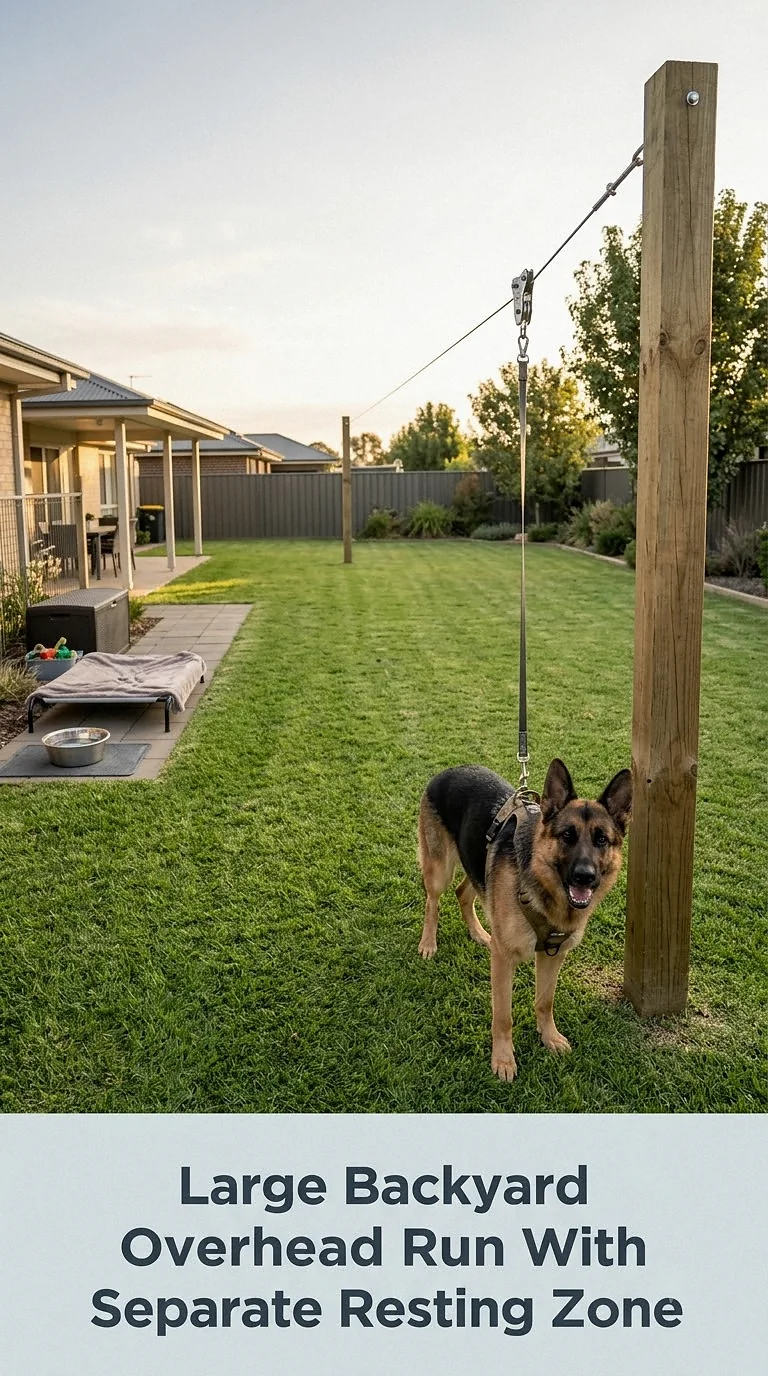
A spacious yard offers the opportunity to separate active movement from quiet relaxation.
Create a long overhead trolley across an open stretch of lawn, then position a shaded resting zone where the dog can comfortably reach it without the tether wrapping around the shelter.
The active section should remain uncluttered. The resting section might include a raised outdoor bed, fresh water, and a washable mat.
This arrangement is especially useful for dogs that enjoy walking back and forth while watching family activity in the yard.
Avoid running the tether beside public sidewalks, neighboring dogs, children’s play equipment, or busy gathering areas. A calmer location toward the interior of the property can create a more relaxing environment for supervised outdoor time.
Hidden Tie Out Anchor Beside A Landscaped Patio
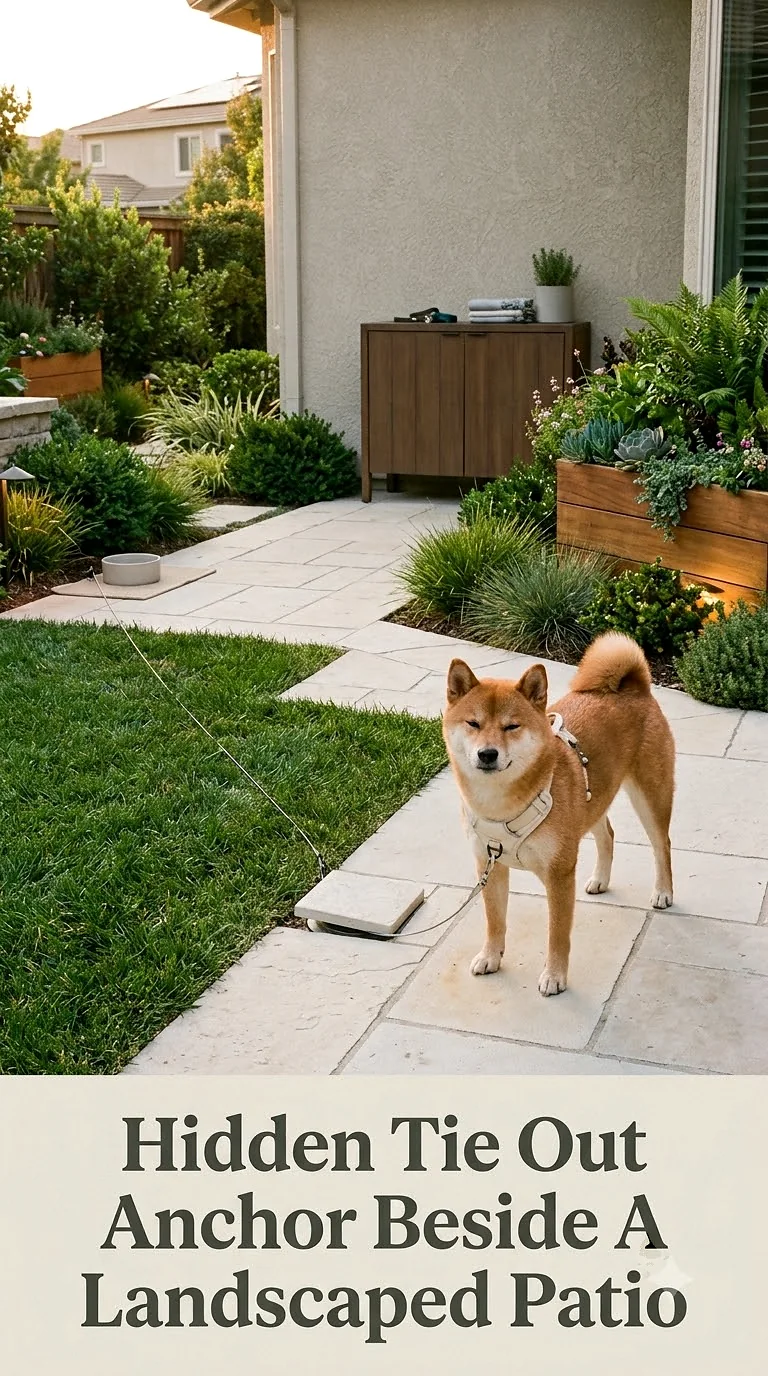
Not every dog-friendly feature needs to be visually obvious.
A low-profile anchor installed beside a landscaped patio can remain almost invisible when it is not being used. Choose a location where the tether extends into open lawn rather than through furniture or planting beds.
Decorative grasses, shrubs, and planters can frame the area from outside the dog’s reach, creating a soft visual boundary without becoming obstacles.
When the tie-out is stored, the backyard looks like a normal landscaped entertaining space. When needed, the line can be attached quickly for supervised lounging.
This approach is ideal for homeowners who prefer an uncluttered yard and want pet equipment to blend quietly into an established outdoor design.
Outdoor Dog Cabana With Tie Out And Washable Bedding
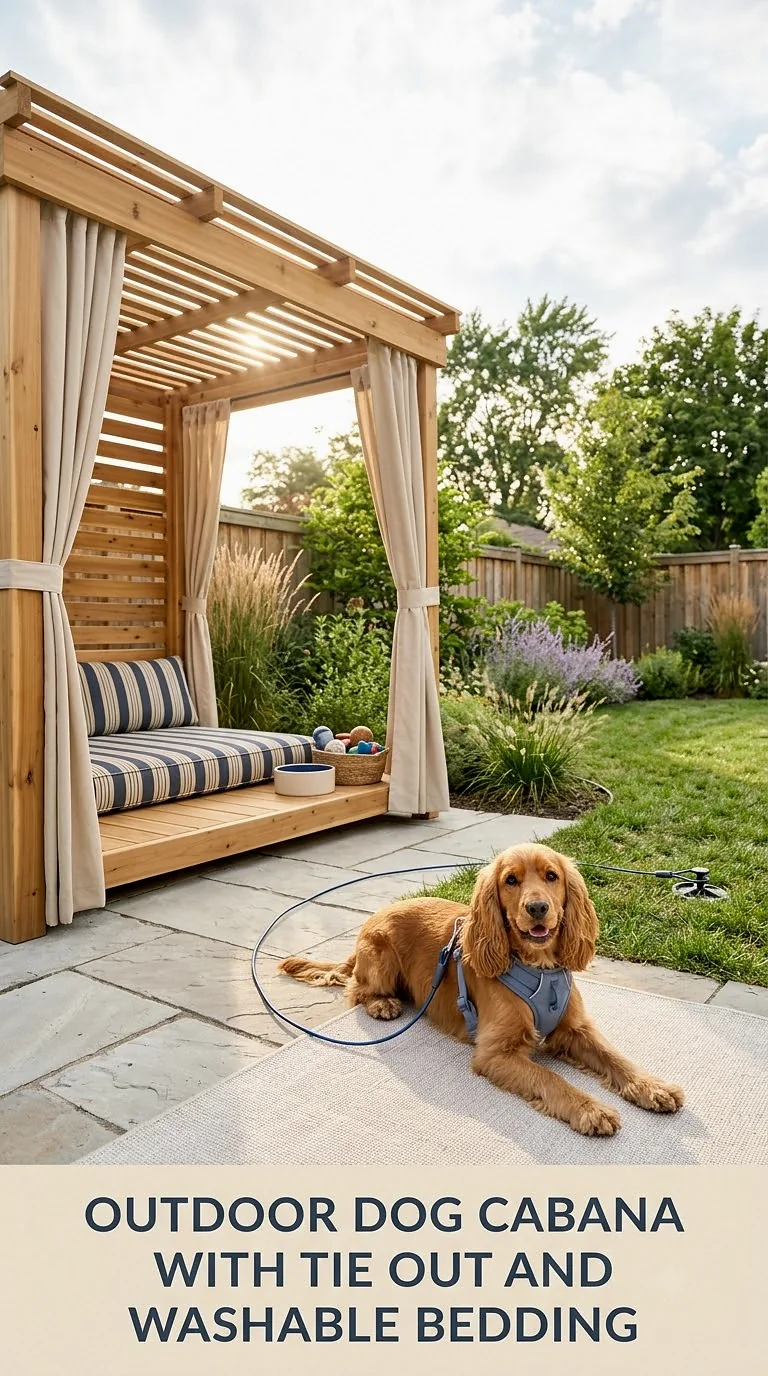
Turn supervised backyard time into a resort-inspired experience with a small open-sided cabana.
A simple covered structure provides a designated resting area while creating an attractive focal point. Keep the tether attachment positioned so the line does not wrap around cabana supports, furniture, or decorative accessories.
Inside, choose washable bedding in neutral outdoor fabric and place fresh water in a stable bowl. Avoid excessive pillows or decorative objects that could become tangled with the line.
Wood framing, cream fabric, and soft greenery create an elegant look that fits beautifully beside pools, patios, and contemporary gardens.
The important feature is not luxury itself, but a comfortable place where your dog can choose to settle away from direct sun.
Multi-Use Backyard Dog Zone With Tie Out, Toy Storage And Water Station
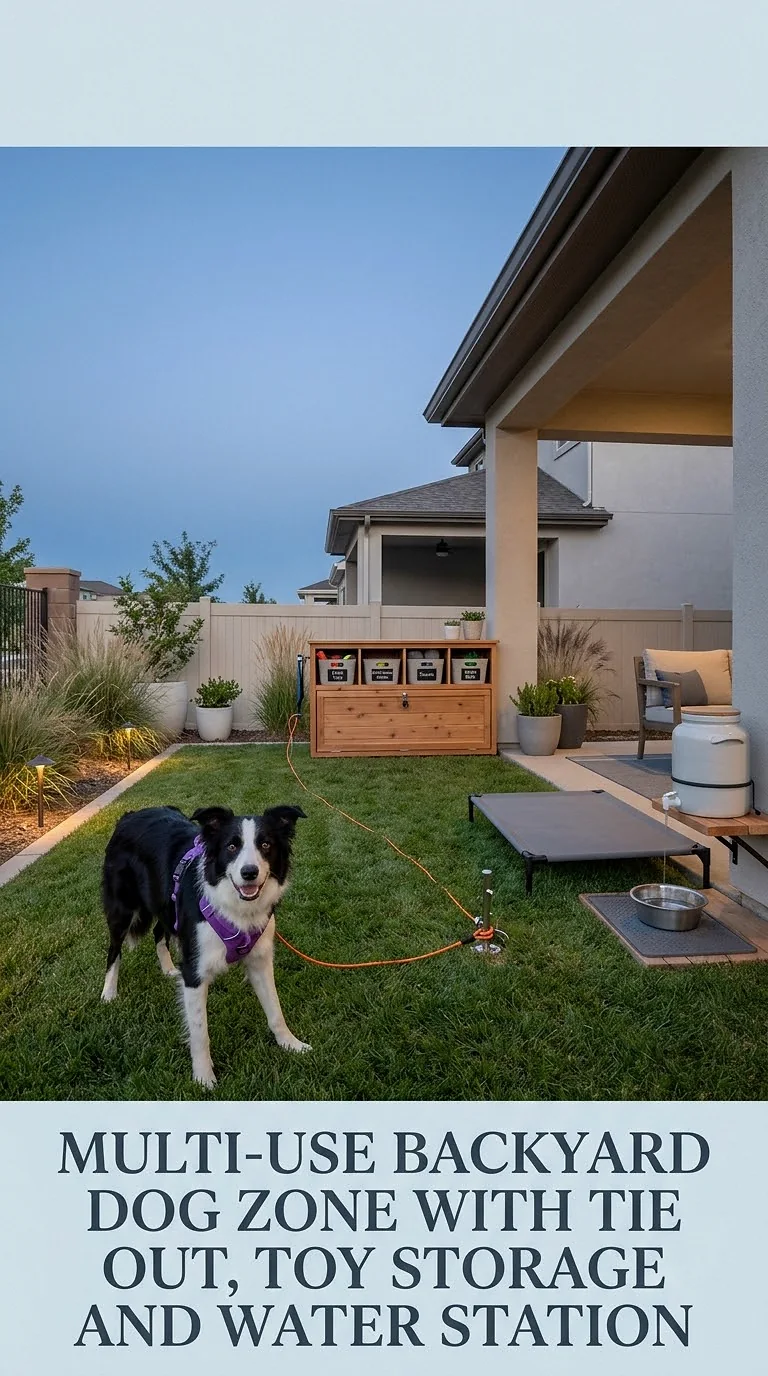
For the most practical setup, organize several dog essentials into one dedicated backyard zone.
Start with a carefully positioned tie-out or running system and keep its entire travel path clear. Then arrange storage and human-access features just beyond that path.
A weatherproof cabinet can hold toys, towels, waste bags, brushes, and extra equipment. Nearby, create an easy-to-clean water station with a heavy bowl that is difficult to tip.
A shaded resting mat gives your dog a clear place to relax between bursts of sniffing and exploring.
Using matching containers, coordinated hardware, and one consistent material palette can make the whole zone look polished. Warm wood, black metal, sage accents, and cream textiles create an especially cozy combination.
Choosing Dog Tie Out Ideas Backyard Spaces That Work For Your Dog
The most beautiful backyard dog setup is one that fits the way you and your dog actually live. A compact rotating anchor may be perfect for quiet patio companionship, while an open trolley run may make more sense in a long or spacious yard. You can keep the look modern and minimal, lean into warm farmhouse materials, or create a soft garden retreat that blends almost invisibly into your landscaping.
Whatever style you choose, prioritize an open movement area, appropriately fitted equipment, dependable shade, fresh water, comfortable footing, and active supervision. Regularly inspect lines, clips, anchors, posts, and attachment points for wear before use, and avoid attaching a tether to equipment designed to tighten or cause discomfort.
Most importantly, think of the tie-out area as one small part of your dog’s outdoor life. Walks, play, training, sniffing adventures, and time with the family still provide experiences a backyard tether cannot replace.
With thoughtful placement and a little styling, even a simple setup can become a comfortable, practical corner where you and your dog can enjoy more time outside together.
Source: https://petstutorial.com
Category: DOGS
