
A little jar of dog treats has a way of becoming one of the busiest spots in the house. You reach for it when your pup sits politely, comes in from the yard, learns a new trick, or simply looks at you with those impossible-to-resist eyes. But half-open treat bags, crumbs in drawers, and bulky packages scattered around the kitchen can quickly make even a lovely space feel cluttered.
The best dog treat storage ideas make those everyday moments easier while helping treats stay fresh, organized, and safely out of reach. Your storage can also become part of your home’s style instead of something you constantly want to hide. Think warm wood shelving, creamy ceramic jars, tidy pantry bins, charming farmhouse tins, or a beautifully organized mudroom station waiting by the door.
You are reading: 19 Dog Treat Storage Ideas For A Beautiful, Organized Pet-Friendly Home
The right solution depends on where you give treats, how many varieties you keep, whether you use homemade or refrigerated rewards, and how determined your dog is when something delicious is nearby. These ideas combine good organization with cozy, practical design so you can create a setup that works naturally with your routine.
Beautiful And Practical Dog Treat Storage Ideas For Every Home
Clear Glass Treat Canisters With Warm Bamboo Lids
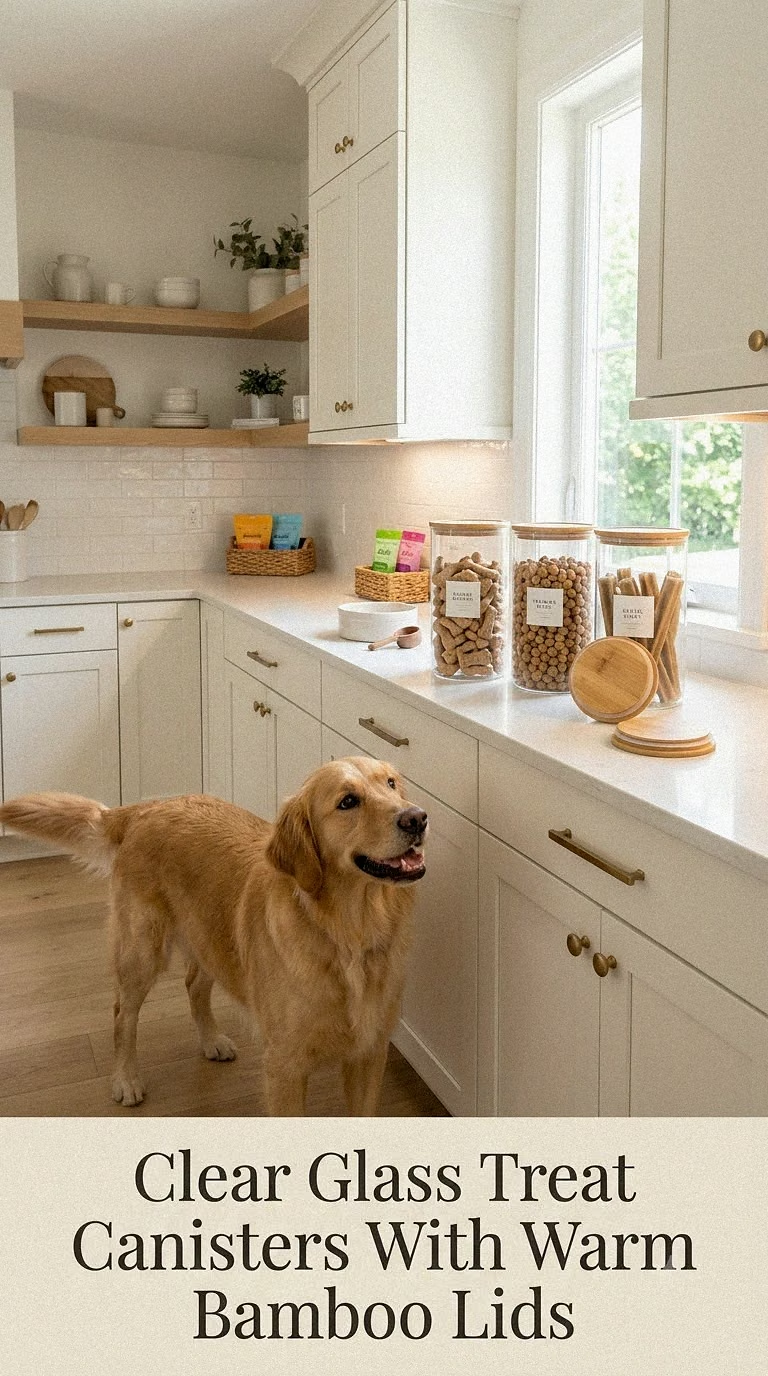
Clear glass canisters paired with bamboo lids create a simple, polished treat station that works beautifully in light, neutral kitchens. Arrange two or three containers on a small wooden tray and fill them with different dry treats, such as crunchy biscuits, dental chews, and tiny training rewards.
The transparent sides make it easy to see when supplies are running low, while the bamboo adds warmth beside white counters, stone backsplashes, or natural wood cabinetry.
Choose containers with snug airtight seals rather than purely decorative lids. Position glass jars toward the back of a sturdy counter where curious noses cannot knock them down.
If you transfer treats from their original packaging, keep the package information and expiration date nearby. A small labeled envelope inside the cabinet above the jars is an easy solution.
For an extra-styled look, add minimal labels in cream, black, or soft sage.
Creamy Ceramic Dog Treat Jar On A Kitchen Counter
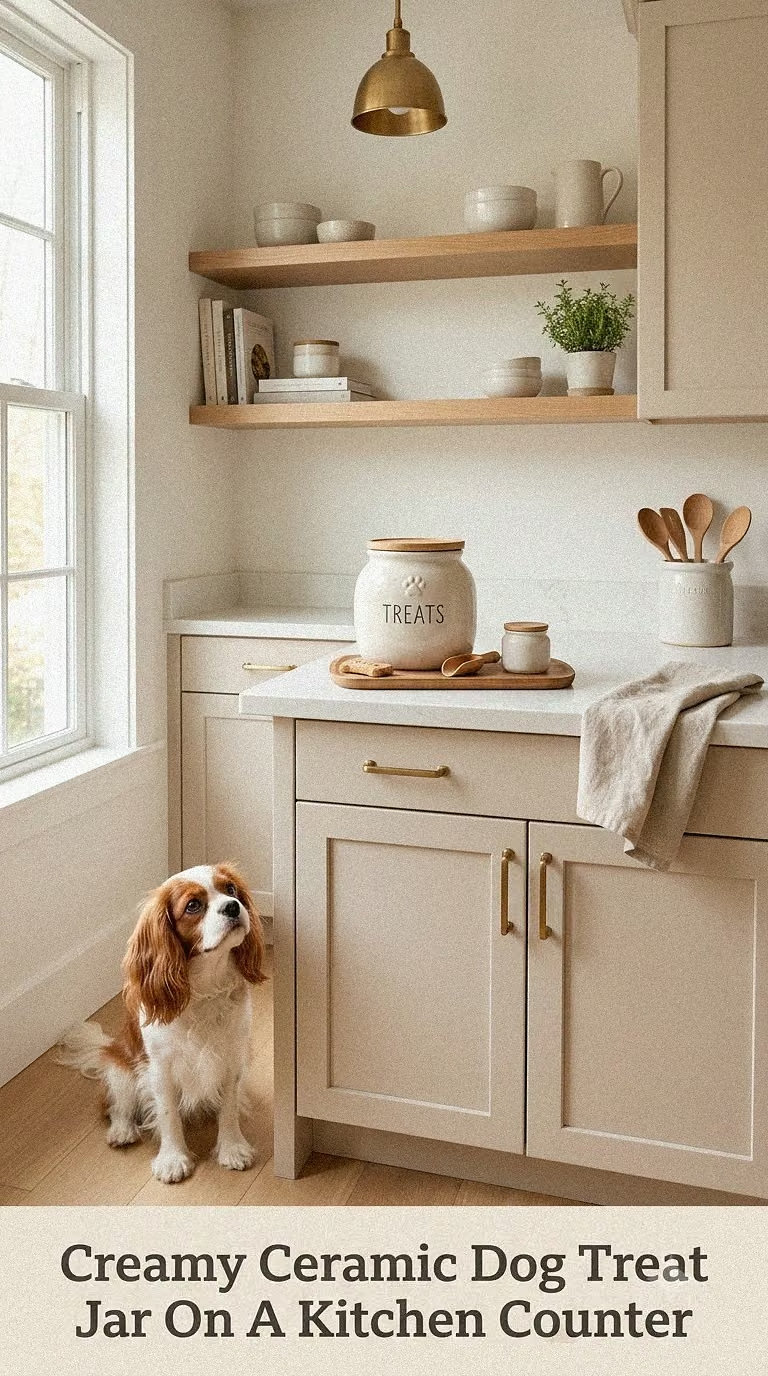
For anyone who prefers not to see the treats themselves, a ceramic jar is an elegant alternative to clear storage.
A large cream or warm white ceramic canister with subtle lettering such as “Treats” can blend into a cozy kitchen rather than looking like obvious pet equipment. Pair it with a wooden cutting board, a little herb pot, and neutral kitchen accessories for a beautifully collected feel.
Look for a jar with a well-fitting lid and a food-safe interior. The opening should be wide enough to reach into comfortably without scraping your hand against the rim.
Ceramic is particularly attractive on countertops, but place it somewhere stable and away from the edge. Heavy jars can break if a determined dog manages to pull one down.
For households with very food-motivated dogs, keeping the jar inside an upper cabinet may be the safer choice.
Modern White Oak Pull-Out Treat Drawer
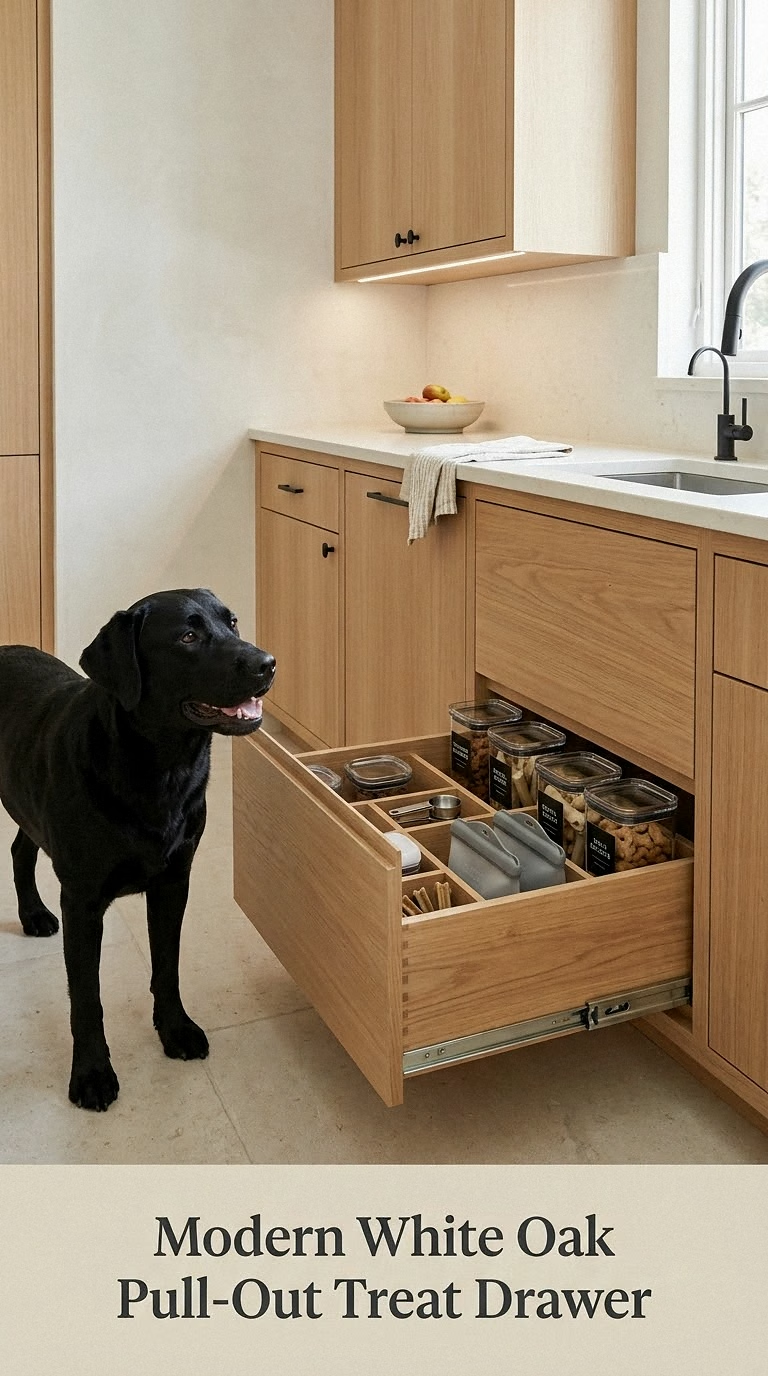
A purpose-built pull-out drawer can turn dog treat organization into an almost invisible part of your kitchen.
Imagine a shallow white oak drawer beside the feeding area with several fitted containers inside. One compartment holds everyday biscuits, another holds training treats, and a third stores chews or refill bags.
This layout keeps visual clutter away while giving you quick access to everything from one location.
Use washable, tightly sealed containers rather than allowing loose treats to sit directly in the drawer. Removable containers make cleaning crumbs much easier and prevent oils from treats from staining beautiful woodwork.
Add small labels to the container lids so you can identify each type immediately when looking down into the drawer.
If you are renovating a kitchen or creating custom cabinetry, this is a subtle luxury worth considering because the drawer can later be repurposed for general storage.
Soft Sage Pantry Shelf With Matching Labeled Bins
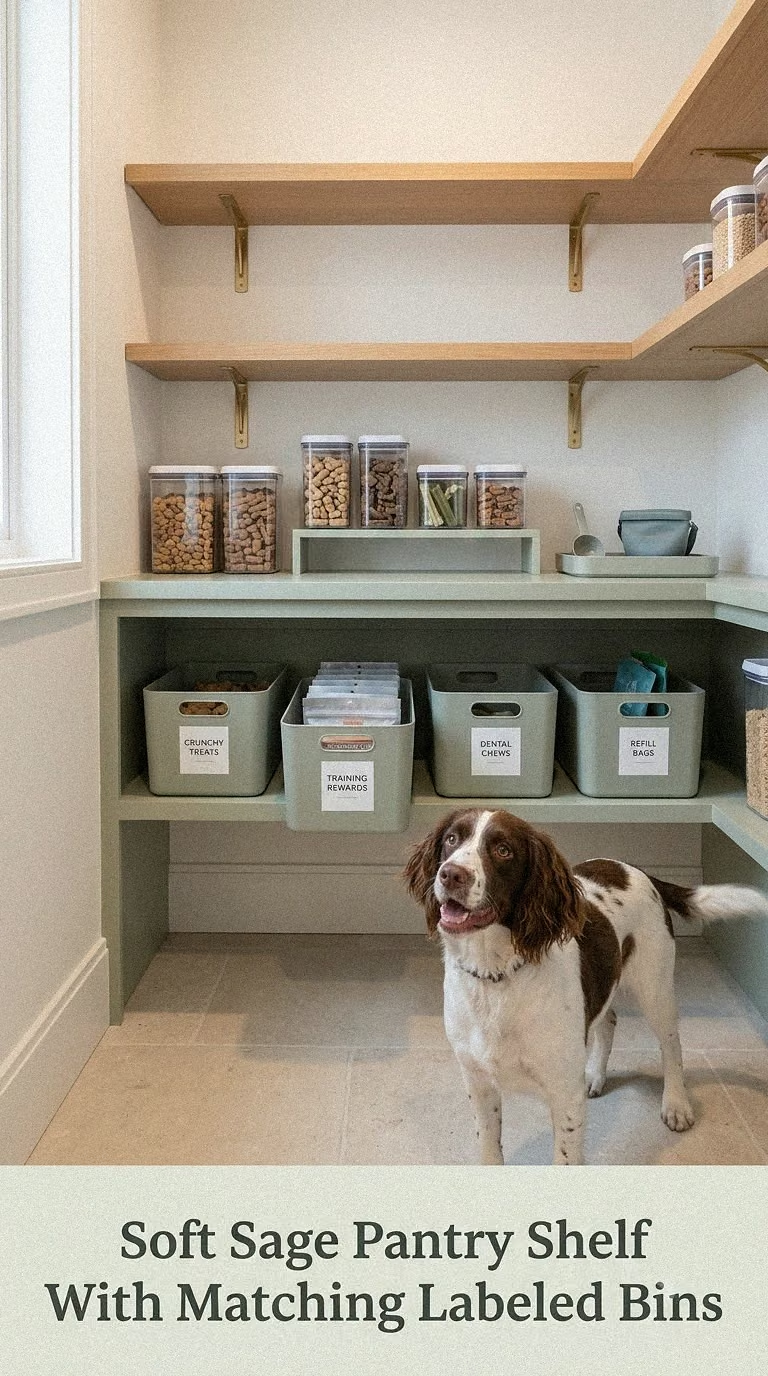
A dedicated pantry shelf can hold far more than a countertop jar while still looking calm and beautifully organized.
Start with matching airtight containers or bins in soft sage green, ivory, or another color that coordinates with your pantry. Reserve separate containers for small treats, larger biscuits, chews, and unopened backup packages.
Keep frequently used treats toward the front and bulk refills behind them.
Whenever practical, placing the original treat bag inside a larger sealed container offers an easy way to keep important product information attached to the food while adding another layer of protection from moisture and curious pets.
Store the shelf in a cool, dry part of the pantry rather than beside appliances that produce heat.
A few coordinated labels can make even an ordinary wire pantry shelf feel intentional, and matching dog-food storage nearby can create a complete pet pantry zone.
Rustic Farmhouse Enamel Tins With Wooden Labels
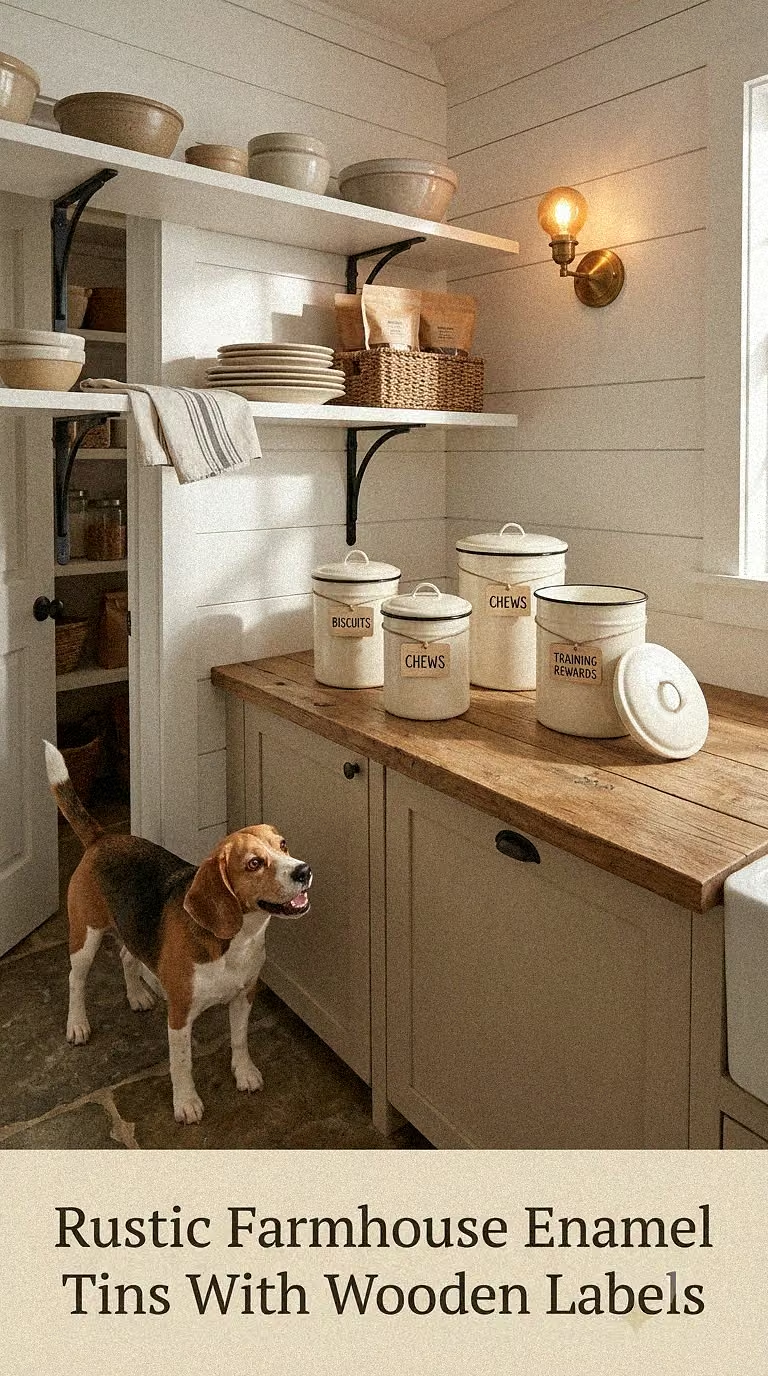
Farmhouse interiors are perfect for old-fashioned enamel treat tins.
Choose cream, white, or muted green tins with dark rims and simple wooden labels. Arrange them on a reclaimed wood shelf or kitchen hutch beside woven baskets and natural textures.
The containers can be divided by purpose, such as “Walks,” “Training,” and “Biscuits,” so you always grab the right reward.
The charming exterior should not come at the expense of freshness. Choose tins with tight lids or place opened treat packets inside sealed inner containers before putting them into decorative tins.
This setup is especially useful if you love seasonal decorating because the surrounding accessories can change while the practical storage remains.
For an inexpensive DIY version, repaint clean food-safe metal canisters and add simple wooden tags tied with cotton cord.
The result feels warm, lived-in, and much more attractive than several colorful treat bags sitting on the counter.
Wall-Mounted Dog Treat Station With Leash Hooks
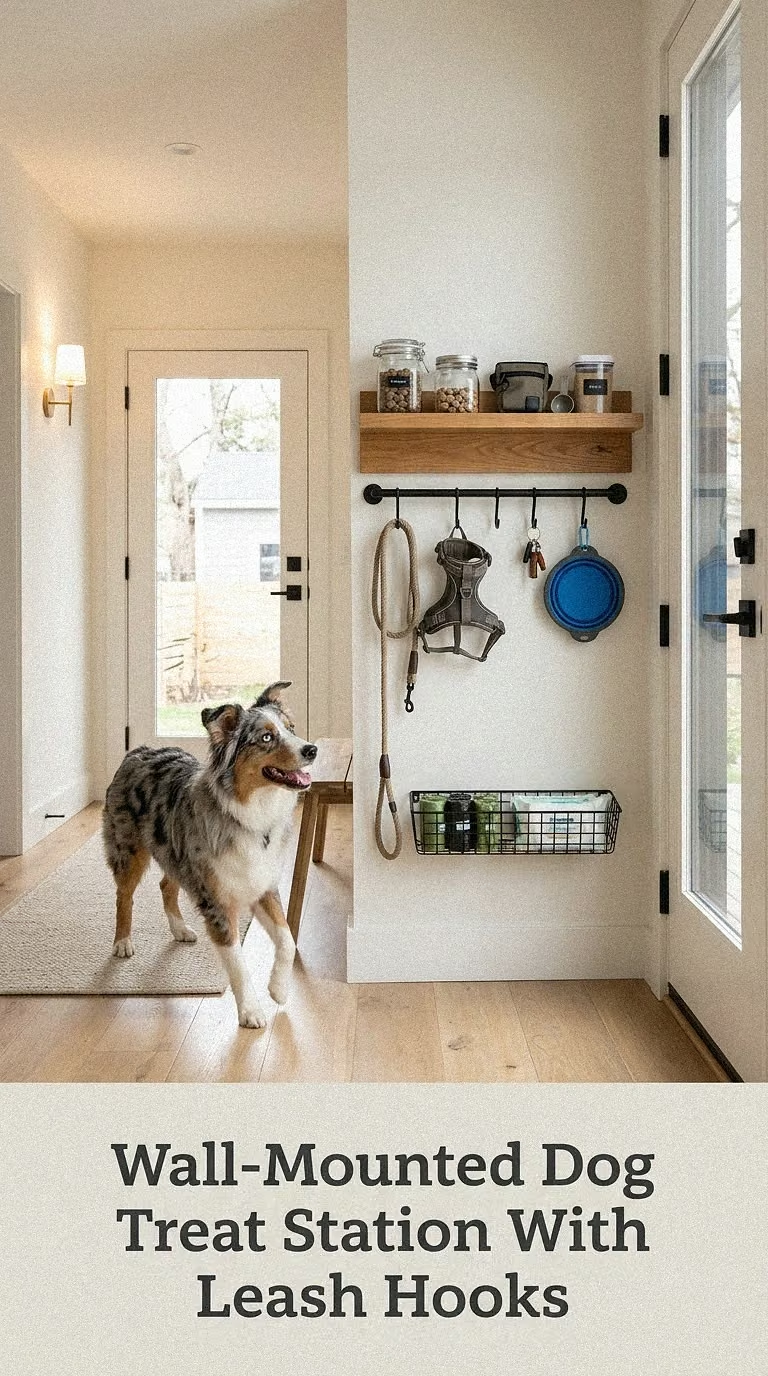
A wall-mounted station brings treats and walking accessories together in one convenient place.
Install a narrow floating shelf above a row of sturdy hooks. Place one or two secure treat containers on the shelf, then hang leashes, harnesses, waste-bag holders, and a small walking pouch underneath.
Warm oak with matte black hooks gives the station a modern look, while painted beadboard and brass hooks create something softer and more traditional.
Position the shelf high enough that your dog cannot reach the containers, even when standing on hind legs.
A small lidded tin of training treats can be particularly helpful here because you can reward calm behavior before leaving the house or reinforce good manners when returning from a walk.
Keep the display visually simple. One framed dog portrait or small decorative sign is usually enough to make the station feel personal without overcrowding it.
Cozy Mudroom Treat Cabinet With Woven Baskets
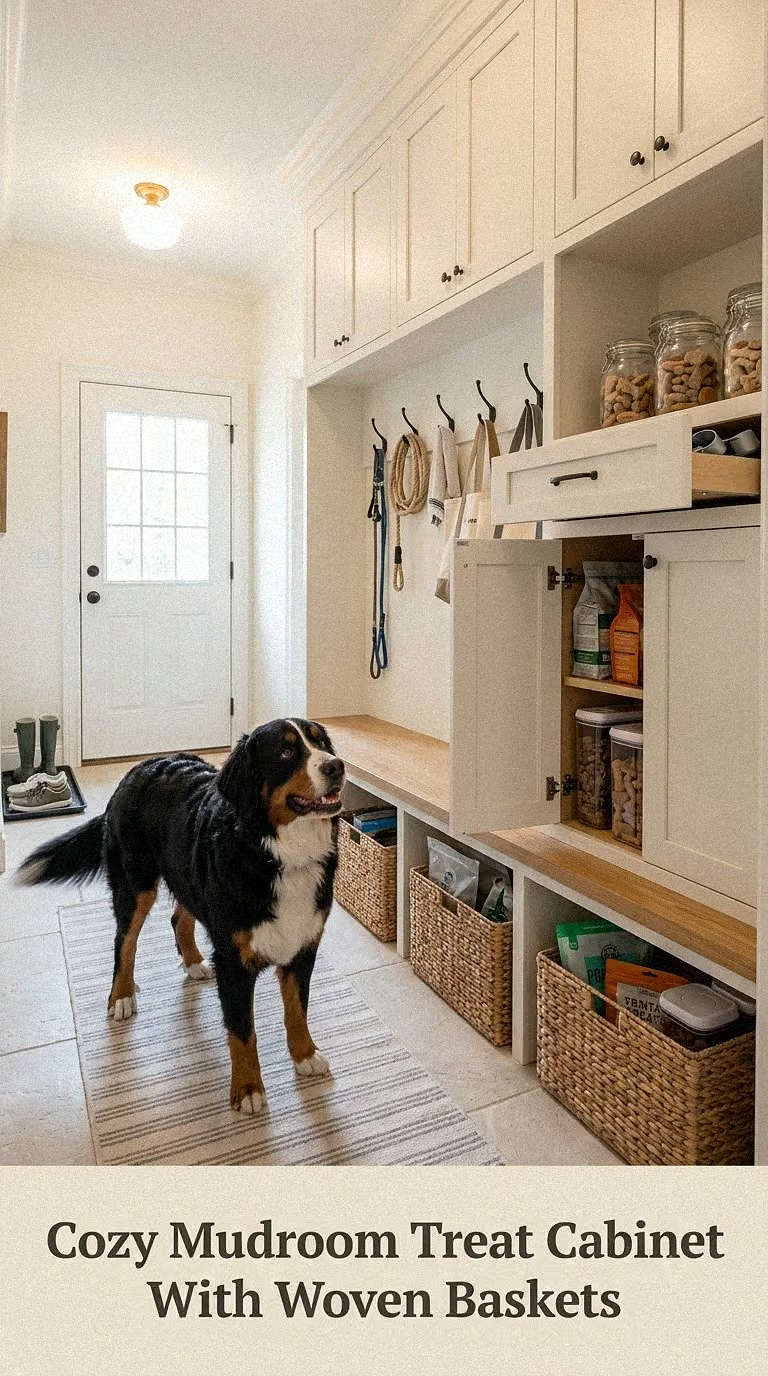
The mudroom is one of the most practical places to store treats if much of your dog’s routine revolves around outdoor adventures.
Create a pet station inside a low cabinet or built-in mudroom bench. Use sealed treat containers inside the cabinet and woven baskets above or beside them for towels, toys, and walking supplies.
Read more : How Does Cerenia Kill A Dog
A palette of warm white, natural wicker, oak, and soft gray creates a relaxed, welcoming entryway.
Keep food itself sealed rather than placing loose treats directly into woven baskets. Baskets are better suited to containing packaged supplies while providing the cozy texture that makes the area visually appealing.
Include a washable tray or mat nearby for muddy paws, and reserve one easy-access container for rewards used after walks or outdoor training.
If your dog knows how to open cabinets, a discreet latch can keep the treat collection safely inaccessible when nobody is watching.
Small Under-Stair Dog Treat And Supply Cabinet
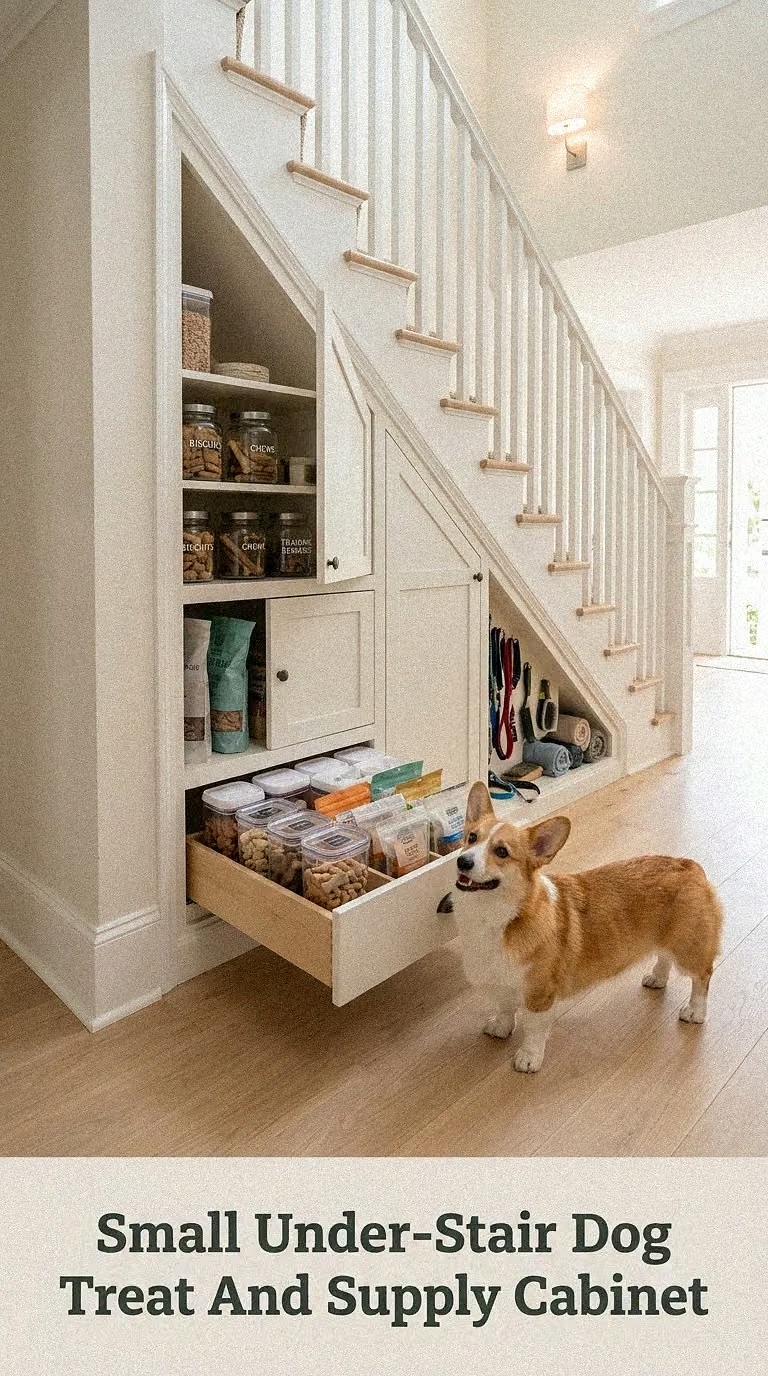
Unused under-stair space can become a surprisingly efficient pet storage area.
Rather than filling the entire nook with random household items, install shallow shelves or a compact cabinet for treats, grooming supplies, leashes, and unopened dog essentials.
Warm wood shelving with soft interior lighting can transform an awkward corner into a polished little pet pantry.
Store treats in sealed containers and group them according to size or purpose. Use the highest shelves for bulk supplies and lower shelves for non-food items that you reach for regularly.
Because under-stair spaces can sometimes feel enclosed, make sure the area stays dry and does not become unusually warm or humid.
This idea works especially well when the dog’s bed or cozy nook is already located beneath the stairs. The storage can sit beside or above the resting area, creating one cohesive dog zone without spreading pet supplies throughout the house.
Slim Rolling Treat Cart For Small Kitchens
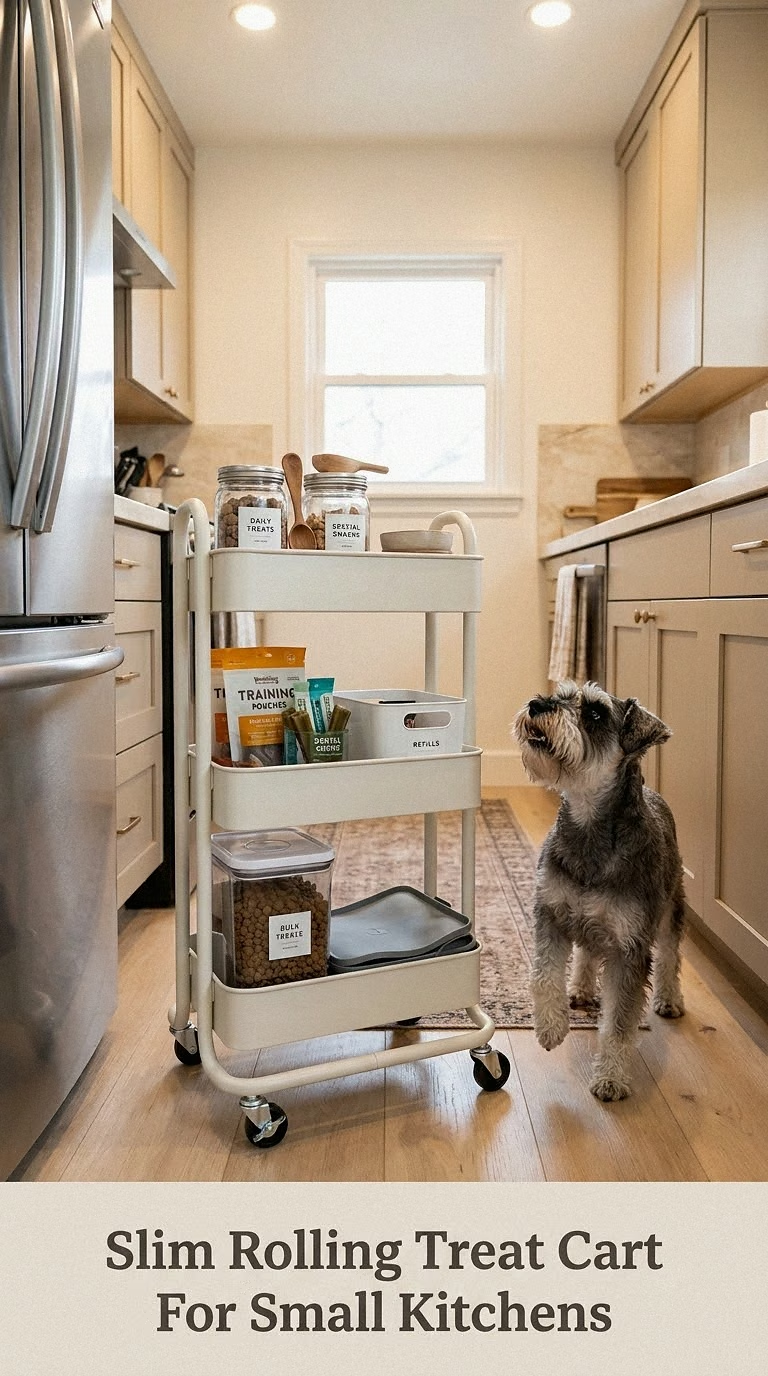
When cabinets are limited, a narrow rolling cart can create storage where none existed before.
Choose a slim three-tier cart that fits beside a pantry, refrigerator, or kitchen cabinet. Place sealed treat containers on the upper shelves and non-food supplies such as wipes, walking bags, and spare bowls below.
Neutral finishes such as cream, matte black, or light wood help the cart look like intentional furniture.
The biggest advantage is flexibility. Roll it closer during training sessions or meal preparation, then tuck it back into a small gap afterward.
However, an open cart should only be used if treats remain securely closed and inaccessible to your dog. A cart parked at nose level with an easy-open jar may quickly become an unintended buffet.
For clever or large dogs, use locking containers or store the cart behind a pantry door when it is not being used.
Minimalist Entryway Training Treat Caddy
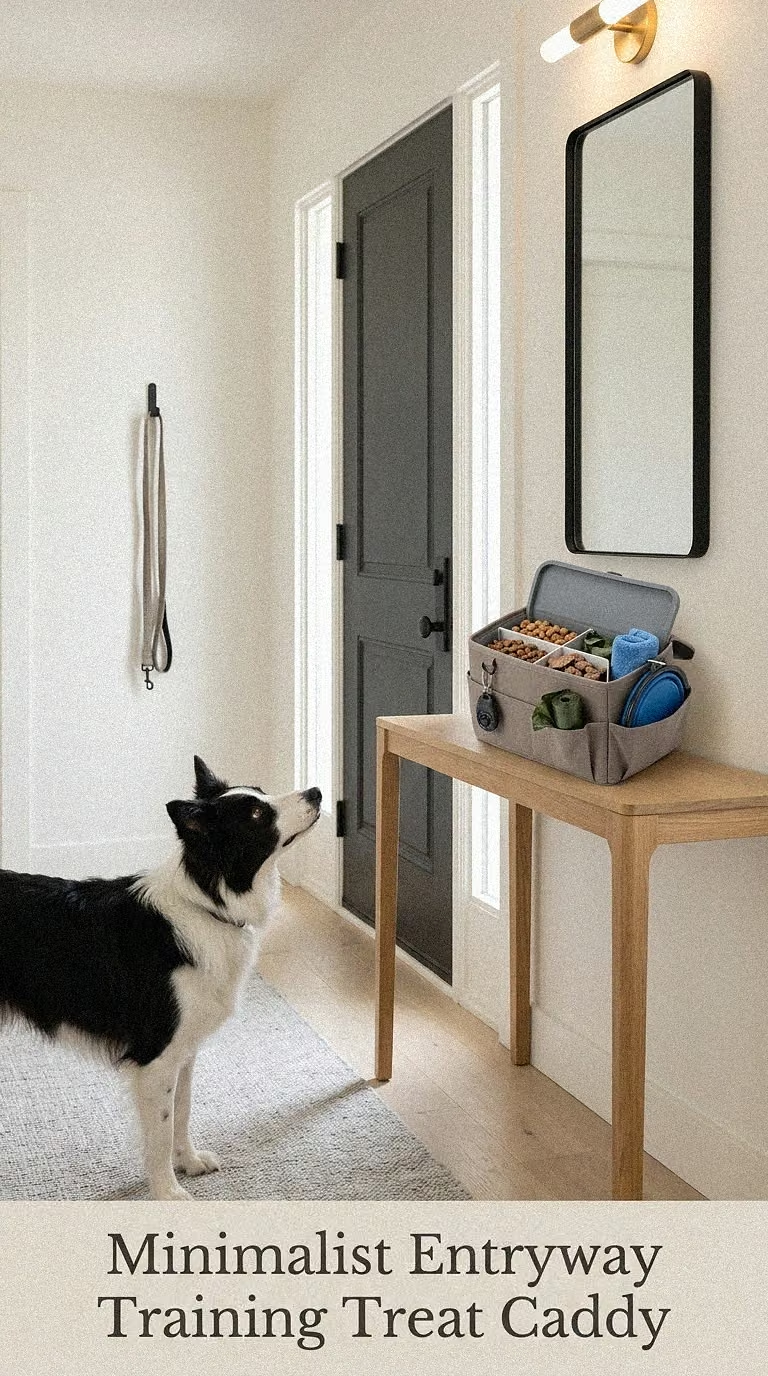
Keeping a small supply of training rewards near the door can make everyday behavior practice much easier.
Create a compact entryway caddy using a small airtight container, leash hook, and shallow wooden tray. Warm beige, white oak, and black hardware create a clean modern look that fits beautifully beside an entry console.
Instead of storing your entire treat supply here, refill the small container as needed from your main pantry storage. This keeps the station tidy and prevents treats from sitting around for longer than necessary.
Small bite-sized treats work especially well for this setup because they can be grabbed quickly when practicing polite door manners, recall, or calm behavior before a walk.
If the entryway gets direct afternoon sunlight, keep the treats inside a drawer or cabinet rather than leaving them exposed on the tabletop.
A hidden drawer inside an entry console can provide the same convenience with virtually no visible pet clutter.
Refrigerator Treat Bin For Fresh And Soft Rewards
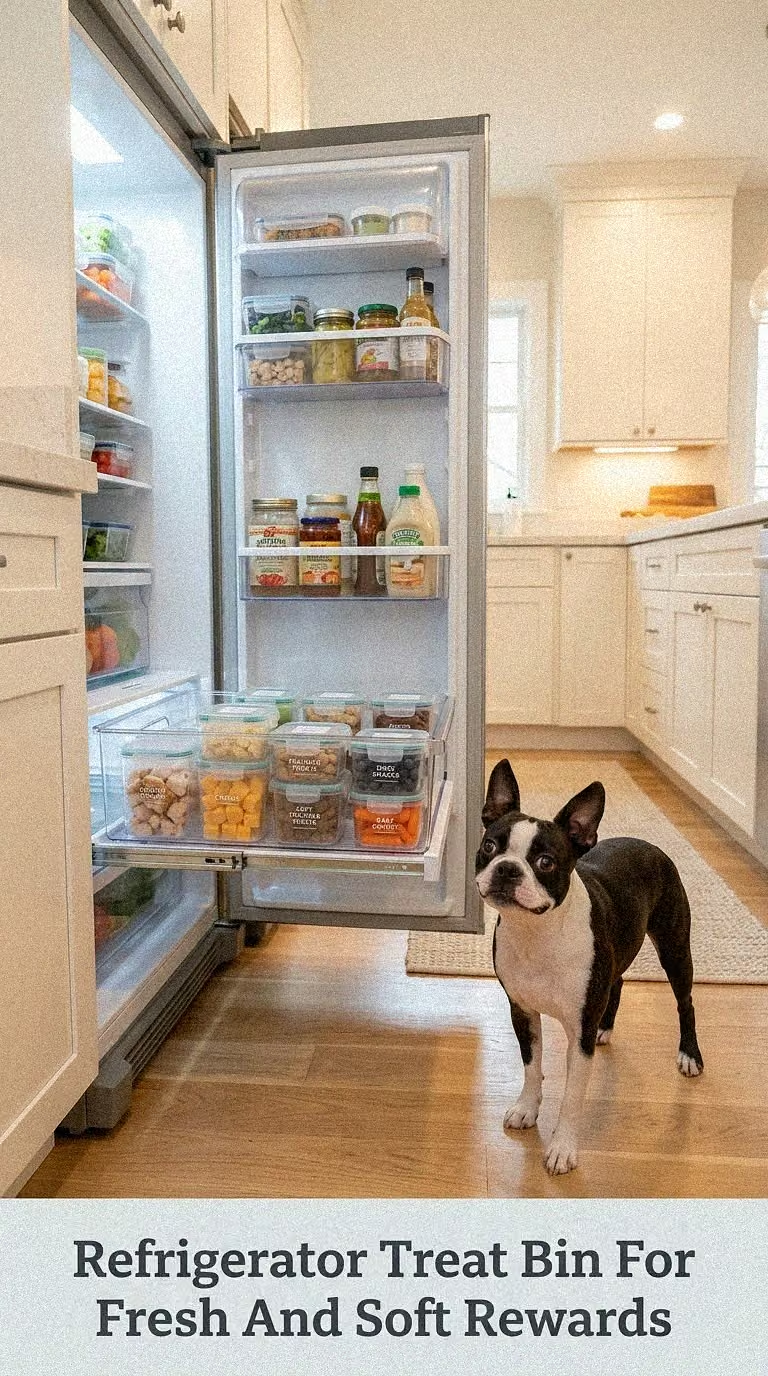
Not every dog treat belongs in a pantry.
Fresh meat-based rewards, certain soft treats, opened refrigerated products, and many homemade recipes may need cold storage. Give these items their own clearly labeled refrigerator bin so they do not become lost behind human food.
A clear rectangular bin works well because you can see the contents without pulling everything out. Use smaller sealed containers inside it to separate different treat types.
Add labels with preparation or opening dates when storing homemade treats. Always follow the storage instructions for the specific product or recipe rather than assuming every treat has the same shelf life.
Keeping the bin on a consistent refrigerator shelf makes training preparation much easier. You can quickly grab a few higher-value treats before a session and return the remainder to cold storage afterward.
The setup may be simple, but matching clear containers and clean labels make it surprisingly satisfying and organized.
Organized Freezer Drawer With Portioned Homemade Treats
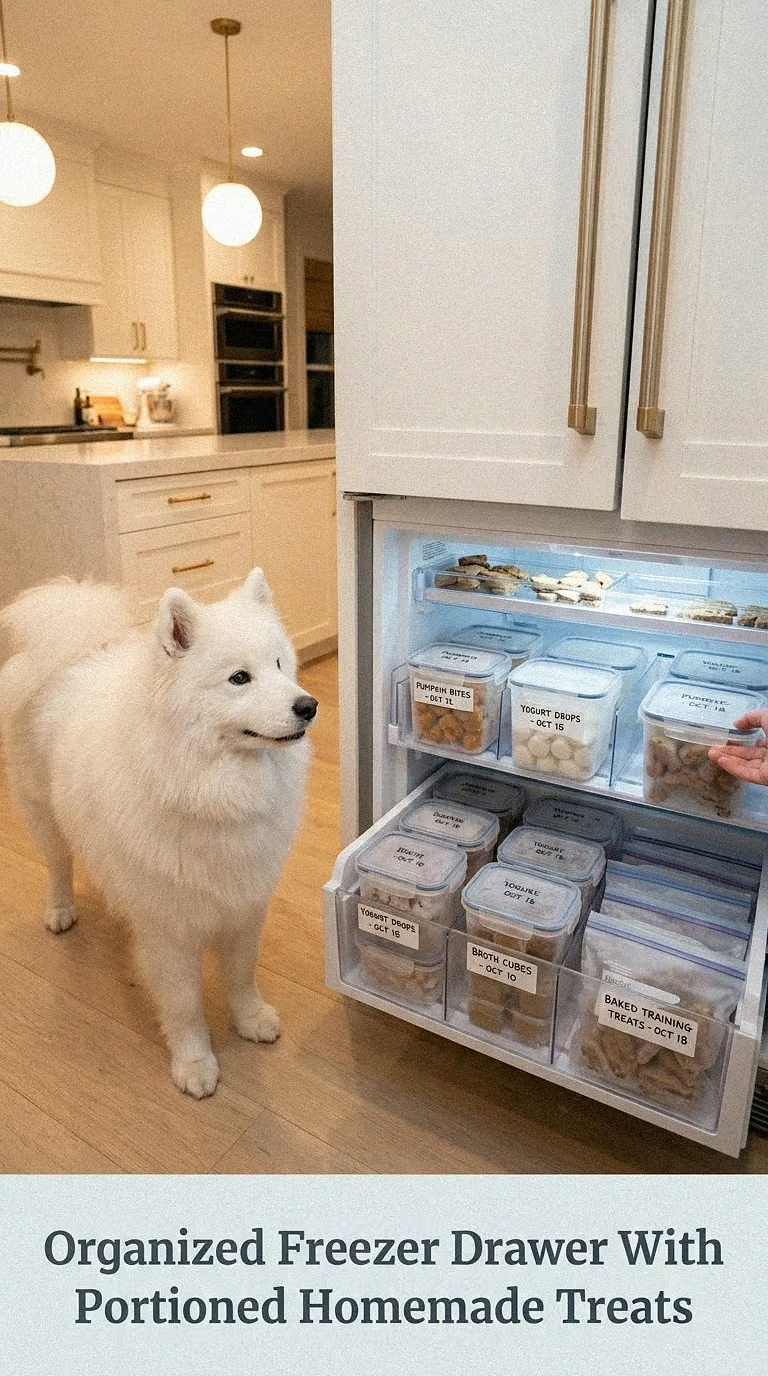
If you enjoy baking or preparing homemade dog treats, freezer organization can save both time and waste.
Use small freezer-safe containers or resealable bags to divide treats into practical portions. Arrange them upright in a dedicated bin so you can remove one portion at a time rather than repeatedly thawing a large batch.
Label each package with the treat name and date.
A particularly pretty system uses matching reusable freezer containers with simple white labels, creating a tidy row inside the drawer.
Allow freshly baked treats to cool completely before storing them. Warm treats sealed too early can trap unwanted moisture.
Freezing is especially useful for treats made with perishable ingredients, but storage requirements vary considerably between recipes. Follow the recipe’s refrigeration and freezing guidance.
This system is ideal for pet owners who love making treats on weekends and want convenient rewards ready for busy weekdays.
Multi-Dog Treat Station With Color-Coded Containers
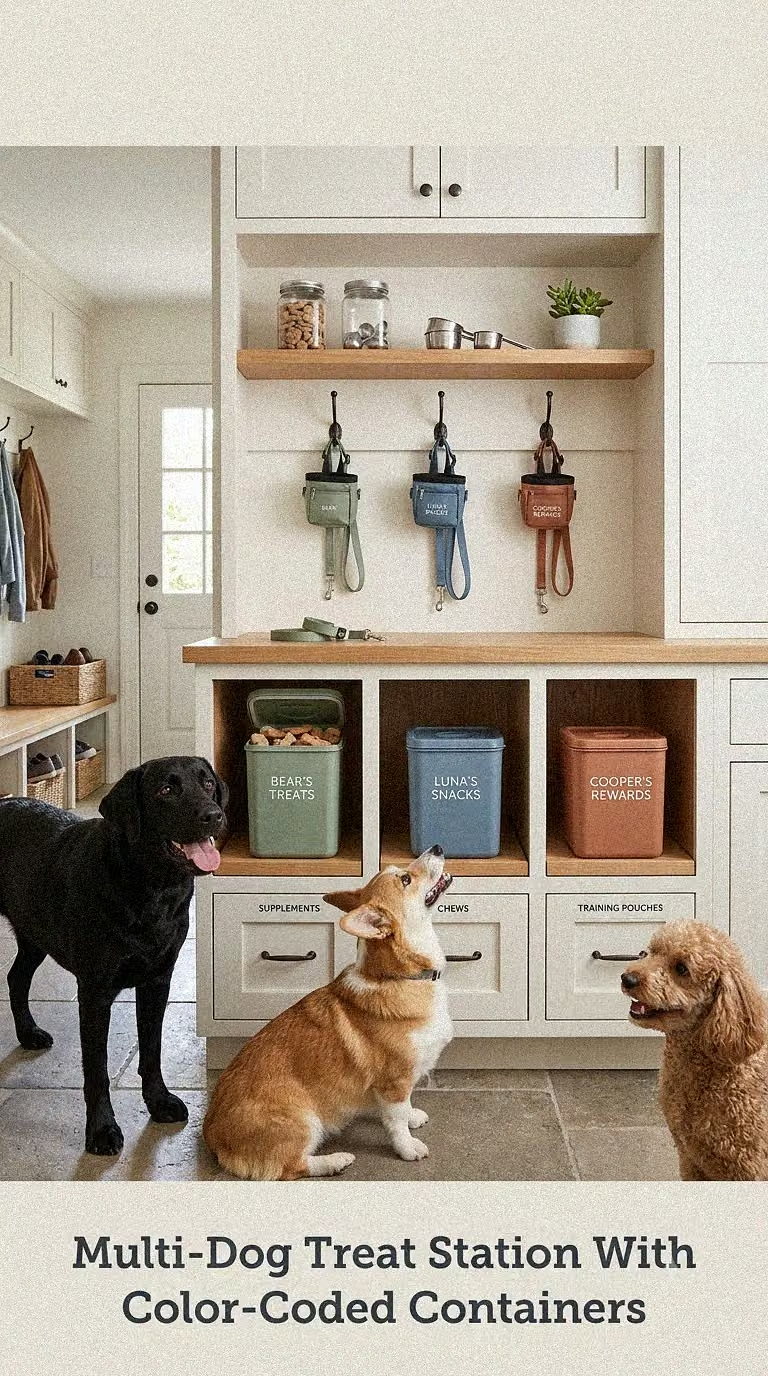
Homes with two or more dogs often need a little more organization, especially when each pet receives different treats.
Create a color-coded storage station with individual sealed containers for each dog. For example, use soft sage labels for one dog, muted terracotta for another, and cream for treats everyone can share.
This prevents confusion when one pet has a different feeding plan or simply prefers a different kind of reward.
Place all of the containers together on a sturdy pantry shelf or inside a cabinet. Add each dog’s name in clear lettering so visiting family members or pet sitters can understand the system quickly.
Keep special instructions nearby when needed, but avoid relying on color alone since labels are much clearer.
Visually, the coordinated containers can turn a functional pet shelf into one of the prettiest sections of the pantry while making everyday routines much smoother.
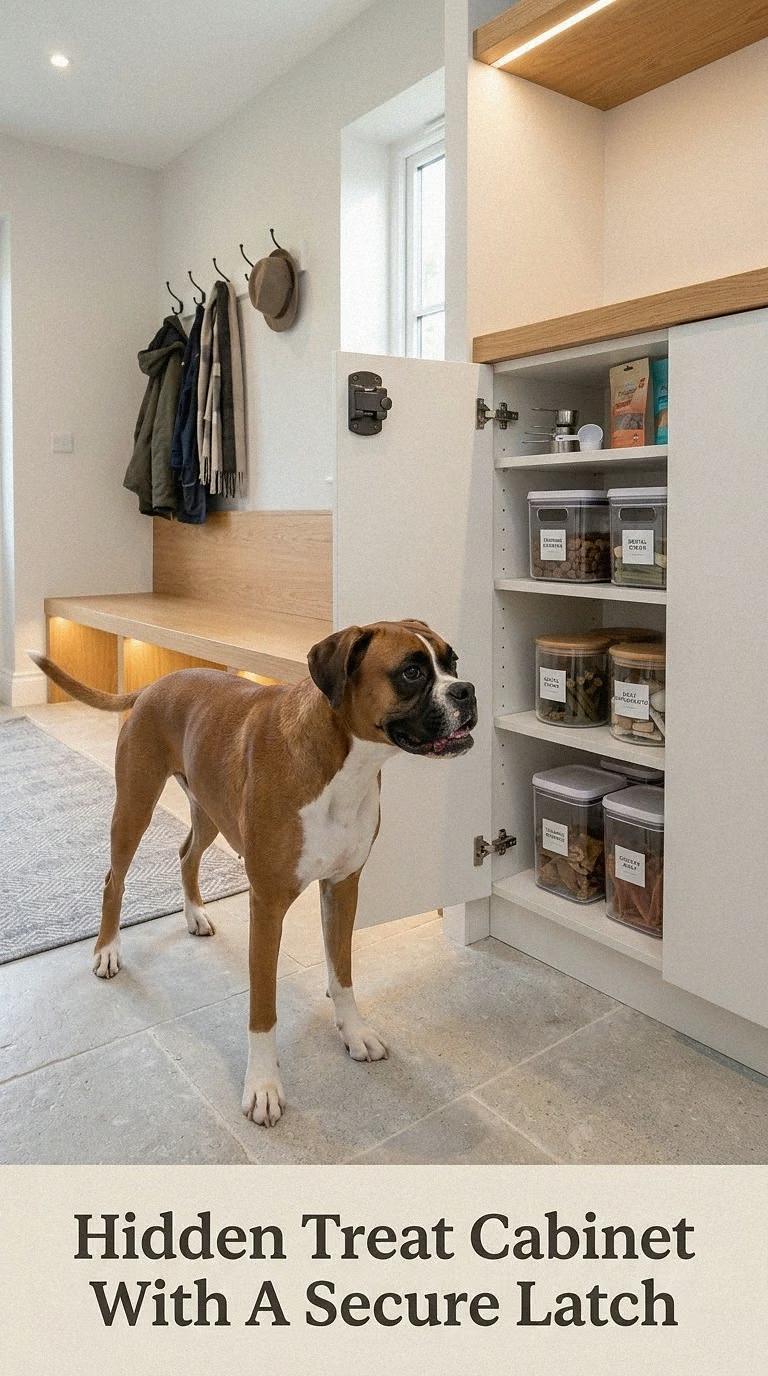
Hidden Treat Cabinet With A Secure Latch
Read more : 19 Shelter Dog Enrichment Ideas For Happier, Calmer Kennel Days
Some dogs seem capable of opening almost anything when snacks are involved.
For persistent treat thieves, a hidden cabinet with a secure latch combines safety with a clean interior aesthetic. Use an upper kitchen cabinet, mudroom cupboard, or tall pantry compartment and organize treats inside sealed containers.
From the outside, nothing suggests that a tempting collection of biscuits is waiting inside.
This approach is especially useful for large dogs that can reach countertops or clever dogs that have learned to nudge ordinary cabinet doors open.
Inside the cabinet, install shallow shelves so containers remain visible rather than disappearing behind one another. A small washable liner catches crumbs and makes cleanup simple.
Avoid overcrowding the space. Keeping just a few regularly used varieties plus neatly stored backups makes rotation easier and helps you notice older packages before opening something new.
Decorative Woven Basket With Sealed Treat Containers Inside
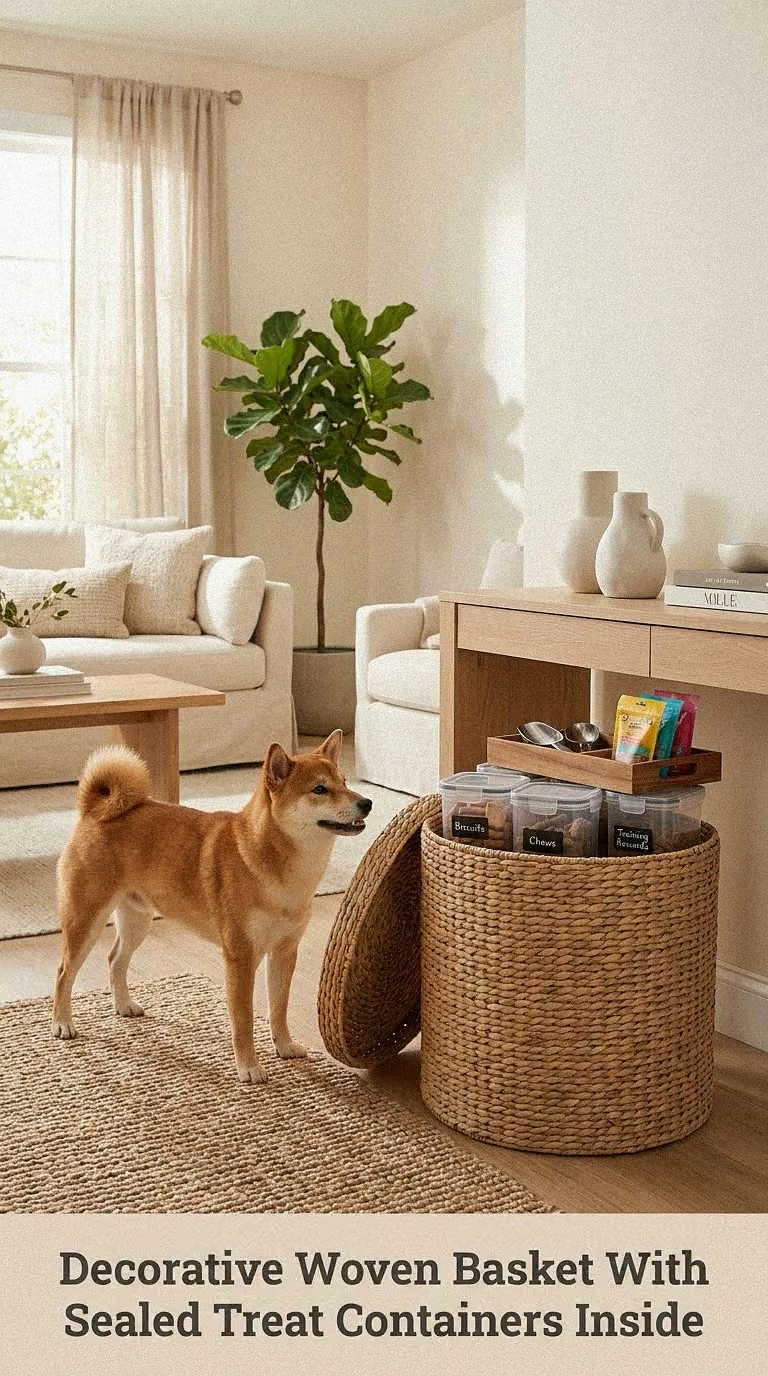
A woven basket is perfect when you want dog supplies to blend into a living room, family room, or open-plan kitchen.
Choose a lidded basket in natural seagrass or rattan and place several small airtight containers inside. The basket hides colorful packaging while the sealed inner containers protect the actual treats.
This combination gives you the best of both worlds: cozy decorative texture on the outside and practical food storage within.
Place the basket on a console, built-in shelf, or inside a cabinet rather than directly on the floor where your dog can investigate it.
This approach is particularly useful when you keep treats near a living-room training area but do not want the space to look like a pet-supply store.
Pair the basket with another matching one for toys or grooming accessories. Repeating the same material makes the pet storage feel integrated with the rest of the room.
Modern Wooden Treat Box With Removable Airtight Inserts
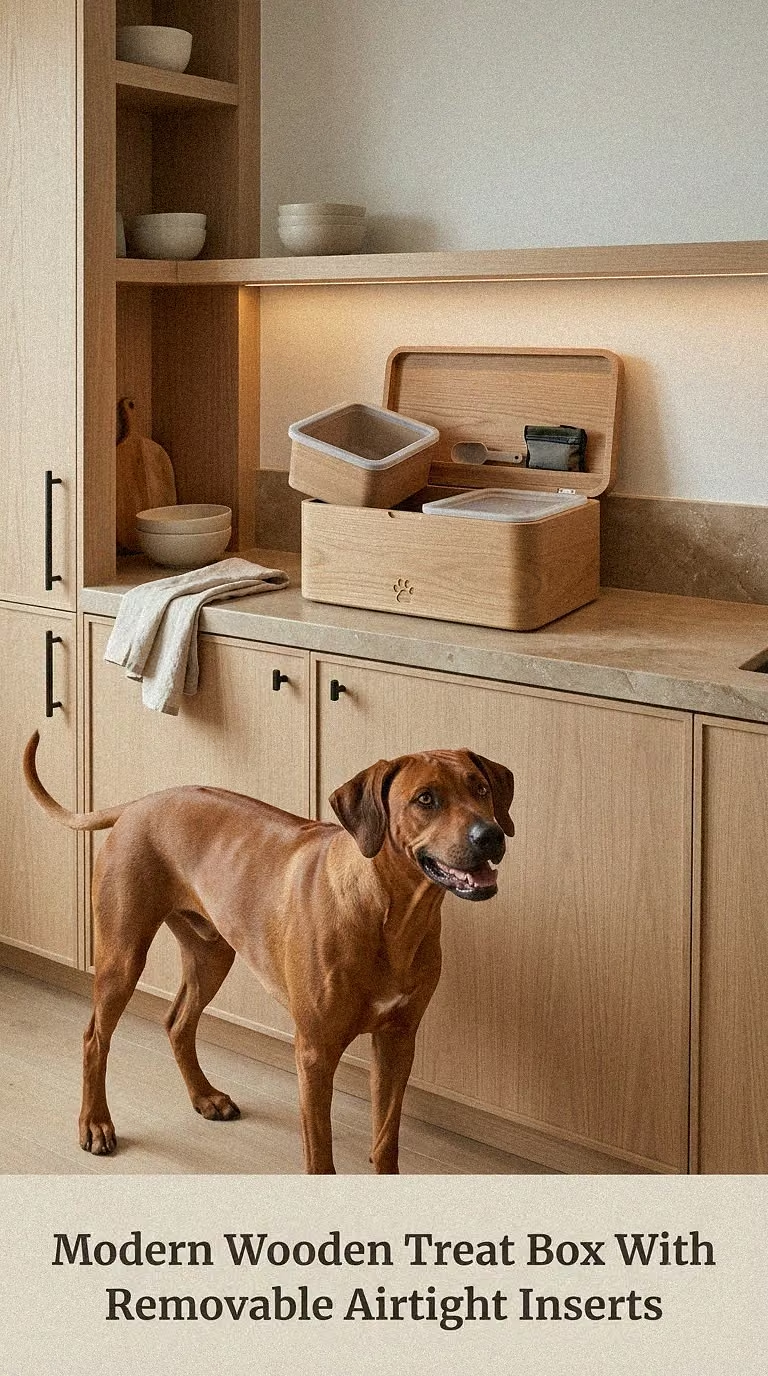
A handcrafted wooden treat box can become a beautiful piece of functional decor.
Choose white oak, walnut, or another smooth-finished wood and divide the box into several sections. Instead of placing treats directly against the wood, fit removable airtight containers inside each compartment.
This protects the treats while keeping the outer storage piece easy to maintain.
A hinged lid can hide everything when closed, while engraved labels or tiny brass nameplates give the box a custom look. Place it on a kitchen shelf, mudroom counter, or pet feeding console.
This design is also achievable as a DIY project. A basic unfinished wooden box can be sanded, stained, and fitted around purchased food-safe containers.
The key is making the washable inner containers responsible for food storage while allowing the decorative wood shell to provide the visual impact.
Built-In Feeding Station With Brass Treat Drawers
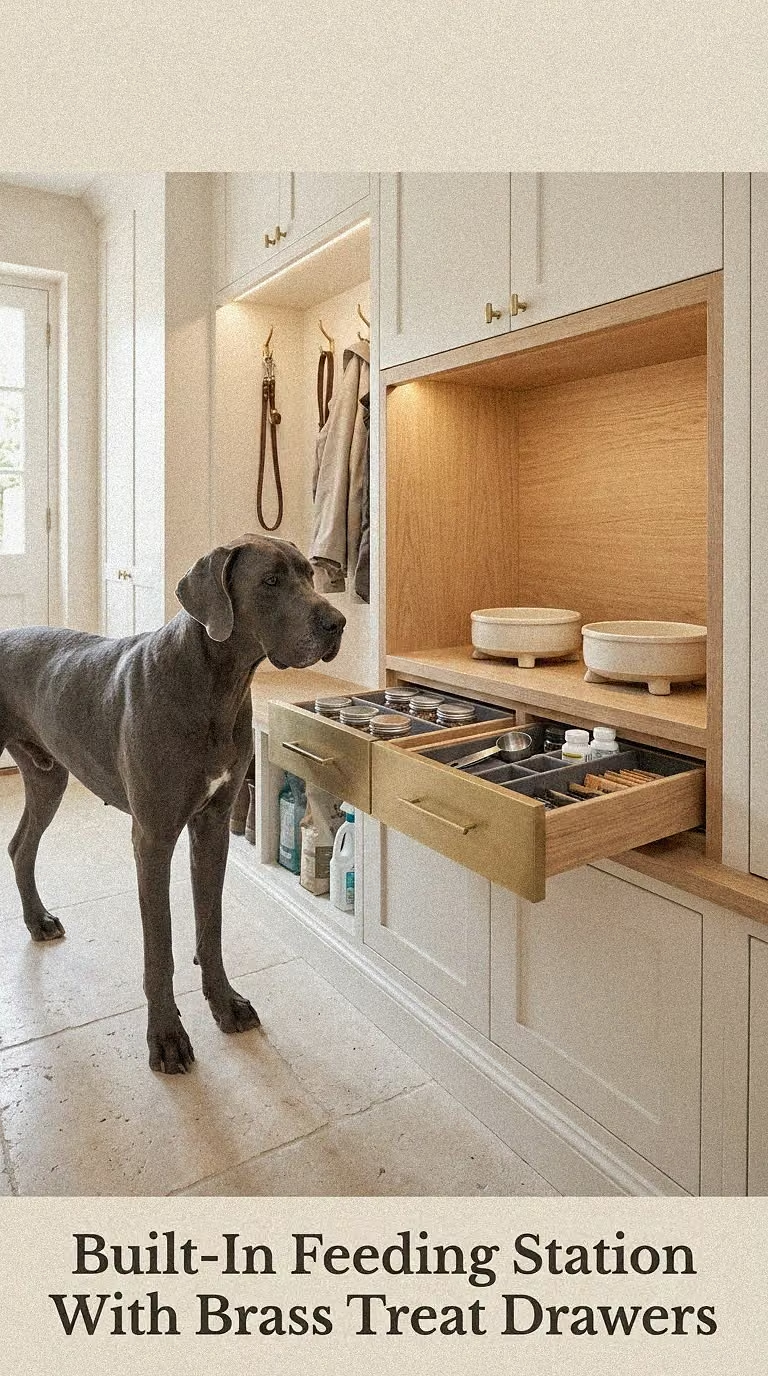
For a more luxurious interpretation, integrate treat storage directly into a built-in feeding station.
Picture warm white cabinetry with a white oak countertop, two neatly positioned food bowls below, and small drawers above finished with brushed brass pulls. Inside one drawer, removable airtight containers hold different treats in clearly labeled sections.
This creates a dedicated pet zone that feels as thoughtfully designed as the rest of the kitchen.
Use easy-to-clean materials around the bowls, particularly on the floor and backsplash where water splashes are likely. Keep treat containers separate from any damp feeding accessories.
The drawers can also hold measuring tools, supplements recommended for your dog, or walking supplies depending on your routine.
Although custom cabinetry is an investment, the concept can be recreated inexpensively with a freestanding console or repurposed kitchen cabinet for a similar polished effect.
DIY Mason Jar Treat Shelf With Simple Handmade Labels
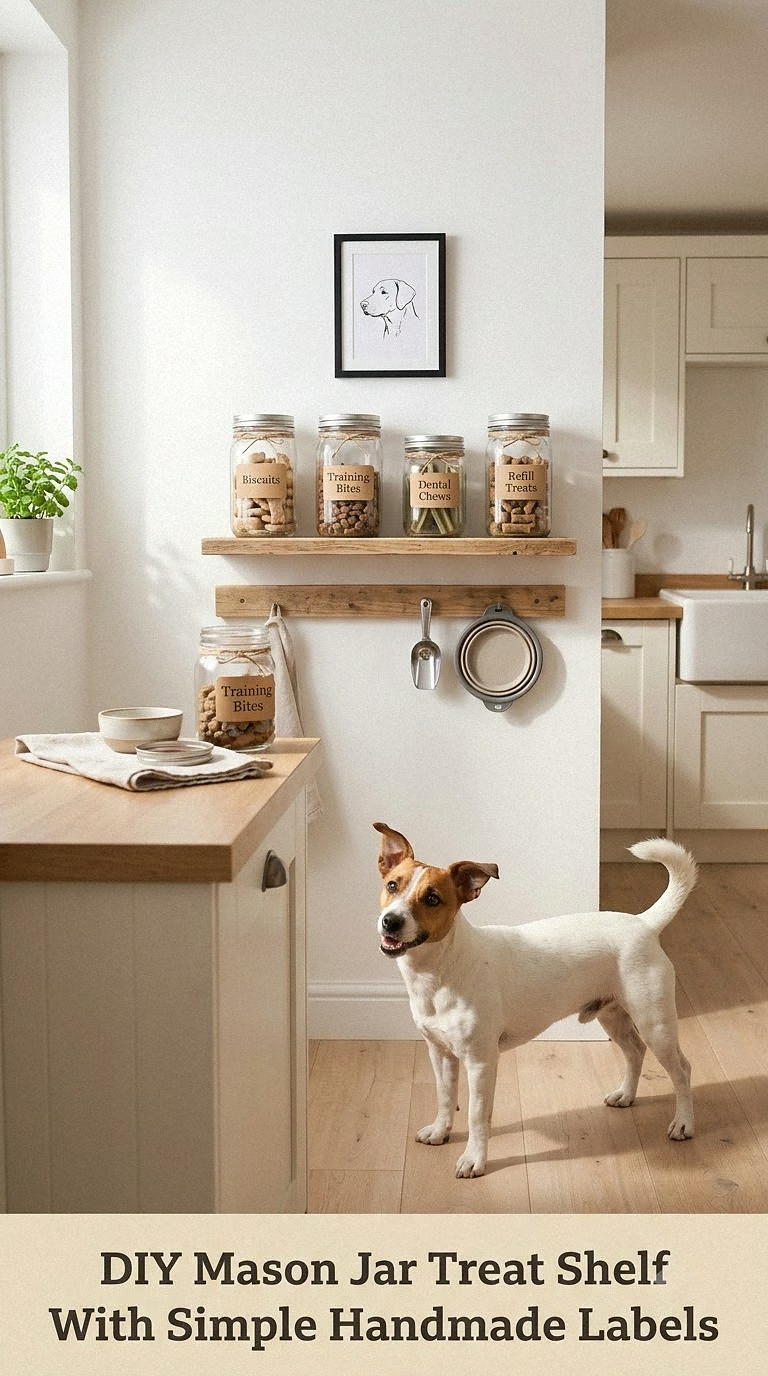
A small DIY shelf can turn inexpensive jars into a charming treat display.
Mount a short wooden shelf in the pantry or kitchen and arrange several mason-style jars with airtight lids across it. Add handwritten kraft labels, minimalist printed tags, or small wooden plaques to distinguish biscuits, training treats, and chews.
Natural wood and clear glass create an approachable handmade look that suits farmhouse, cottage, and casual kitchens.
Because glass can break, mount the shelf securely and position it beyond your dog’s reach. Avoid locations where jars could be bumped by opening doors or busy kitchen traffic.
You can also place the original treat bags inside larger containers instead of transferring treats if retaining packaging is more convenient.
For an especially budget-friendly project, use jars you already own, purchase replacement sealing lids, and build the shelf from leftover wood.
Compact Apartment Treat Drawer With Stackable Containers
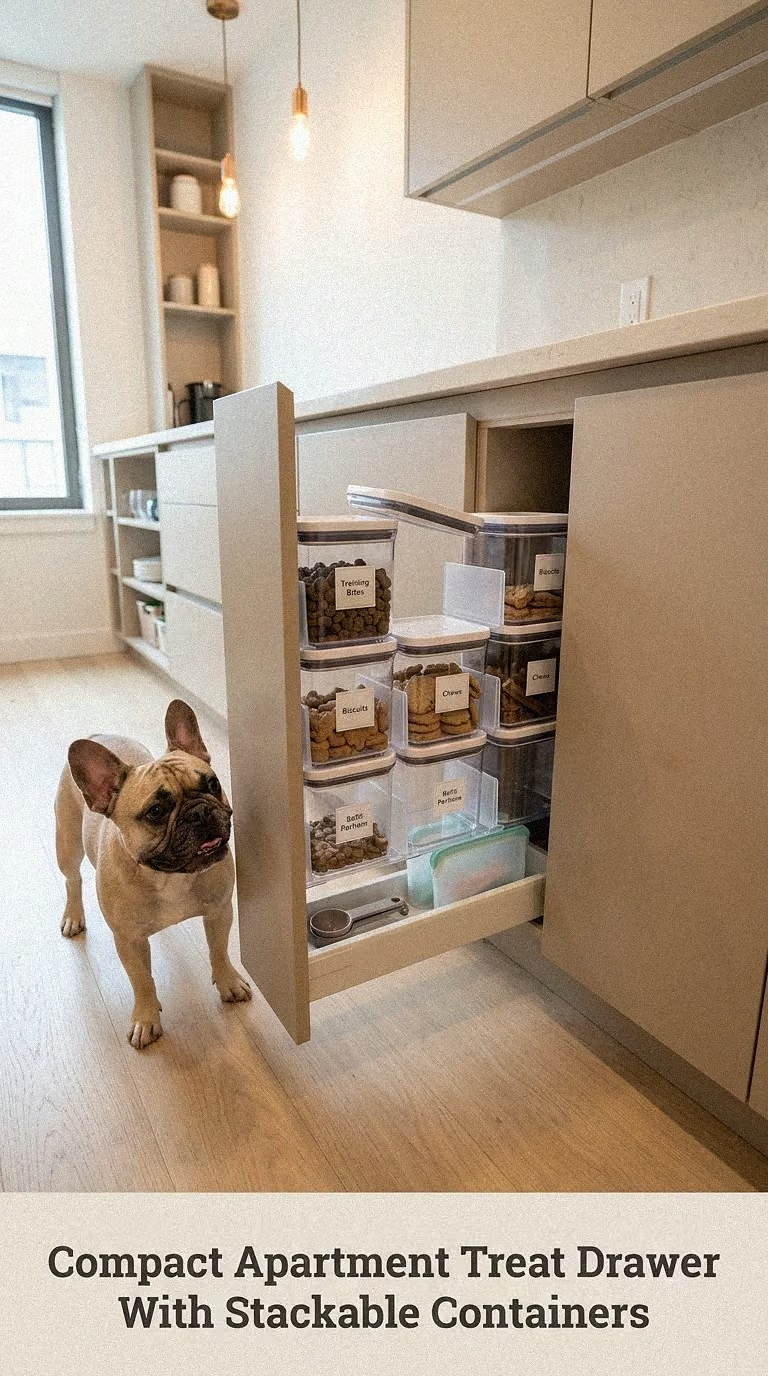
Small apartments benefit from storage that uses every inch efficiently.
Dedicate one kitchen drawer to dog treats and fill it with shallow, stackable airtight containers. Choose rectangular shapes instead of round jars so very little drawer space is wasted.
Organize the containers by frequency of use, keeping daily training treats toward the front and occasional chews toward the back.
Clear lids let you check supplies without opening each container. Small labels can include the treat name and relevant date information.
If the drawer is deep, use two layers of containers or a removable organizer tray to take advantage of vertical space.
This setup is particularly useful because it keeps pet supplies completely hidden when the drawer closes. There is no need for a large pantry, freestanding cart, or additional furniture.
A simple dedicated drawer can provide all the storage many apartment dogs actually need while keeping the kitchen calm and uncluttered.
Creating Dog Treat Storage Ideas That Work For Your Home
Beautiful organization does not have to mean creating an elaborate pet pantry or buying an entire collection of matching containers. The most useful dog treat storage ideas are the ones that make sense for the way you and your dog actually live.
If you reach for rewards several times a day, a secure countertop jar, training caddy, or pull-out drawer may be perfect. If you buy multiple treat varieties, a dedicated pantry shelf can keep everything visible. Homemade-treat lovers may benefit more from labeled refrigerator and freezer zones, while owners of enthusiastic snack thieves may want enclosed cabinets and secure latches.
Whichever style you choose, focus first on keeping treats properly sealed, clean, dry, stored according to their package or recipe instructions, and safely out of your dog’s unsupervised reach. Then add the colors, baskets, labels, wood finishes, and decorative details that make the setup feel like part of your home.
A thoughtfully organized treat station makes small daily routines feel easier, and it creates a lovely little place dedicated to one of life’s happiest rituals: rewarding a very good dog.
Source: https://petstutorial.com
Category: DOGS
