
A thoughtfully designed patio can become one of your dog’s favorite places in the entire home. Instead of treating the outdoor area as simply a spot for a table and a few chairs, you can create a comfortable little retreat where your dog can nap in the shade, watch the garden, enjoy fresh air, and stay close while you relax outside.
The best dog patio ideas balance beauty with everyday practicality. You want something that looks like a natural extension of your home while still considering muddy paws, spilled water, excited zoomies, sunny afternoons, and the occasional curious nose investigating your plants.
You are reading: 18 Dog Patio Ideas For A Beautiful, Cozy, Pet-Friendly Outdoor Space
Fortunately, a dog-friendly patio does not need to look like a kennel or play yard. Soft outdoor textiles, warm wood, attractive planters, washable beds, secure fencing, shady corners, and clever storage can make the space feel polished while quietly supporting your dog’s needs.
Whether you have a sprawling backyard terrace or a tiny paved courtyard, these ideas offer plenty of inspiration. Some are easy weekend projects, while others can become part of a larger patio renovation. Choose the elements that suit your climate, available space, decorating style, and most importantly, your dog’s personality.
Beautiful Dog Patio Ideas For Comfortable Outdoor Living
Cozy Covered Patio With A Built-In Dog Bed
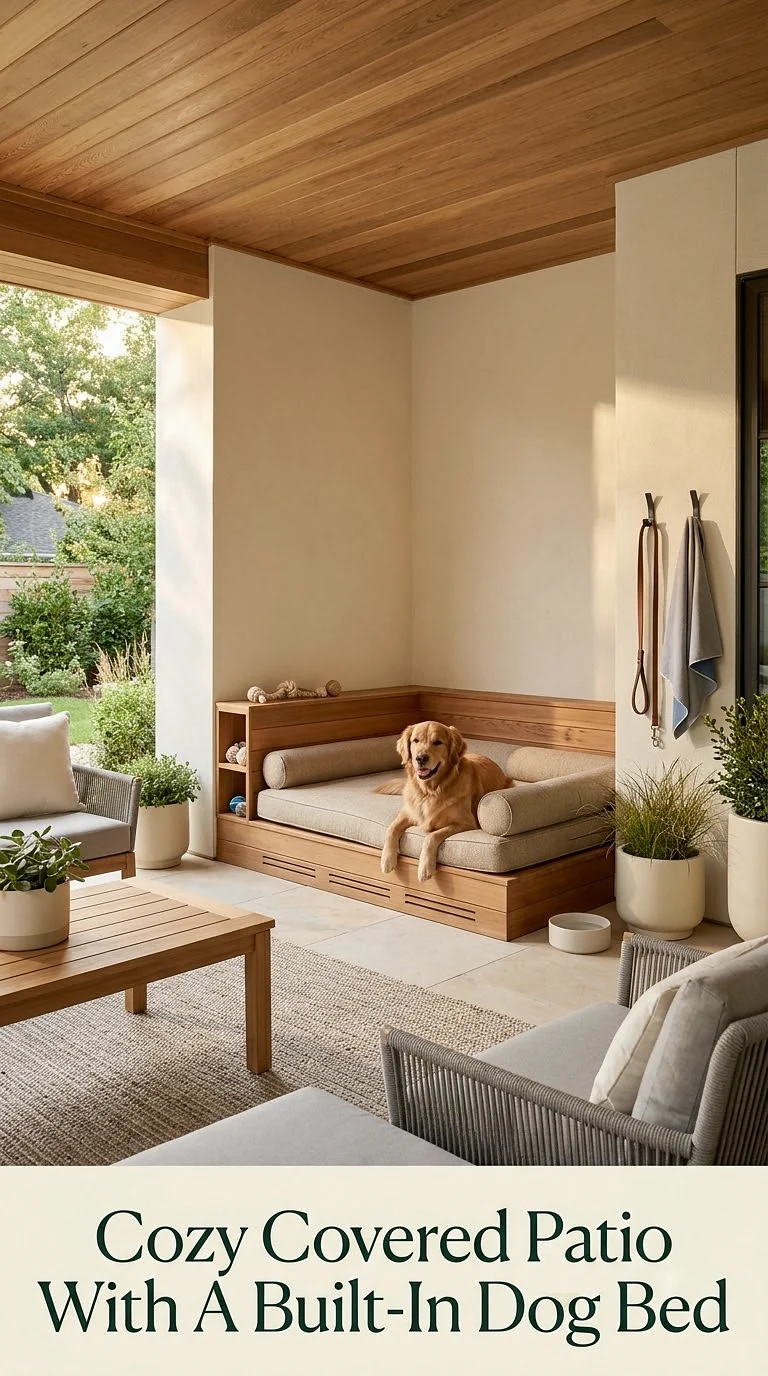
Turn a sheltered corner of your patio into a permanent resting place with a built-in dog bed tucked beneath a bench or outdoor counter.
A warm wood bench with a recessed sleeping nook underneath can look surprisingly sophisticated. Add a thick washable cushion in oatmeal, beige, sage, or charcoal so the dog area blends naturally with the rest of your furniture.
Position the nook where your dog can still see you and the surrounding yard. Most dogs enjoy feeling included rather than being tucked away in an isolated corner.
A covered location also helps protect bedding from direct sunlight and light rain. Choose outdoor-grade fabric that can handle dirt and moisture, and use removable cushion covers so cleaning stays simple.
For an affordable DIY version, modify a basic outdoor bench by leaving one lower section open. Add a cushion, small washable rug, and a favorite toy to make the space feel inviting.
Modern Concrete Patio With A Shaded Dog Lounge
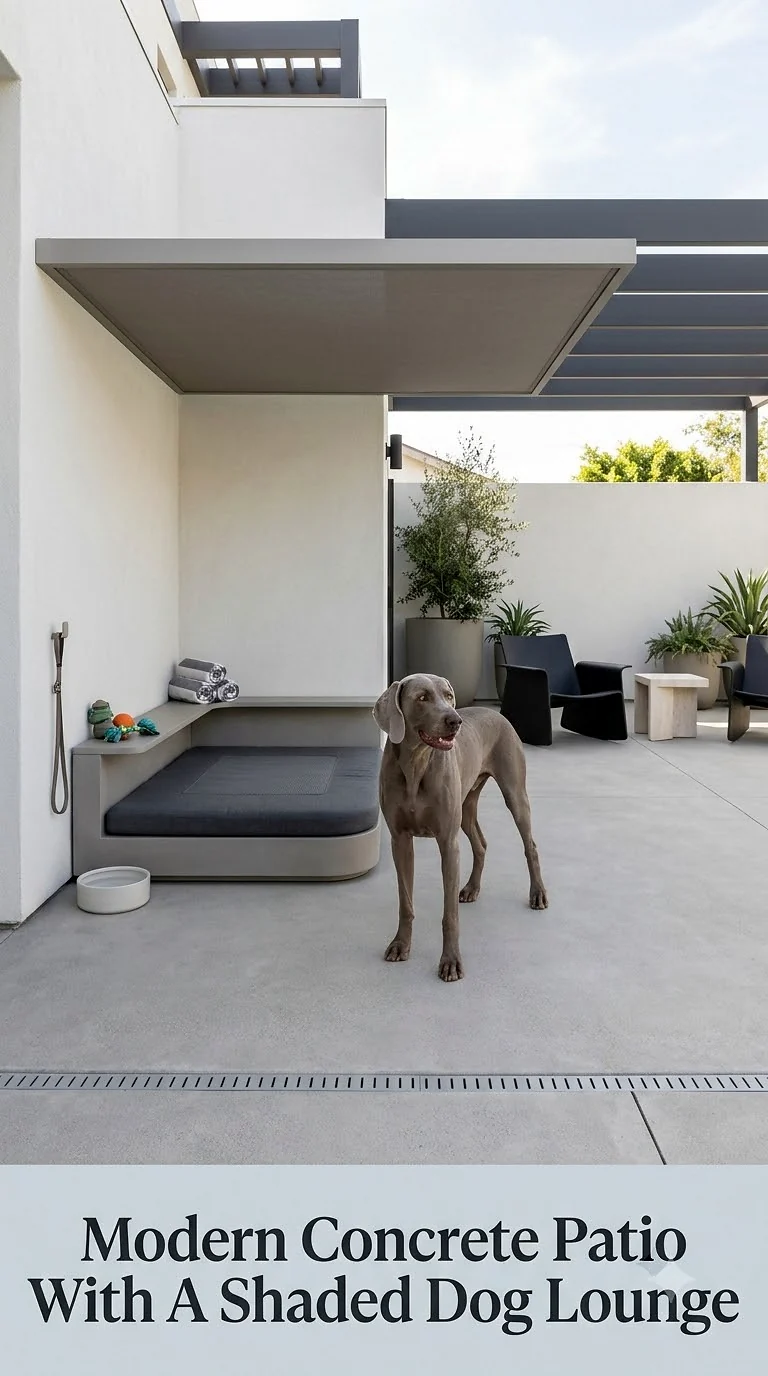
A contemporary concrete patio can become a stylish dog retreat with just a few softer elements.
Start with clean concrete pavers or a smooth patio floor and pair them with black metal furniture, large neutral planters, and warm wood details. Then create a dedicated dog lounge beneath a cantilever umbrella or covered pergola.
An elevated outdoor dog bed works especially well in this setting because air can circulate beneath it. Add a water bowl nearby and keep the resting area out of strong afternoon sun whenever possible.
Because concrete can become very warm, pay attention to how much direct sunlight reaches the surface throughout the day. Rugs, shaded sections, or alternative walking surfaces can create more comfortable routes across the patio.
The contrast between minimal hardscaping and soft dog-friendly accessories makes this idea especially attractive for modern homes.
Soft Sage Patio Corner With Woven Furniture And Dog Bed
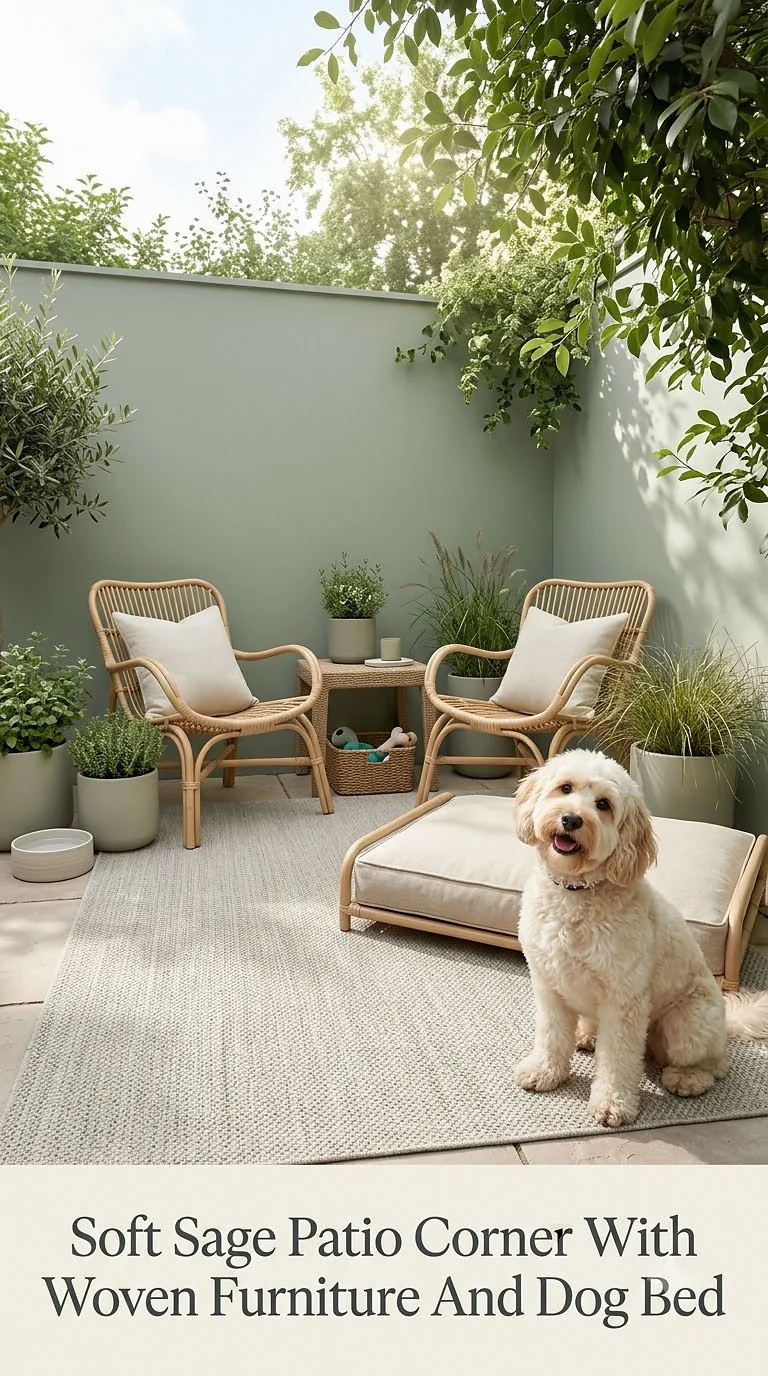
For a calmer, cottage-inspired look, decorate your patio with soft sage green, cream, pale wood, and woven textures.
Place a comfortable dog bed next to a wicker or rattan-style outdoor chair so your pet has a relaxing spot beside you. A washable cream outdoor rug can help visually connect the seating area while adding softness beneath paws.
Use sage-colored cushions, lightweight throws, and ceramic planters to continue the palette. When choosing greenery, check each plant carefully for pet safety before placing it where your dog can reach it.
This setup works beautifully on medium-sized patios where you want the dog area to feel integrated rather than separate.
A lidded woven basket can hold outdoor toys, grooming towels, and spare leashes without making the patio feel cluttered. The finished space feels less like a pet zone and more like a peaceful outdoor living room designed for everyone.
Small Patio With A Space-Saving Dog Station
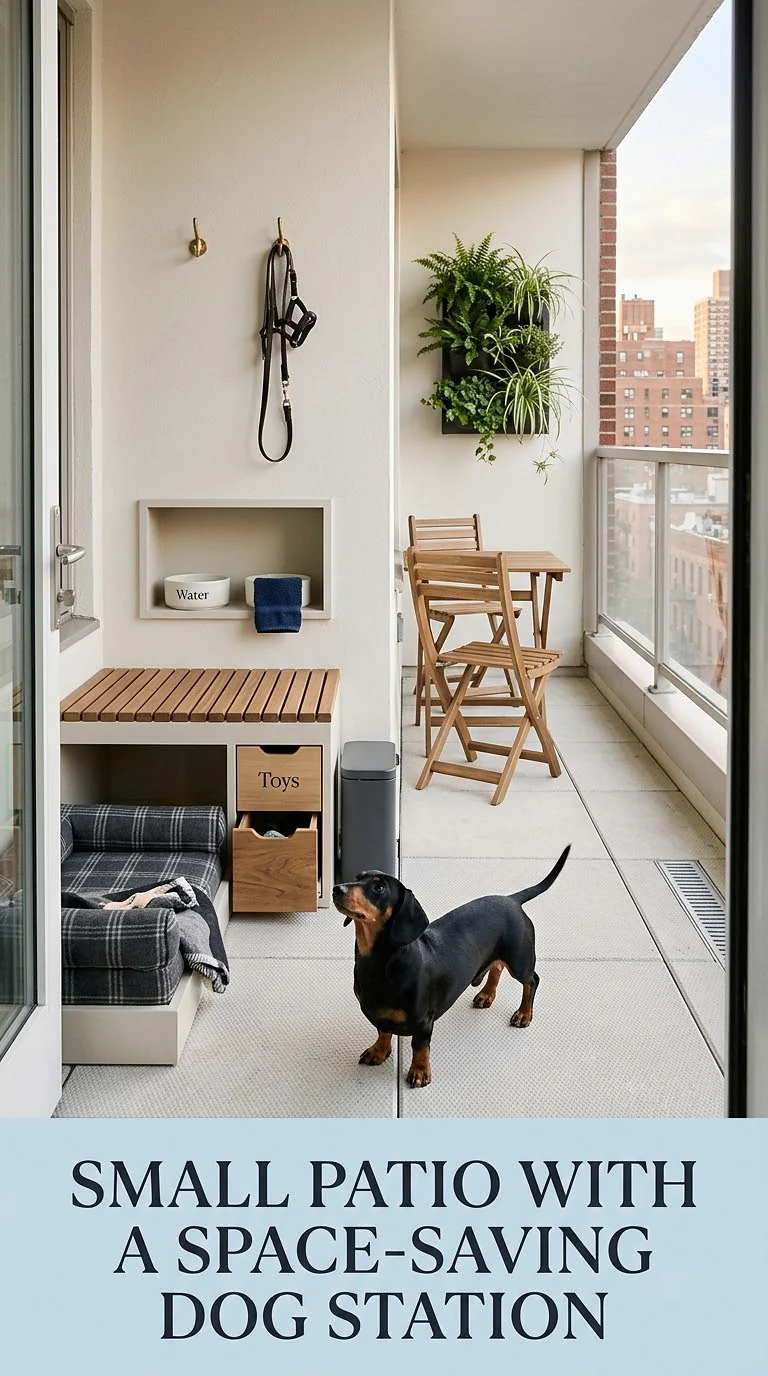
Even a tiny patio can provide your dog with a comfortable outdoor retreat.
Instead of filling the space with bulky furniture, use a slim bench against one wall and place a compact dog bed beneath or beside it. A narrow vertical shelf can hold a water bowl, towels, toys, and other small supplies.
Wall-mounted hooks are useful for hanging leashes and harnesses without using valuable floor space.
Choose furniture with open legs rather than heavy bases. This creates visual breathing room and makes a small patio feel less crowded.
A foldable side table or wall-mounted drop-leaf table can provide a place for your coffee without permanently occupying the center of the patio.
Keep the color palette simple with light wood, warm white, and muted green. A few carefully chosen accessories will usually make a small space feel more intentional than dozens of tiny decorations.
Rustic Farmhouse Patio With A Wooden Dog Feeding Station
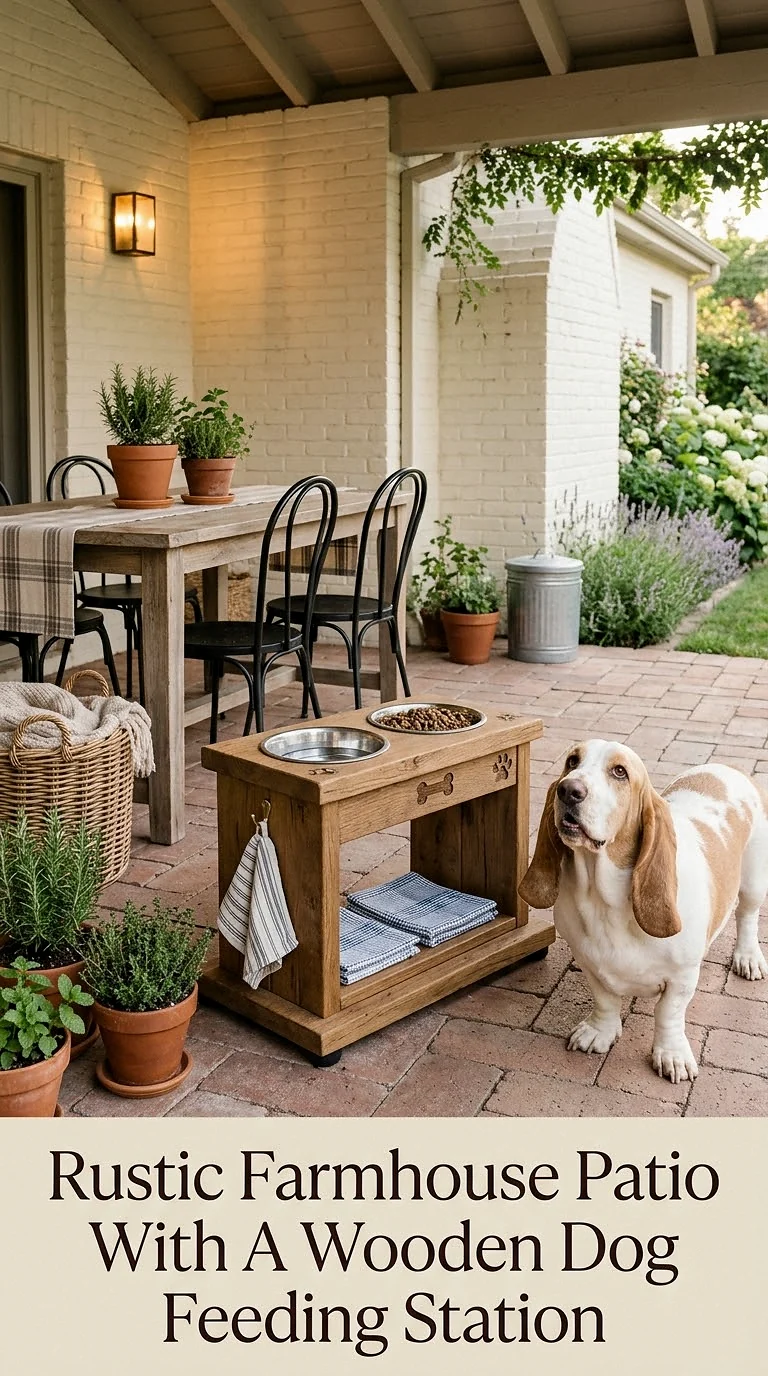
A farmhouse patio is the perfect setting for a charming outdoor feeding station.
Build or repurpose a low wooden console with openings that securely hold stainless steel water and food bowls. Staining the wood in a medium oak or weathered brown tone helps it coordinate with farmhouse benches, lanterns, and planters.
Place the station against a protected wall where it will not become an obstacle in busy walking areas.
A lower shelf can hold a sealed container for treats or outdoor supplies, while hooks along the side can store a leash and towel.
If your dog eats meals outdoors occasionally, bring leftover food inside afterward rather than leaving it exposed.
Complete the look with terracotta pots, neutral cushions, and a simple outdoor rug. The feeding station becomes part of the patio styling instead of looking like a collection of loose bowls.
Pergola Patio With A Breezy Dog Nap Zone
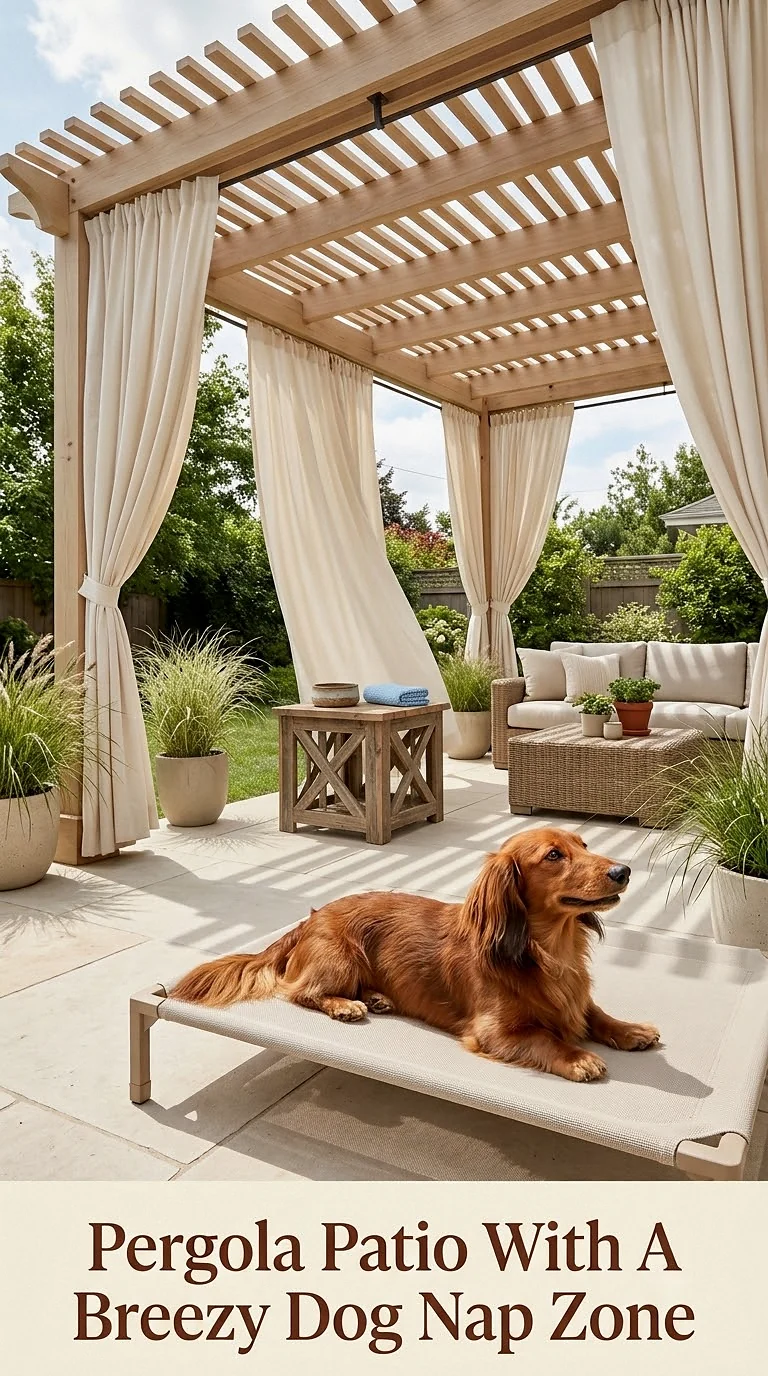
A pergola naturally creates a beautiful framework for a dog-friendly patio.
Underneath the structure, arrange your seating on one side and give your dog a roomy resting area nearby. A raised bed, cooling mat, or thick outdoor cushion can create an appealing nap zone without interfering with the furniture layout.
For additional shade, consider a retractable canopy, outdoor curtains, or shade fabric positioned above the strongest sun exposure.
Climbing greenery can soften the structure beautifully, but always research individual plant varieties before allowing them to grow within reach of pets.
Outdoor curtains can also make the patio feel more intimate. Tie them back during breezy weather and keep loose fabric away from dogs that tend to chew.
String lights overhead can make the pergola equally appealing after sunset, transforming it into a cozy evening retreat for both you and your dog.
Mediterranean Patio With Terracotta Pots And Pet-Safe Greenery
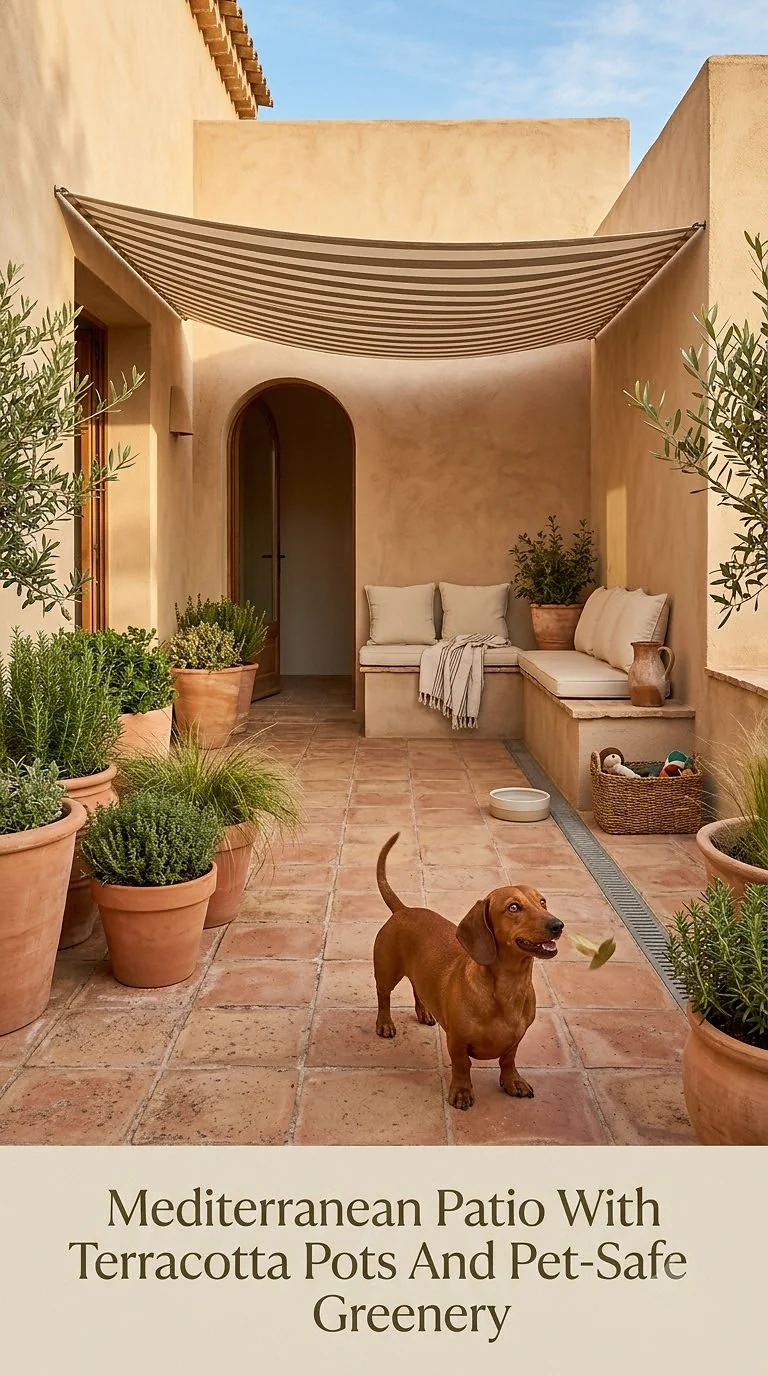
Create a sun-washed Mediterranean mood using terracotta, warm cream walls, textured stone, and carefully selected greenery.
Cluster several terracotta pots around the edges of the patio while keeping the center open for comfortable movement. Before purchasing plants, confirm that each specific variety is appropriate for homes with dogs.
Mix different pot sizes rather than lining up identical containers. A large statement planter surrounded by smaller pots creates a relaxed, collected appearance.
Add a striped outdoor cushion or washable dog mattress in cream and muted blue for a coastal Mediterranean touch.
Read more : How Do I Know if My Chihuahua is Pregnant
A wooden water bowl stand can blend beautifully into this style, especially when paired with natural textures such as linen-look cushions and woven baskets.
The overall effect feels lush and romantic without sacrificing practical walking space.
Minimalist White Patio With A Hidden Dog Storage Bench
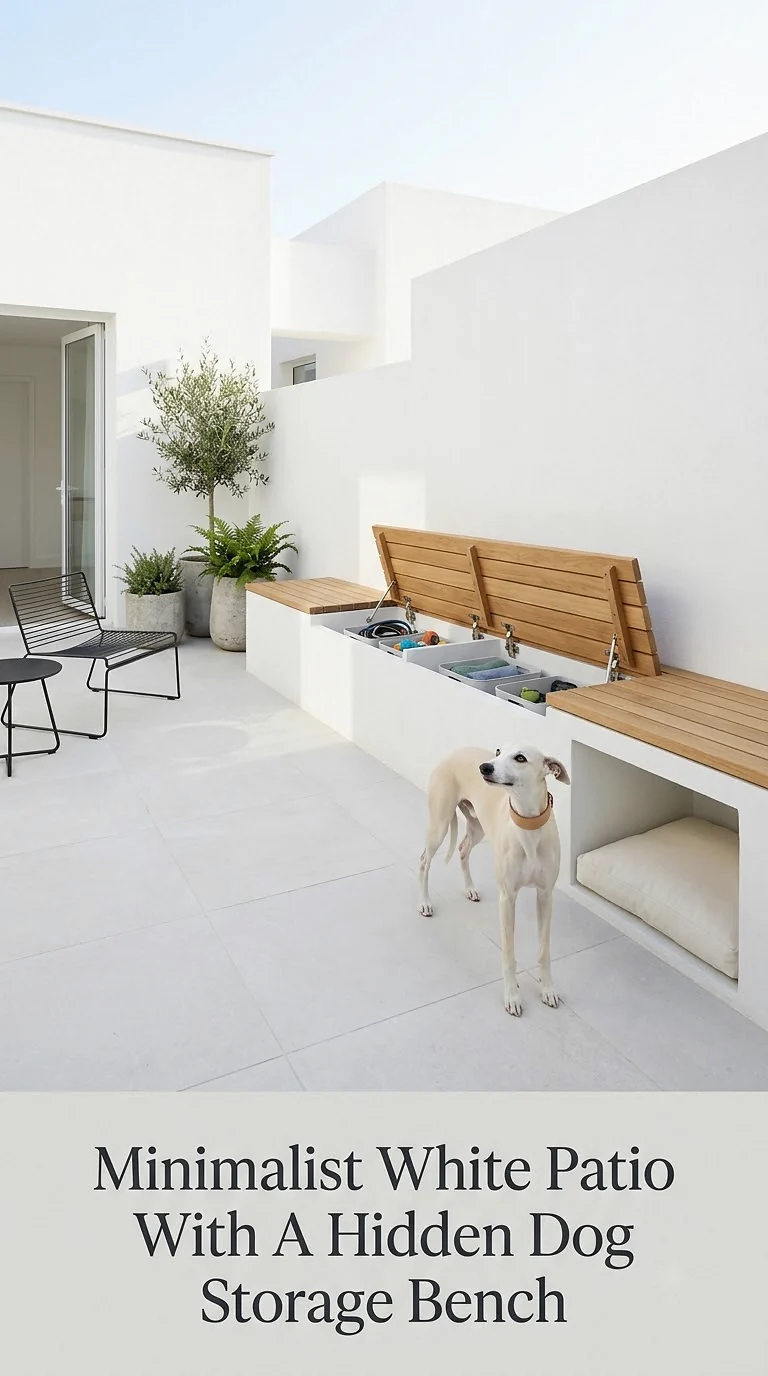
Pet supplies can disappear almost completely inside a multifunctional outdoor bench.
Choose a weather-resistant storage bench in white, pale gray, or natural wood and use it to store balls, towels, brushes, spare bowls, and other patio essentials.
Place your dog’s bed beside the bench so the entire pet area occupies one tidy section of the patio.
The top of the bench can provide additional seating, which is particularly helpful on compact patios.
For a minimalist look, keep visible accessories to a minimum. One water bowl, one attractive bed, and one toy basket may be all you need.
Select containers that close securely and keep anything unsuitable for chewing out of reach.
Finish the space with simple planters, streamlined outdoor chairs, and a neutral rug. The result feels calm and uncluttered even when you have plenty of dog supplies stored nearby.
Boho Patio With A Washable Rug And Floor-Level Dog Lounge
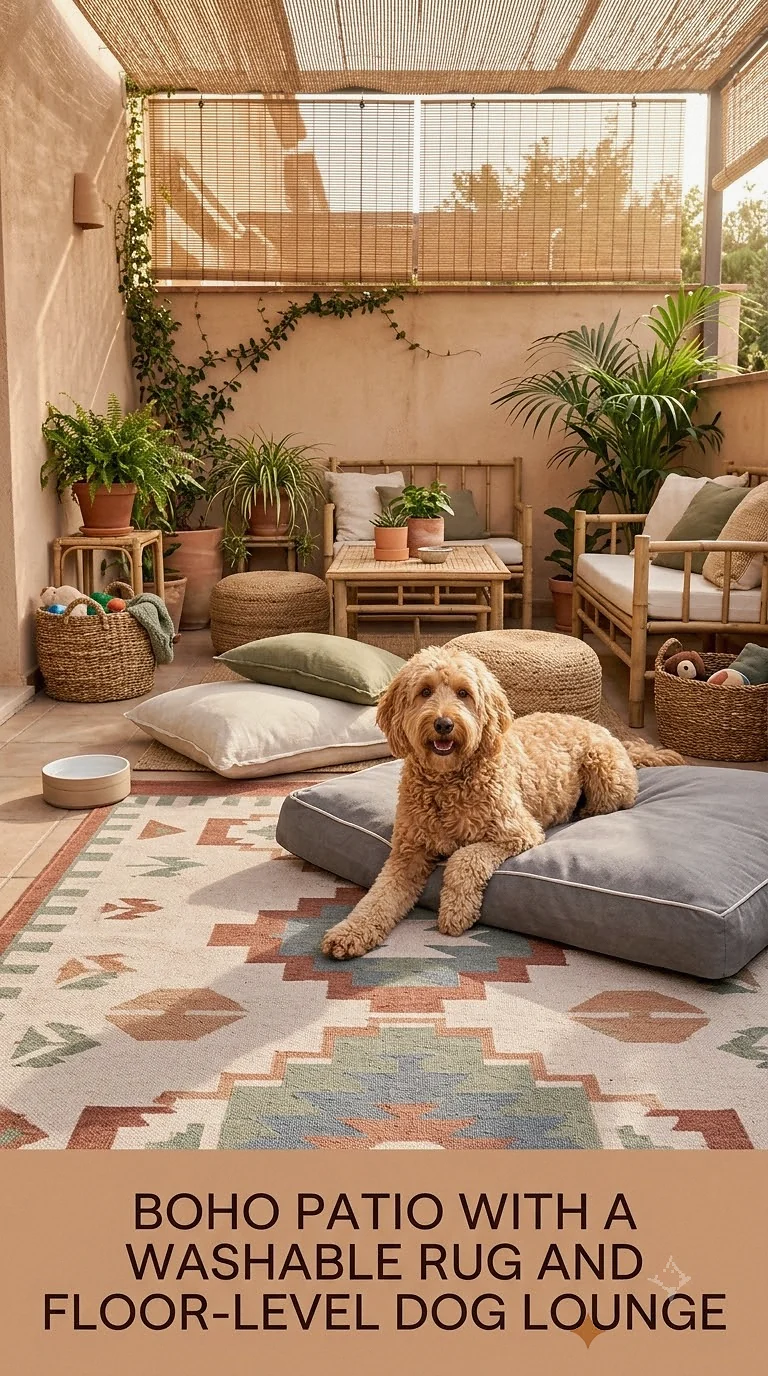
A boho-inspired patio makes it easy to create a relaxed lounge that humans and dogs can enjoy together.
Layer a washable outdoor rug beneath low wooden seating, oversized floor cushions, and a thick dog bed. Choose earthy shades such as rust, sand, olive, warm cream, and muted terracotta.
Woven baskets can hold toys while lantern-style lighting adds visual warmth in the evening.
Avoid placing delicate decorations or breakable objects directly at tail height. Instead, position accessories on secure shelves or stable tables.
Because the furniture sits lower to the ground, your dog can remain close while you read, chat, or enjoy a morning coffee.
For easier maintenance, choose outdoor fabrics designed to handle moisture and dirt. The textures can still look beautifully soft and cozy without requiring constant cleaning.
Luxury Patio With A Custom Outdoor Dog Daybed
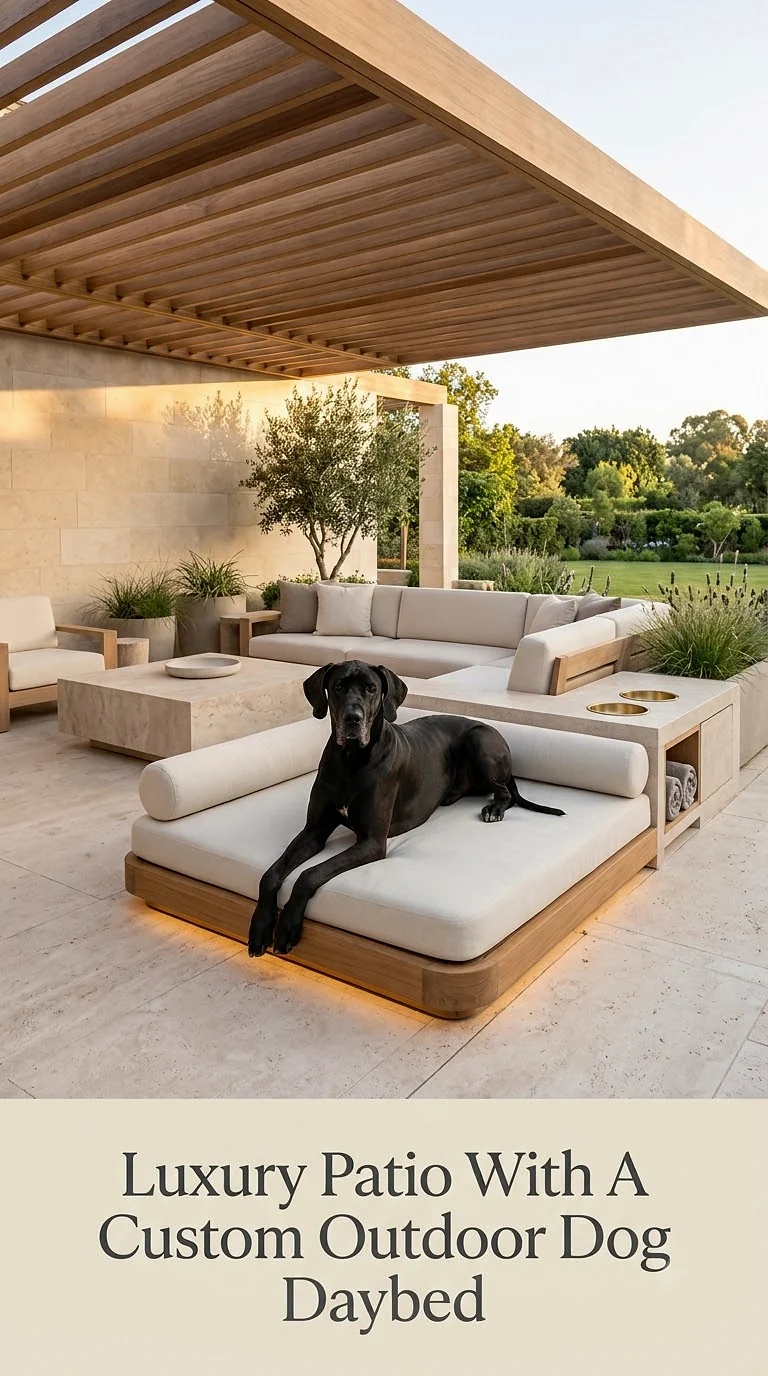
If you are designing a larger patio, a custom dog daybed can become part of the architecture rather than an afterthought.
Imagine a low white oak platform with a fitted outdoor cushion positioned beside an elegant sectional sofa. A recessed bowl station could be built into one end, while hidden drawers store toys and towels.
Choose durable materials appropriate for outdoor exposure and avoid complicated decorative details that are difficult to clean.
Keep the dog bed slightly separated from busy pathways so your pet can rest without constantly being stepped around.
Large planters, stone pavers, and understated lighting can complete the luxurious look.
The goal is not necessarily expensive decoration. What makes this concept feel high-end is the sense that every detail, including the dog’s space, has been intentionally integrated into the overall patio design.
DIY Pallet Patio Dog Bed With A Removable Cushion
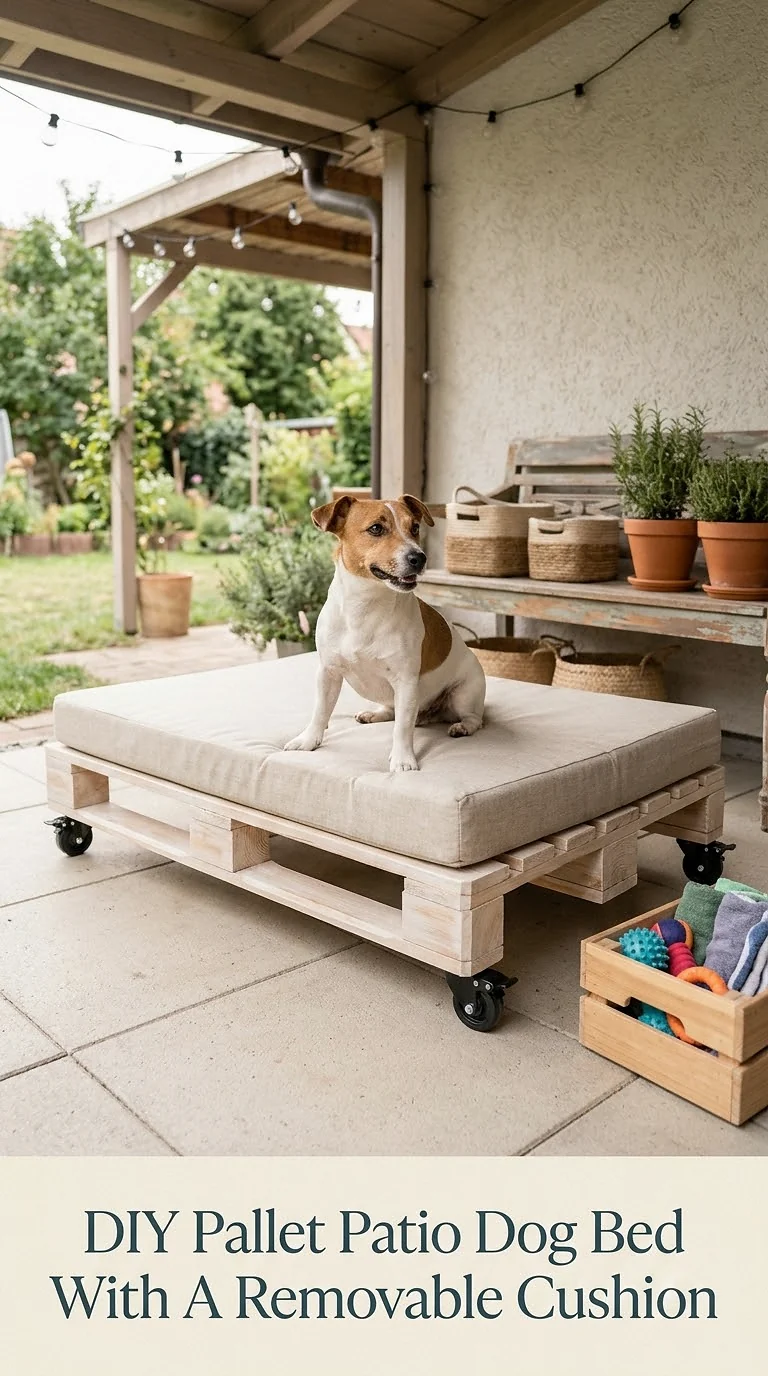
A simple wooden platform bed can bring character to a patio without requiring a major budget.
Use smooth, appropriately treated outdoor lumber or a carefully prepared pallet-style base. Sand every surface thoroughly and make sure there are no exposed nails, splinters, or sharp edges.
Add a removable waterproof or outdoor-rated cushion that can be taken inside during severe weather.
Small furniture feet can raise the platform slightly, helping air circulate underneath and making it easier to sweep the patio.
Paint the frame soft white for a cottage look, sage green for something playful, or stain it warm brown for a rustic appearance.
You can even add your dog’s name to the front panel for a personal touch.
The result is an inexpensive feature that looks much more intentional than placing an indoor dog bed outside.
Gravel And Paver Patio With A Dedicated Dog Path
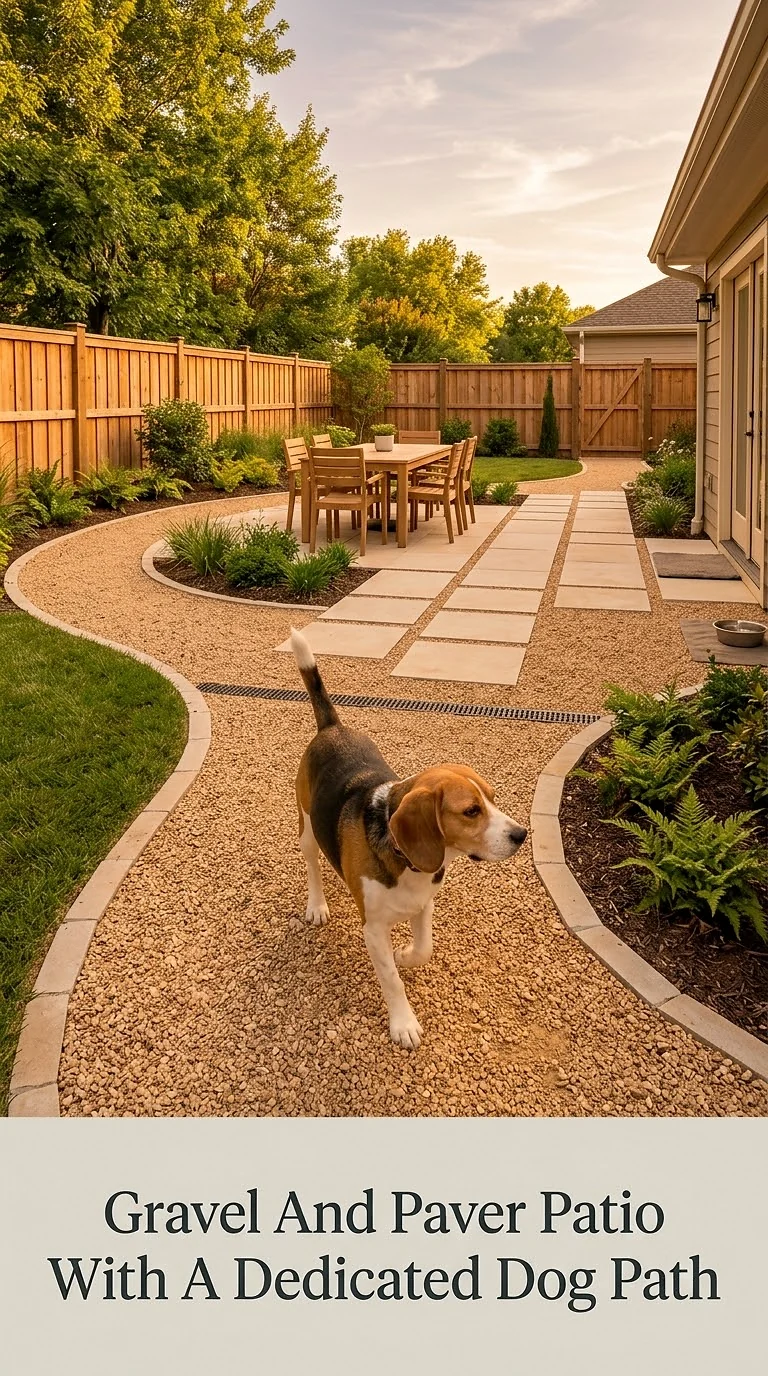
For energetic dogs, the patio layout itself can help organize movement.
Create a main seating area from large stone or concrete pavers, then add a defined pathway leading toward the lawn, gate, or favorite observation spot.
This visual route helps protect planted sections while giving your dog an obvious way to travel through the space.
Choose surfaces suitable for your climate and your dog’s paws. Avoid sharp gravel or materials that become uncomfortably hot.
Planting beds can be slightly raised or edged to discourage shortcuts through delicate landscaping.
A small bench along the edge of the route creates a pleasant place to sit while your dog explores.
This layout is especially helpful for dogs that repeatedly run the same route across a yard. Rather than fighting the natural traffic pattern, you can intentionally incorporate it into the design.
Covered Patio With A Cooling Station And Fresh Water Area
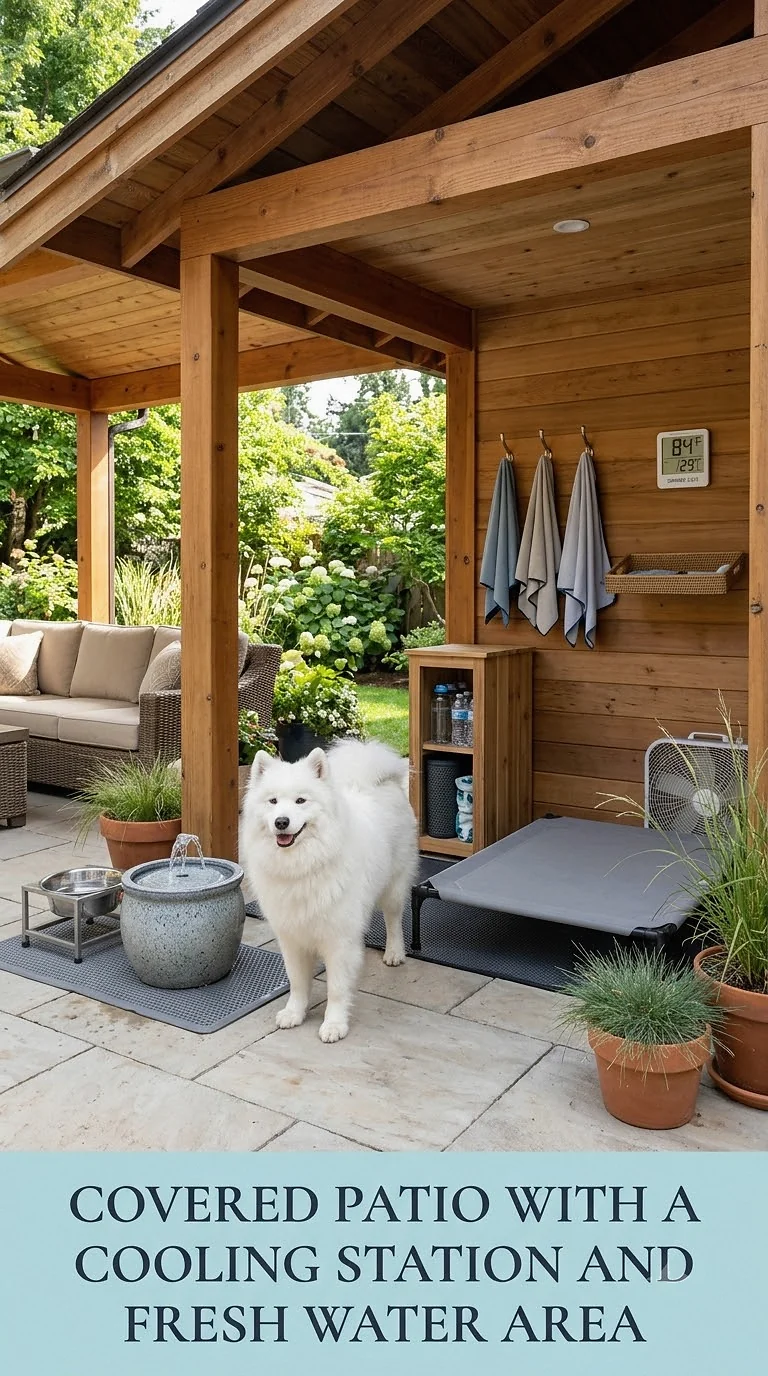
Warm climates call for a patio setup focused on shade and hydration.
Reserve the coolest covered corner for a large water bowl, raised bed, and optional cooling mat. Position the area away from heat-reflecting walls whenever possible.
Choose pale flooring and furniture if you are designing the patio from scratch, as dark hardscape materials can become uncomfortable in strong sun.
A large umbrella or overhead shade can provide additional protection where permanent coverage is limited.
Keep water easily accessible whenever your dog is enjoying the patio, and refresh it regularly.
This station does not need to look clinical. Use an attractive ceramic-look bowl, natural wood stand, neutral mat, and soft outdoor cushion to integrate everything with the rest of the decor.
Read more : Can Dogs Get Mono
The finished corner feels like a miniature outdoor retreat rather than a collection of cooling products.
Dog-Friendly Patio Garden With Raised Planters
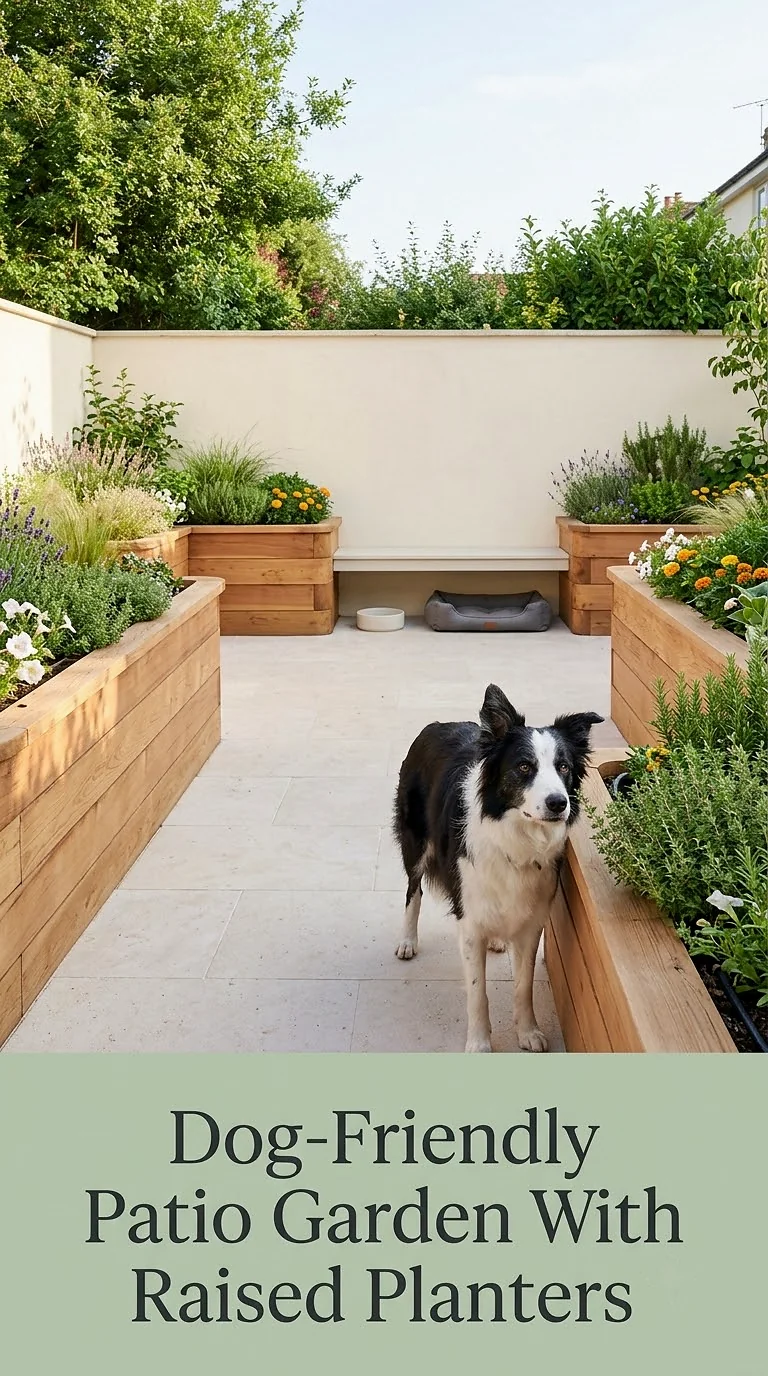
Raised planters can help combine gardening with a dog-friendly patio layout.
Arrange tall planters along the perimeter, leaving plenty of open floor space through the center. Elevating plants can reduce casual nibbling, although determined dogs may still reach them, so plant selection remains important.
Use containers in matching tones such as charcoal, cream, or terracotta for a cohesive look.
Herbs, flowers, grasses, and foliage can create plenty of visual texture, but verify each species before introducing it to a pet-accessible area.
Raised beds can also provide useful separation between a dog lounge and the rest of the garden.
If your dog likes to dig, give particularly tempting soil containers extra height or protective edging.
This style is ideal for anyone who wants a lush patio without placing dozens of easily knocked-over pots directly on the floor.
Privacy Screen Patio With A Quiet Dog Retreat
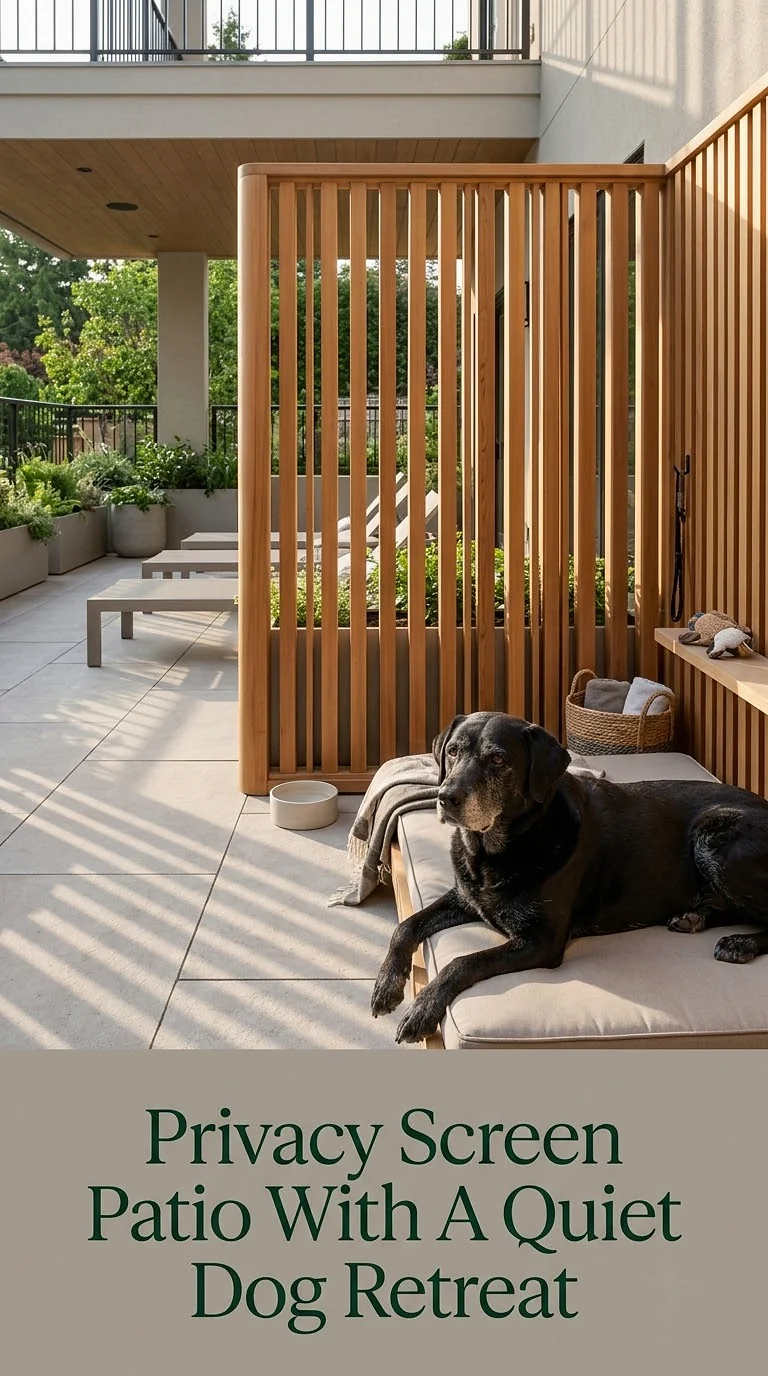
Dogs living near busy sidewalks or neighboring yards can sometimes benefit from a patio that feels visually sheltered.
Install a wooden slat screen, bamboo-style panel, or sturdy decorative privacy wall along the most exposed side of the patio.
Place the dog’s bed a short distance in front of the screen, creating a quieter area away from constant activity beyond the boundary.
A narrow planter can soften the wall, while warm outdoor lighting makes the corner feel inviting after dark.
Make sure the privacy structure is secure and does not create gaps your dog could squeeze through.
A partially screened patio can also look more polished, especially in townhouses and small urban backyards where neighboring spaces are close together.
Combine the screen with a comfortable chair and small side table so the retreat becomes a pleasant shared corner rather than a space intended only for your pet.
Mudroom-Style Patio Entry With Paw Cleaning Storage
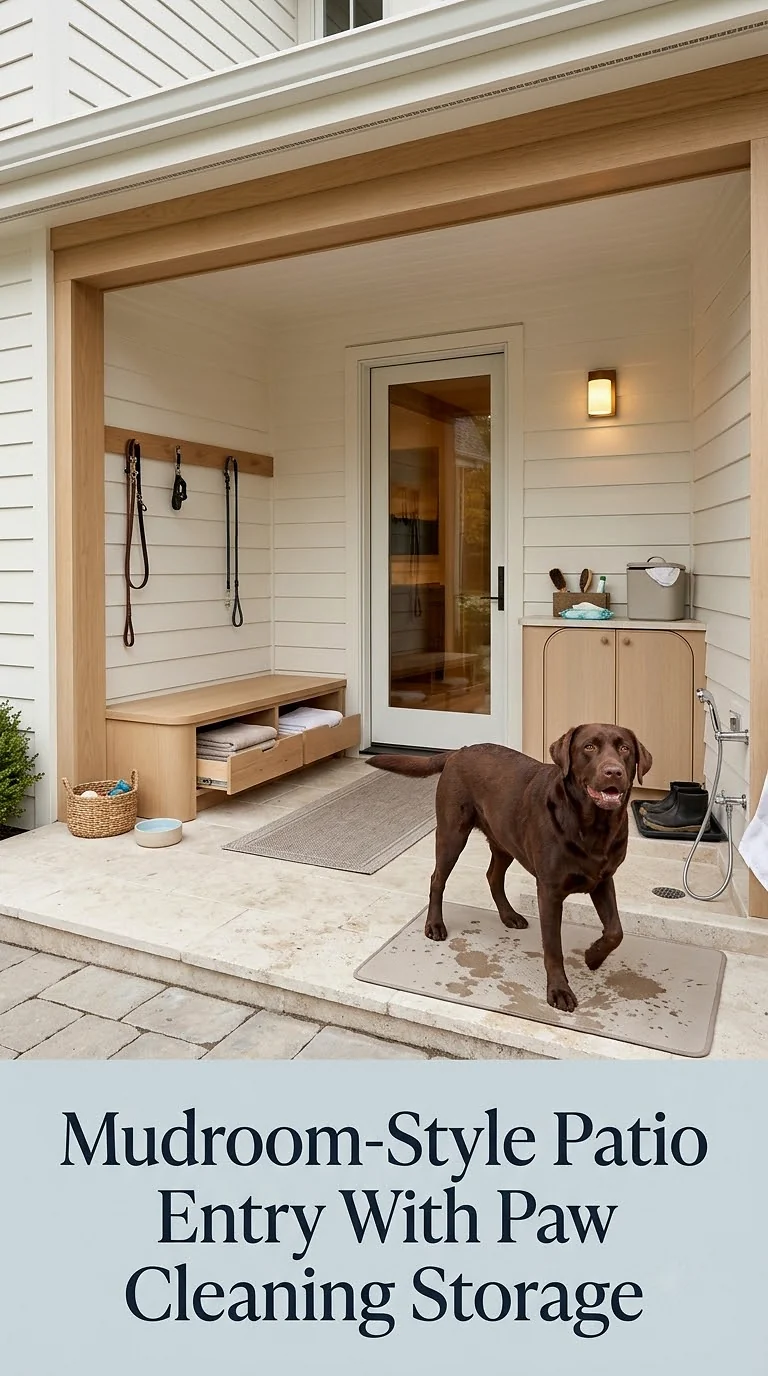
If your patio connects directly to the house, turn the doorway into a practical transition zone.
Place a slim outdoor bench near the entrance with a basket underneath for towels. Wall hooks can hold leads, while a washable mat provides a designated spot for wiping paws before your dog goes indoors.
A small covered container can hold waste bags and grooming supplies.
Choose materials that tolerate frequent cleaning. Sealed wood, powder-coated metal, and washable outdoor textiles are usually easier to maintain than delicate indoor finishes.
You could also place a shallow water-resistant tray near the entrance for especially muddy days.
Decorate the station with a small sign, outdoor cushion, or attractive storage basket so it feels intentional.
This simple setup can make a noticeable difference in homes where the patio is used as the main route between indoor living spaces and the backyard.
Enclosed Courtyard Patio With A Safe Dog Play Corner
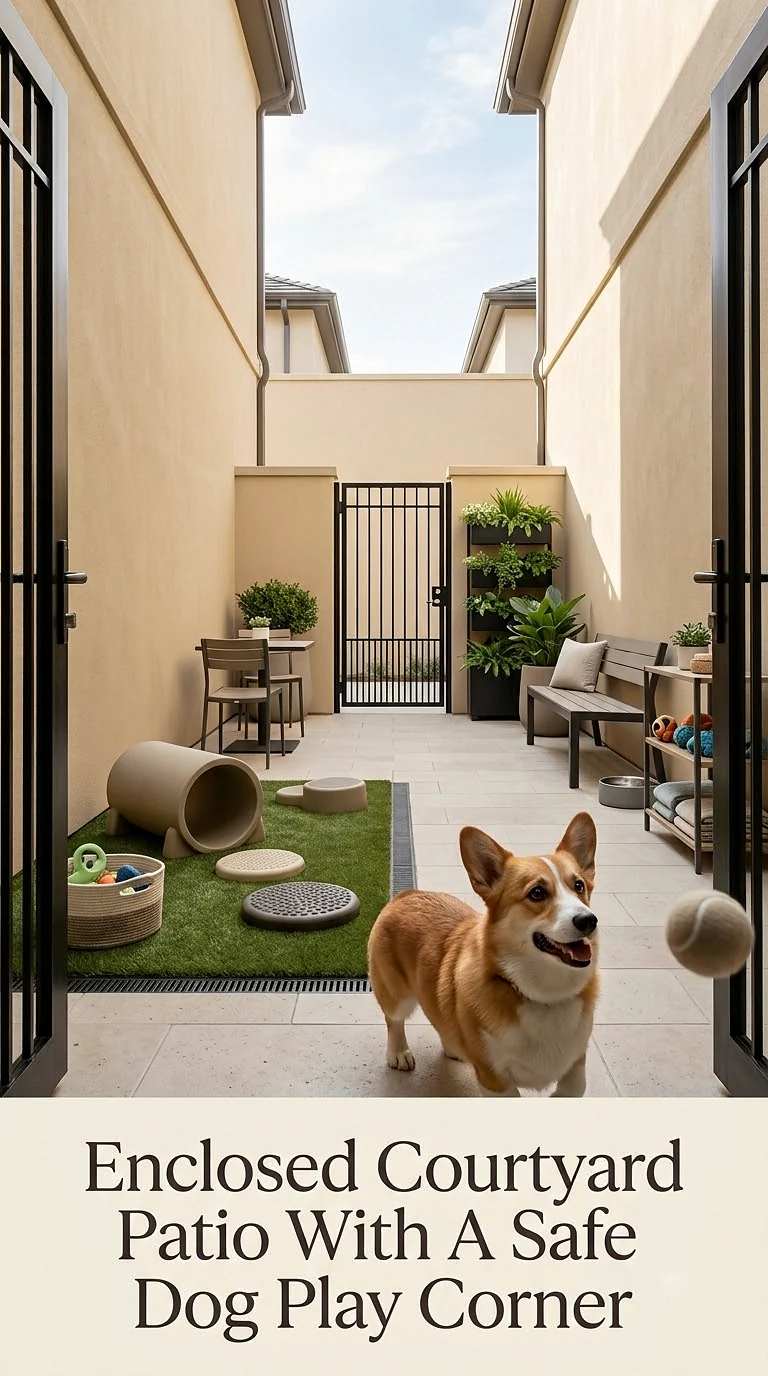
A private courtyard can become a wonderful compact play space when its layout is carefully organized.
Keep the central section open so your dog has space to move. Push seating, planters, and storage toward the perimeter to reduce obstacles.
Add one basket of outdoor toys and rotate them rather than leaving everything outside at once.
A small tunnel, low platform, or sturdy step can provide occasional enrichment without turning the courtyard into a full agility course.
Check fencing, gates, and boundaries regularly for loose hardware or escape-sized gaps.
If the floor is completely paved, include a shaded resting surface where your dog can comfortably lie down.
Wall-mounted greenery and vertical planters can add decoration without consuming precious floor space, making this an especially effective solution for smaller homes.
Indoor-Outdoor Patio With Coordinated Dog Furniture
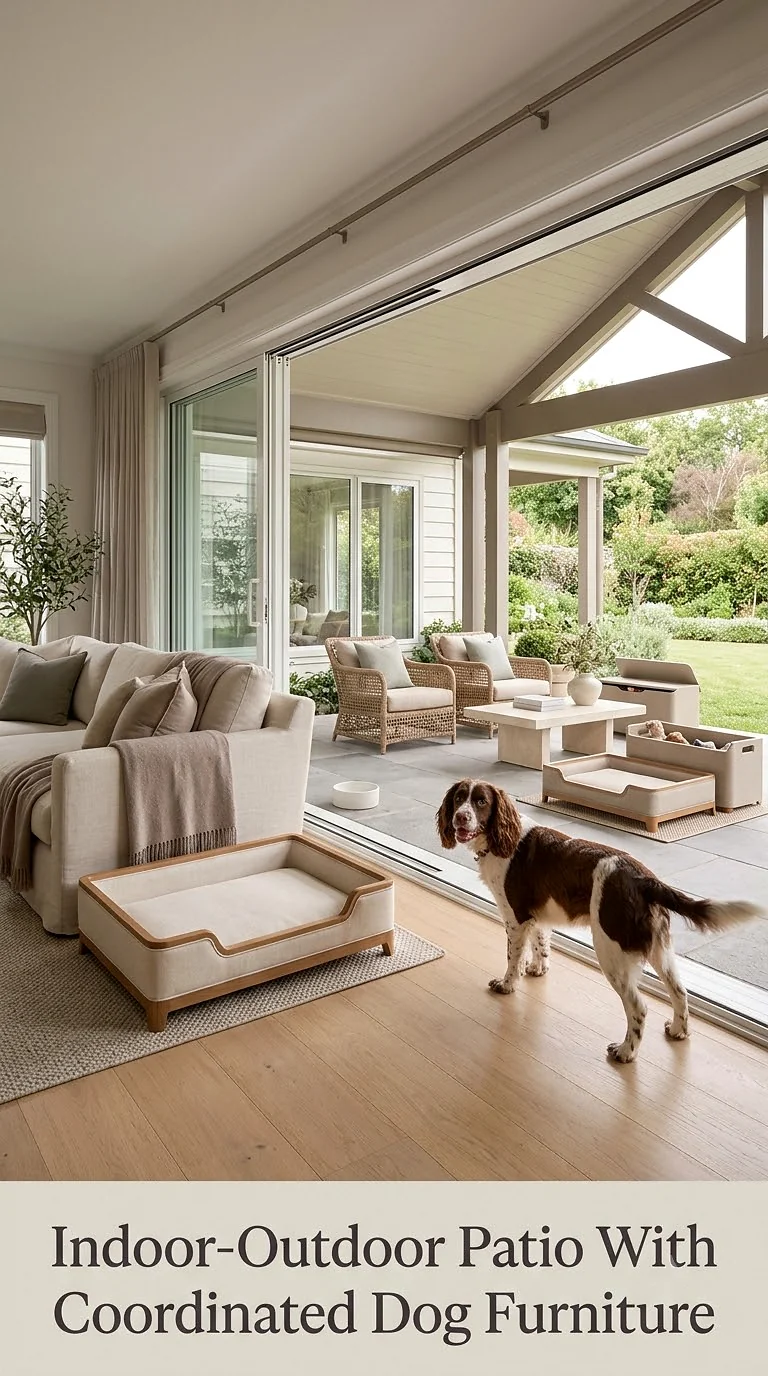
One of the most elegant approaches is to treat your dog’s outdoor space as an extension of the interior.
If your living room opens onto the patio through large sliding doors, repeat similar colors on both sides. For example, a warm beige sofa indoors could coordinate with a taupe outdoor dog bed and light oak patio furniture.
Matching textures help the transition feel seamless.
Place the dog bed close enough to the doorway that your pet can easily move between indoor and outdoor relaxation spots.
Use washable fabrics and outdoor-rated finishes even if the patio is covered, since dust and moisture will still reach the area.
A simple ceramic water bowl and small toy basket can complete the arrangement.
This understated design works especially well for contemporary homes where you want pet furniture to blend naturally into a carefully styled living space.
Creating Dog Patio Ideas That Work For Your Home
The most beautiful dog patio is not necessarily the biggest or most expensive one. A simple shaded corner with a comfortable bed, fresh water, secure boundaries, and a few thoughtfully chosen accessories can be just as inviting as an elaborate outdoor renovation.
Start by observing how your dog already uses your patio. You may notice a favorite shady corner, a preferred viewing spot, or a well-traveled route toward the yard. Designing around those natural habits often produces a space that feels comfortable from the very beginning.
From soft sage garden patios and Mediterranean terraces to minimalist storage benches and cozy pergola lounges, there are countless ways to make outdoor living more enjoyable for both of you.
Choose materials you can clean easily, keep walkways uncluttered, provide dependable shade and water, check plants before adding them, and create at least one comfortable place where your dog can simply stretch out beside you.
With a few thoughtful changes, your patio can become more than an outdoor seating area. It can become a peaceful shared space filled with fresh air, comfortable afternoons, and plenty of happy time together.
Source: https://petstutorial.com
Category: DOGS
