
Creating a special outdoor space for your dog can completely change the way you both enjoy the backyard. Instead of simply opening the door to an ordinary patch of grass, imagine stepping outside to a welcoming little retreat with soft shade, comfortable lounging spots, room to sniff and play, and clever details that make everyday cleanup easier.
The best outdoor dog areas do not have to resemble kennels or purely functional runs. With thoughtful landscaping, attractive fencing, warm wood accents, washable textiles, greenery, and well-planned activity zones, your dog’s space can feel like an intentional part of your home.
You are reading: 19 Outdoor Dog Area Ideas For A Beautiful, Safe, And Happy Backyard
Whether you have a sprawling backyard, an awkward side yard, a compact patio, or just a small outdoor corner, there are plenty of ways to create something practical and beautiful. Some designs focus on exercise, others prioritize quiet lounging, enrichment, easy cleaning, or stylish integration with the rest of the garden.
The following outdoor dog area ideas offer a mix of modern, cozy, affordable, space-saving, and more luxurious inspiration so you can find a setup that suits both your home and your dog’s personality.
Beautiful And Practical Outdoor Dog Area Ideas
Modern Black Metal Dog Run With Artificial Turf And Cedar Border
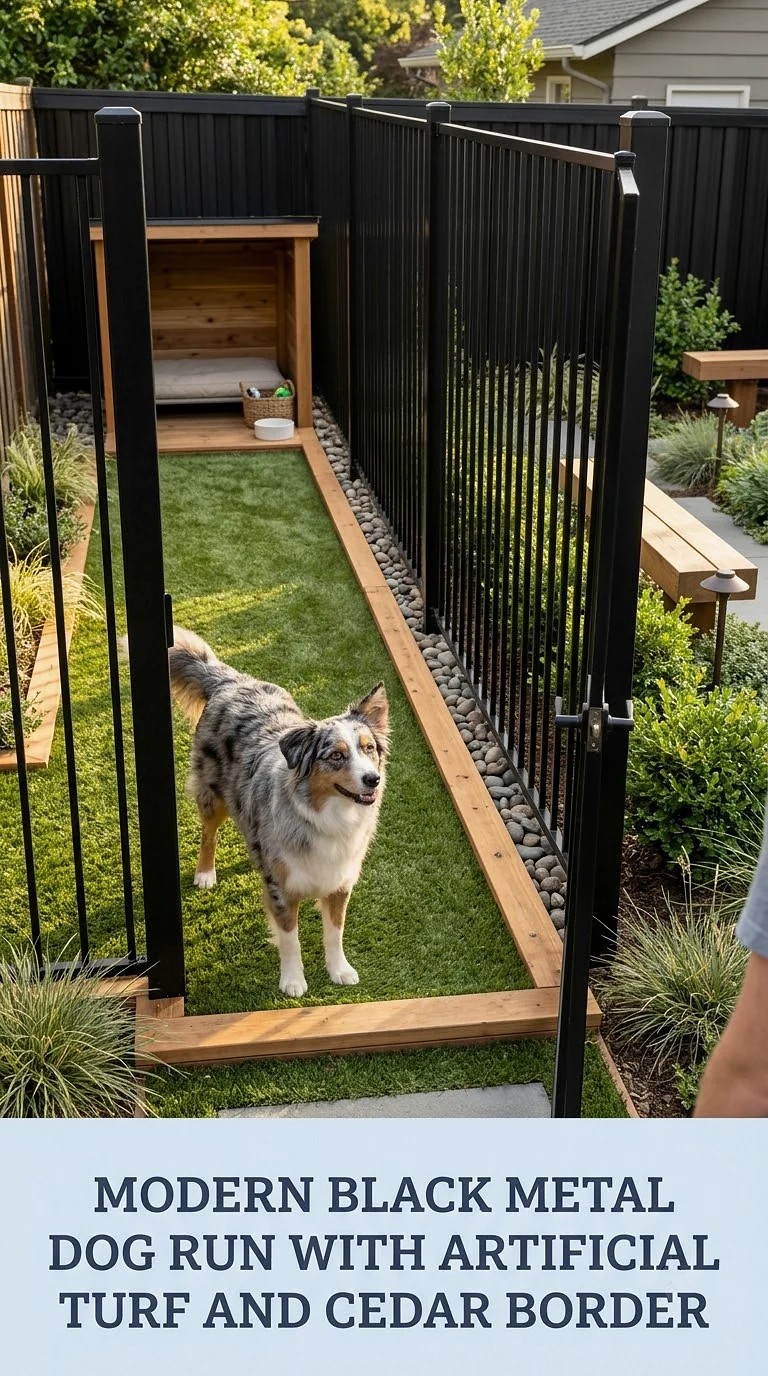
For a clean contemporary backyard, combine slim black metal fencing with warm cedar edging and a neatly finished artificial turf surface. The contrast between dark fencing, natural wood, and fresh green turf creates an outdoor dog area that feels much more polished than a traditional kennel.
A rectangular layout along the edge of the yard works especially well because it preserves the main lawn for entertaining or gardening. Add a secure gate near the house so your dog can move easily between indoor and outdoor spaces.
Choose turf designed for pets with good drainage underneath, and plan for regular rinsing and cleaning. Because synthetic surfaces can become hot in direct summer sun, position at least part of the run beneath a shade sail, pergola, or mature tree.
Finish the space with a washable outdoor bed, stainless-steel water bowl, and a few weather-resistant toys.
Shaded Patio Dog Lounge With Pergola And Washable Outdoor Bed
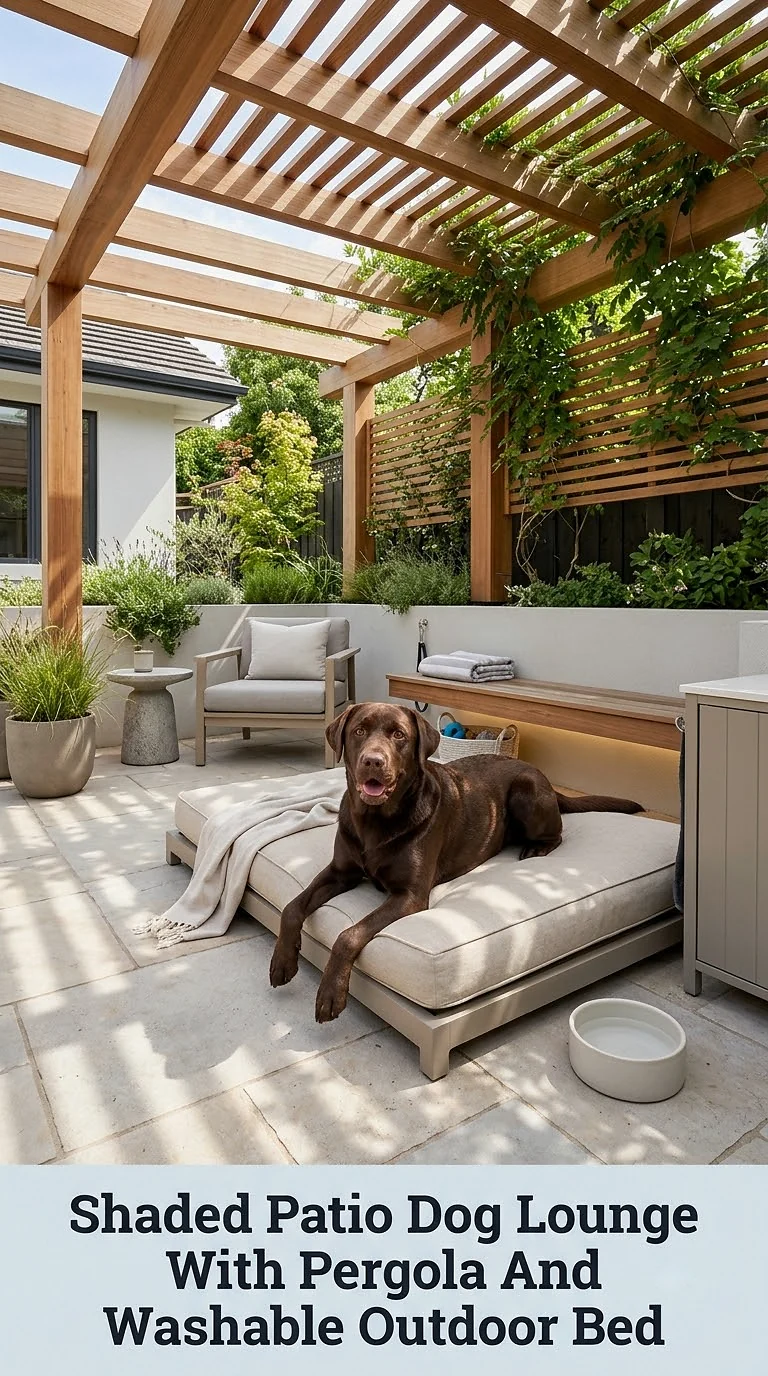
A covered patio can become a relaxing outdoor living room for both you and your dog. Start with a simple timber or metal pergola and create a shaded corner beneath it with a generously sized outdoor dog bed.
Soft neutrals such as oatmeal, beige, warm gray, and muted olive help the space blend beautifully with garden furniture. A washable bed cover makes the setup easier to maintain after muddy paws or rainy weather.
Place the bed where your dog can see both the garden and the house. Many dogs enjoy relaxing somewhere that lets them remain close to household activity without being directly in the middle of it.
Add a heavy water bowl that is difficult to tip, a small storage basket for outdoor toys, and perhaps a weather-resistant rug. Outdoor textiles should be able to dry thoroughly rather than remaining damp underneath.
Narrow Side Yard Dog Run With Gravel And Stepping Stones
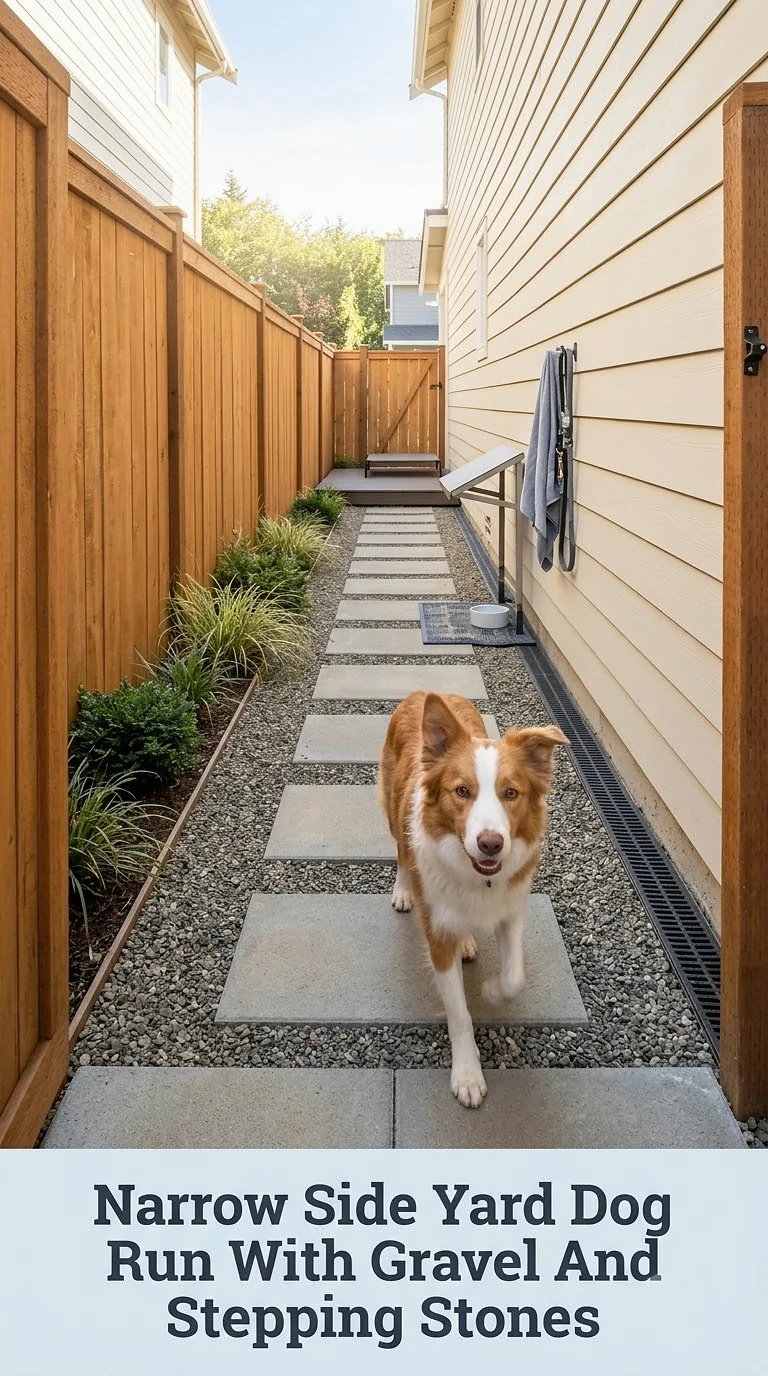
That narrow strip between the house and fence can become one of the most useful dog spaces on the property.
Create a long side-yard run with secure fencing at both ends and a well-draining gravel surface. Large stepping stones down the center make the area comfortable for people to walk through while adding a more landscaped appearance.
Warm timber fencing works beautifully with charcoal gravel and pale concrete pavers. If privacy is limited, add vertical wooden battens or a screened section while keeping enough airflow through the space.
A narrow run is particularly useful when you want to give your dog a dedicated toilet and exercise area without sacrificing the main backyard.
Include a shaded resting platform near one end and keep drainage in mind from the beginning. A nearby hose connection can make routine cleanup much easier.
Soft Green Lawn Play Zone With Curved Path And Border Planting
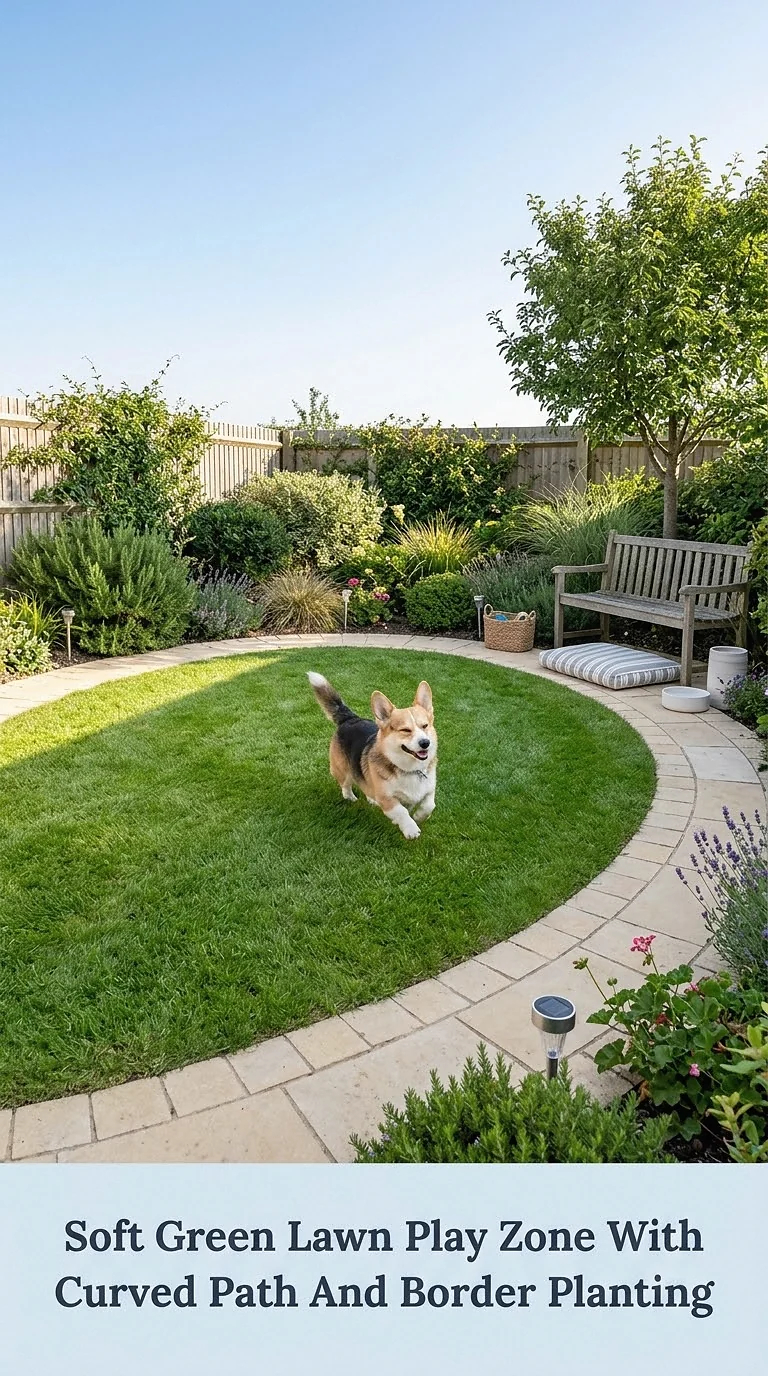
If you prefer a softer garden look, design your dog’s space as part of the landscaping rather than separating it completely.
Create an open lawn play zone surrounded by gently curved garden borders. A winding paver path around the perimeter can give your dog an interesting route for sniffing and exploring while also reducing wear on heavily traveled sections of grass.
Use sturdy, dog-appropriate planting around the edges and leave enough distance between delicate plants and the main running route. Research every plant before adding it where a curious dog could chew or dig.
Low fencing or decorative garden barriers can help protect planted beds while keeping the overall design airy.
This style works beautifully for dogs that enjoy wandering, sniffing, and following little routes around the garden rather than constantly sprinting across an open yard.
Rustic Cedar Dog House Courtyard With Gravel And Pavers
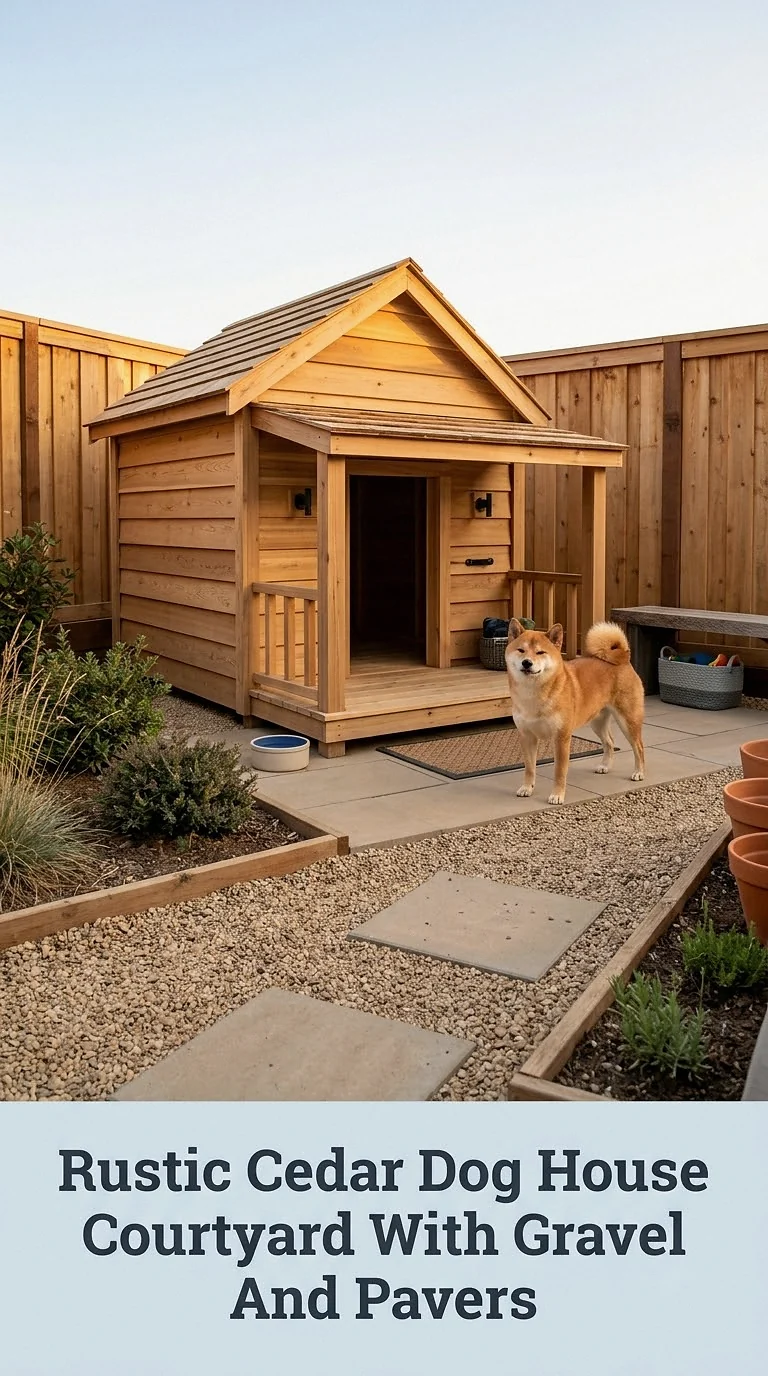
A traditional dog house can feel surprisingly sophisticated when it is treated as the centerpiece of a small landscaped courtyard.
Choose a cedar or natural timber shelter with an elevated floor and place it on a stable paved base. Surround the structure with compact gravel and create a simple pathway using oversized concrete or stone pavers.
A small timber fence can visually separate the dog area from the rest of the backyard without making it feel harsh or industrial.
Keep the interior dry, properly ventilated, and appropriate for your climate. The shelter should provide a comfortable retreat from the weather rather than becoming a place where your dog spends long periods isolated from the family.
A simple outdoor hook for a leash, a covered toy bin, and a water station can turn the courtyard into a practical everyday dog zone.
Small Apartment Patio Dog Corner With Privacy Screen And Potty Patch
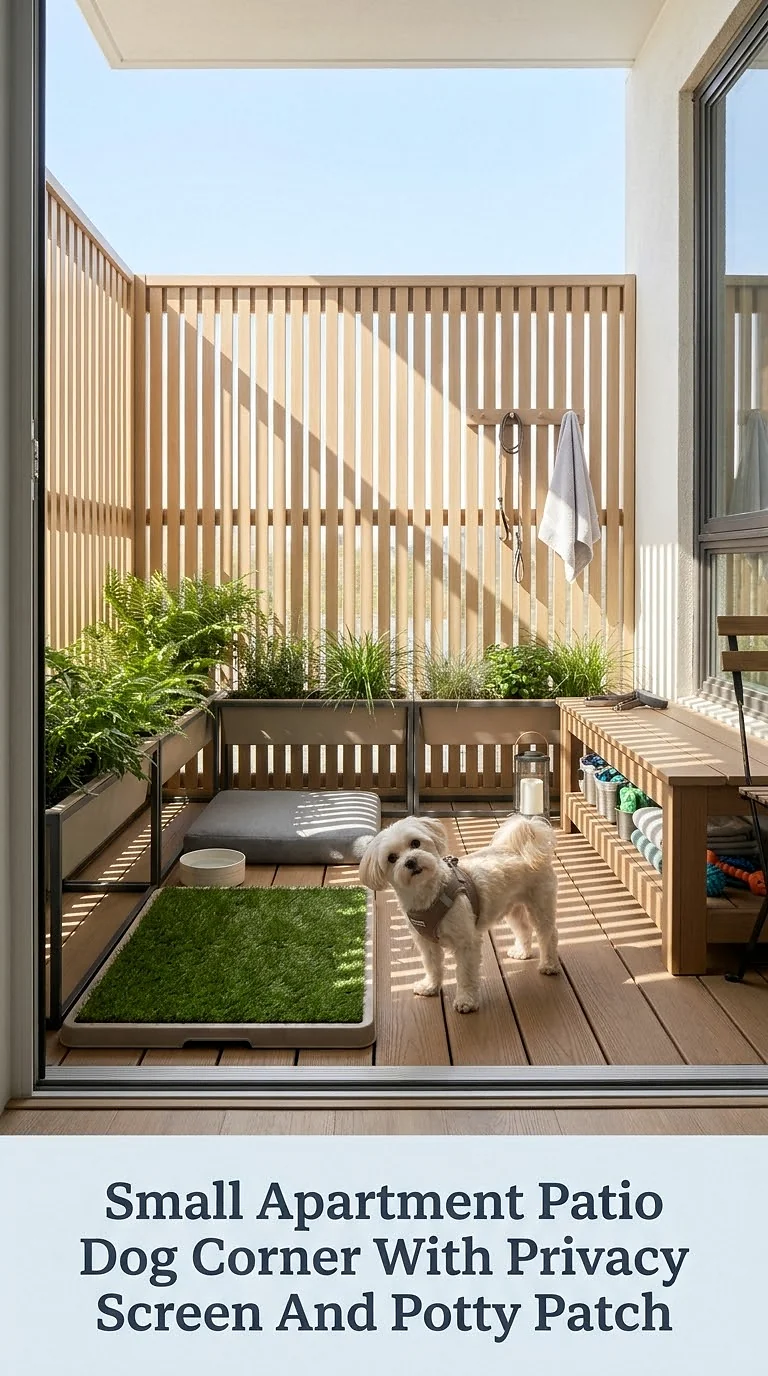
Even a tiny patio can include a dedicated space for your dog without feeling cluttered.
Place a compact potty patch in one corner and visually soften it with a freestanding wood-slat privacy screen. A narrow outdoor storage bench can hold waste bags, wipes, toys, and grooming supplies while also doubling as seating.
Choose light colors such as warm white, sand, pale oak, or soft sage to keep the small patio feeling open.
A small washable mat beside the door can catch wet paws before your dog heads indoors. If you use artificial grass for the potty area, choose a setup with removable trays or effective drainage so it can be cleaned thoroughly.
For balconies or elevated patios, secure railings and openings carefully. Decorative screening should never create gaps that a small or determined dog could squeeze through.
Farmhouse Mudroom-To-Yard Dog Zone With Covered Landing
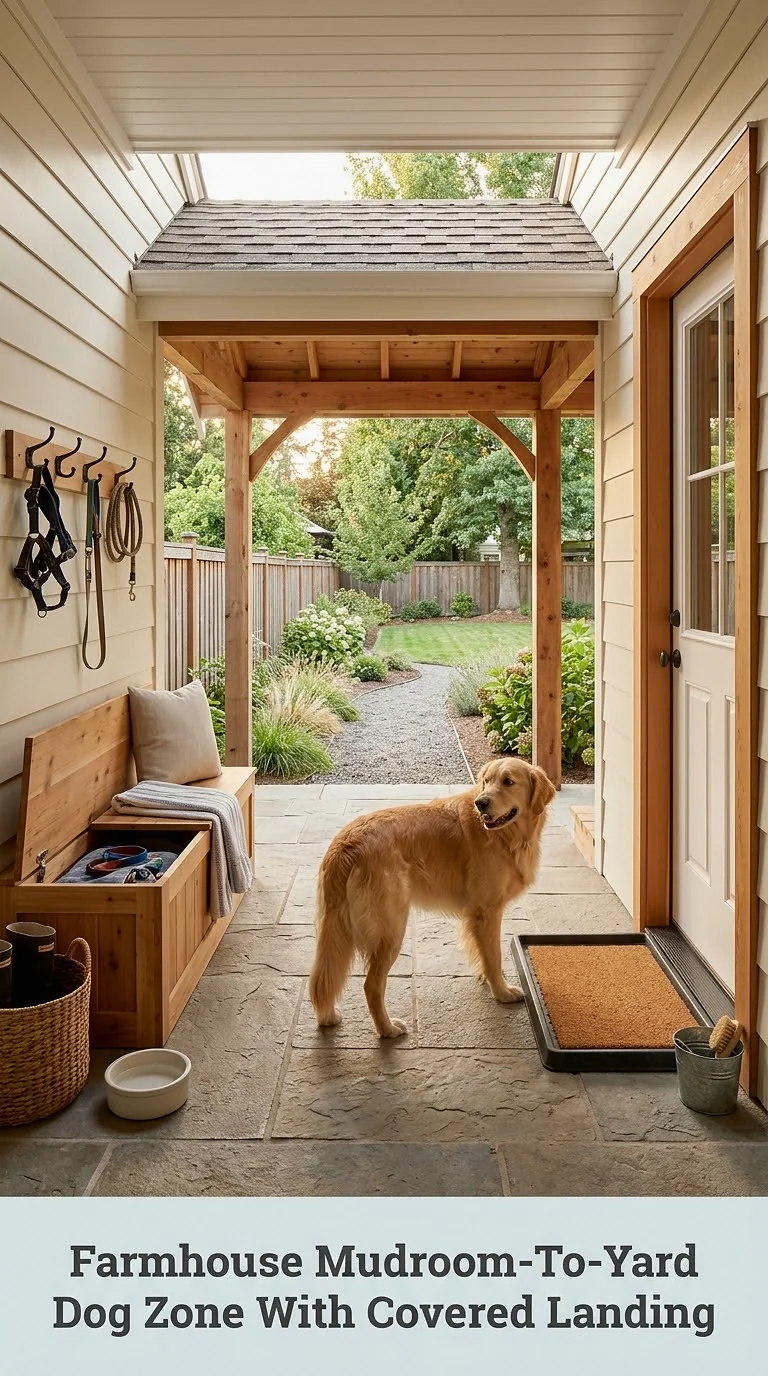
Homes with a mudroom or back entrance are perfect for creating a smooth transition between indoor and outdoor dog spaces.
Read more : The Top 10 Happiest Dogs In The World
Extend the doorway into a small covered landing with brick, stone, or textured pavers. Add warm timber posts, black hardware, and perhaps a half-height gate for a cozy modern farmhouse look.
Inside the covered area, place a boot tray for muddy paws, a water bowl, and a simple bench with hidden dog-supply storage.
This layout works especially well during rainy seasons because it creates a buffer between the yard and your clean interior floors.
If your dog frequently tracks dirt inside, keep an absorbent towel and paw-cleaning supplies near the doorway. A covered transition zone can make those quick cleanup routines feel far less chaotic.
Minimalist Concrete Dog Patio With Raised Bed And Water Station
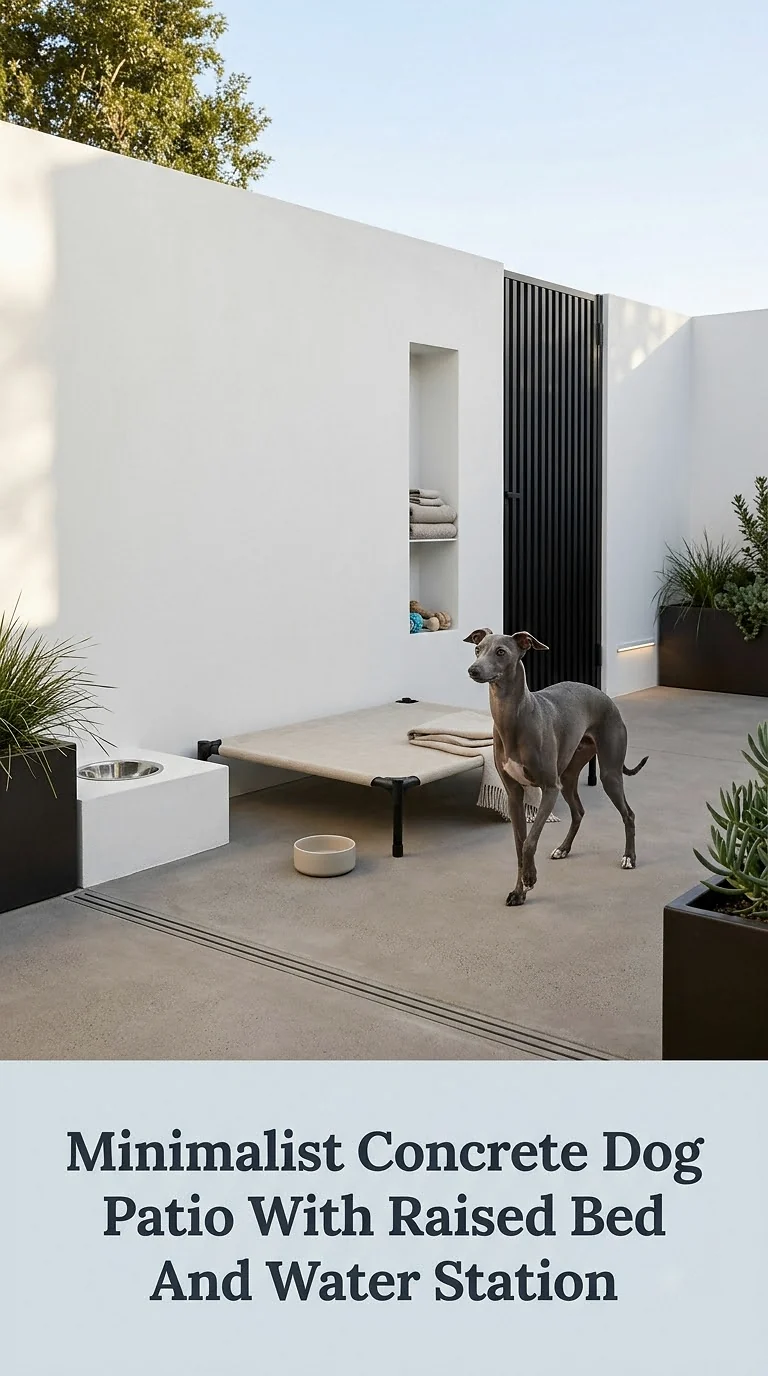
A streamlined dog patio can look elegant without requiring elaborate landscaping.
Use smooth concrete or large-format outdoor pavers as the foundation, then soften the space with a raised dog bed and a few restrained planters positioned safely out of the main running path.
Black, warm gray, tan, and natural wood create a sophisticated neutral palette.
Build a small water station into one corner using a wall-mounted shelf or sturdy outdoor console. Keeping the bowl slightly away from dirt and garden beds can help the area stay tidier.
Concrete is extremely practical to sweep and rinse, but it can become uncomfortably hot in strong sunlight. Pair this style with substantial shade and always check the surface temperature before allowing your dog to spend time there during hot weather.
DIY Timber Shade Shelter With Gravel Base And Toy Basket
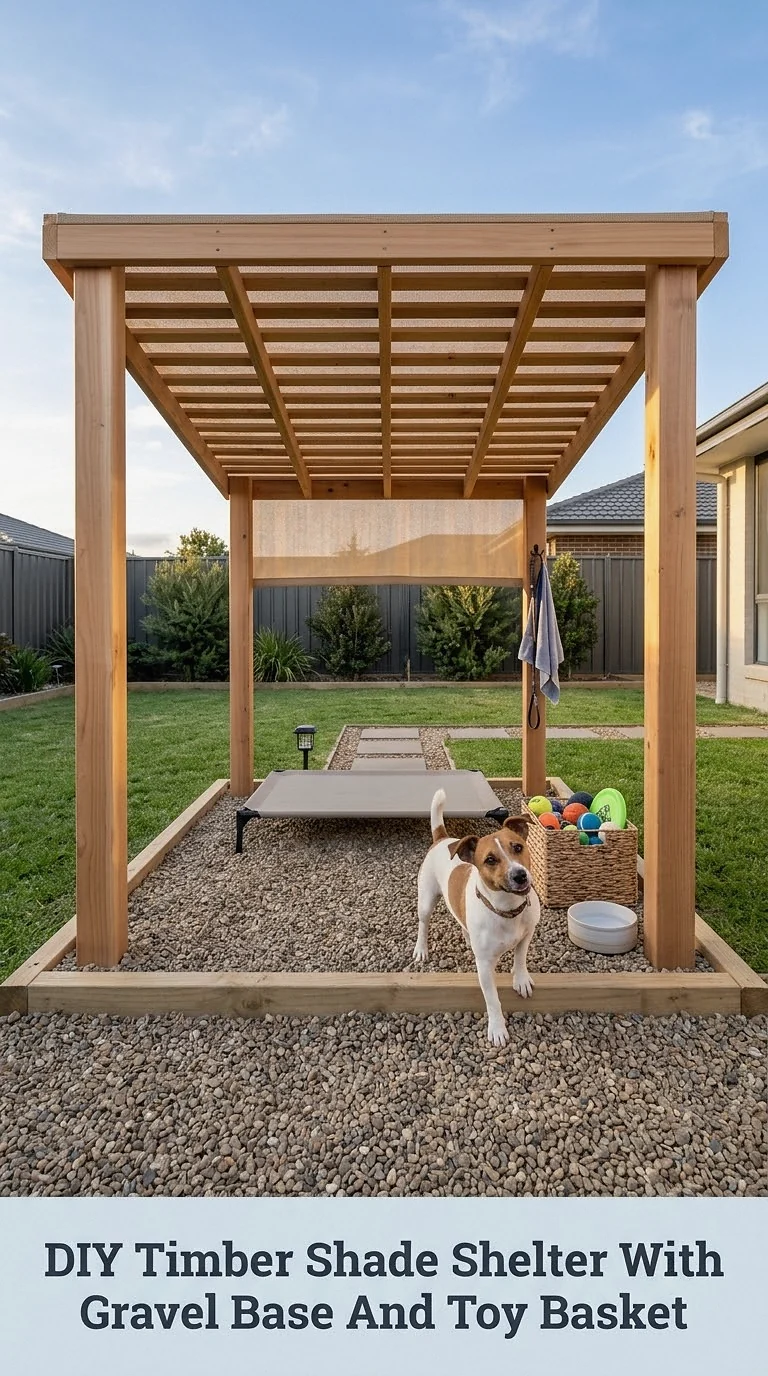
You do not need an expensive custom structure to create a comfortable outdoor retreat.
A simple DIY timber frame with a waterproof roof panel can provide a useful shaded spot in the yard. Keep the design open on several sides for ventilation rather than creating an enclosed box.
Place the shelter over a compacted gravel or paved base so rainwater can drain away instead of collecting beneath your dog’s bed.
Add an inexpensive raised cot, which allows airflow underneath, and keep a weather-resistant basket nearby for balls, tug toys, and outdoor enrichment items.
For a finished look, stain the wood to coordinate with your fence or deck. Make sure all construction materials, screws, edges, and fasteners are smooth and inaccessible to curious mouths.
Luxury Pergola Dog Retreat With Built-In Bench And Storage
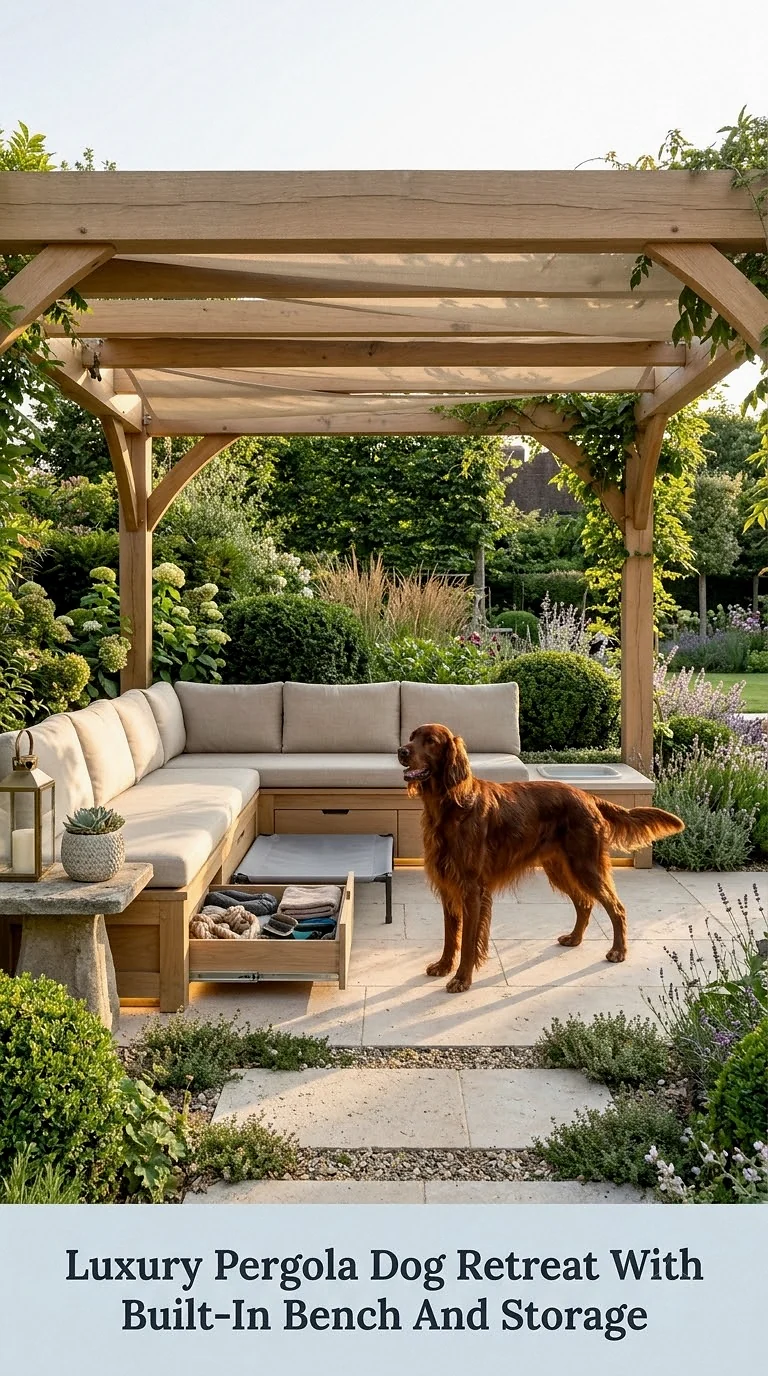
For a more upscale backyard, create a dog retreat that looks like a miniature outdoor room.
A slatted wood pergola can frame the space while providing partial shade. Beneath it, build a long bench with storage compartments for towels, toys, leads, grooming supplies, and outdoor bedding.
Dedicate one end of the bench to a large cushioned dog lounging area. Weather-resistant fabric in taupe, cream, charcoal, or muted green creates a calm, elegant look.
Surround the retreat with oversized pavers and simple architectural planting.
The goal is to make the dog zone feel integrated with the rest of your outdoor entertaining area rather than hidden away. It can become a place where your dog relaxes comfortably while you read, garden, or enjoy coffee outside.
Backyard Enrichment Zone With Tunnels, Platforms And Digging Box
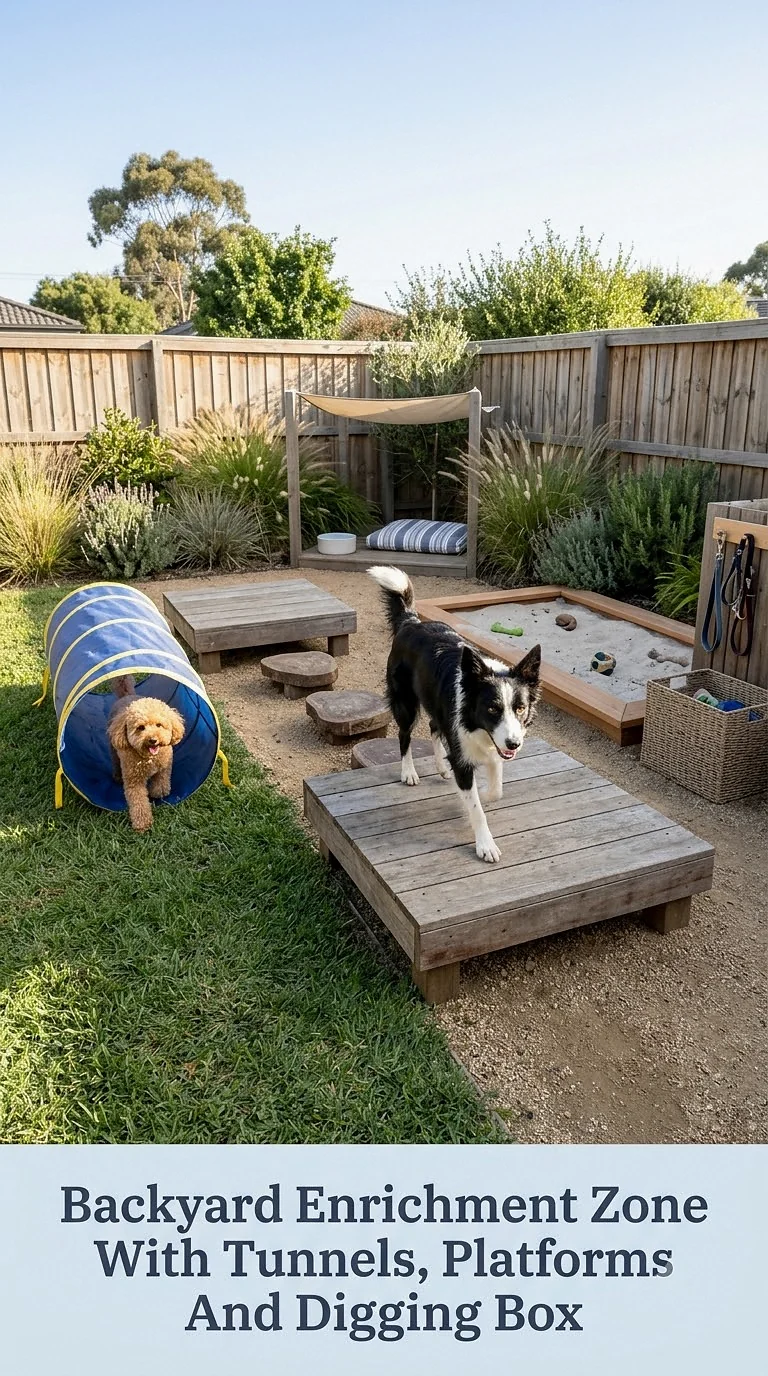
Dogs that love activity may appreciate an outdoor area designed around exploration rather than decoration alone.
Create several small enrichment stations instead of one large obstacle. A short tunnel, sturdy low platform, stepping surface, and designated digging box can encourage different types of movement and investigation.
Keep equipment low, stable, and appropriate for your dog’s size and mobility. Outdoor enrichment should feel playful rather than like a demanding agility course.
A digging box can be especially useful for dogs that naturally love excavating. Fill a defined area with suitable loose material and occasionally hide toys for supervised searching.
Arrange the features with plenty of open space between them. The finished area can still look attractive when the equipment follows a coordinated palette of natural timber, black metal, and muted outdoor colors.
Cooling Dog Zone With Shallow Pool And Large Shade Sail
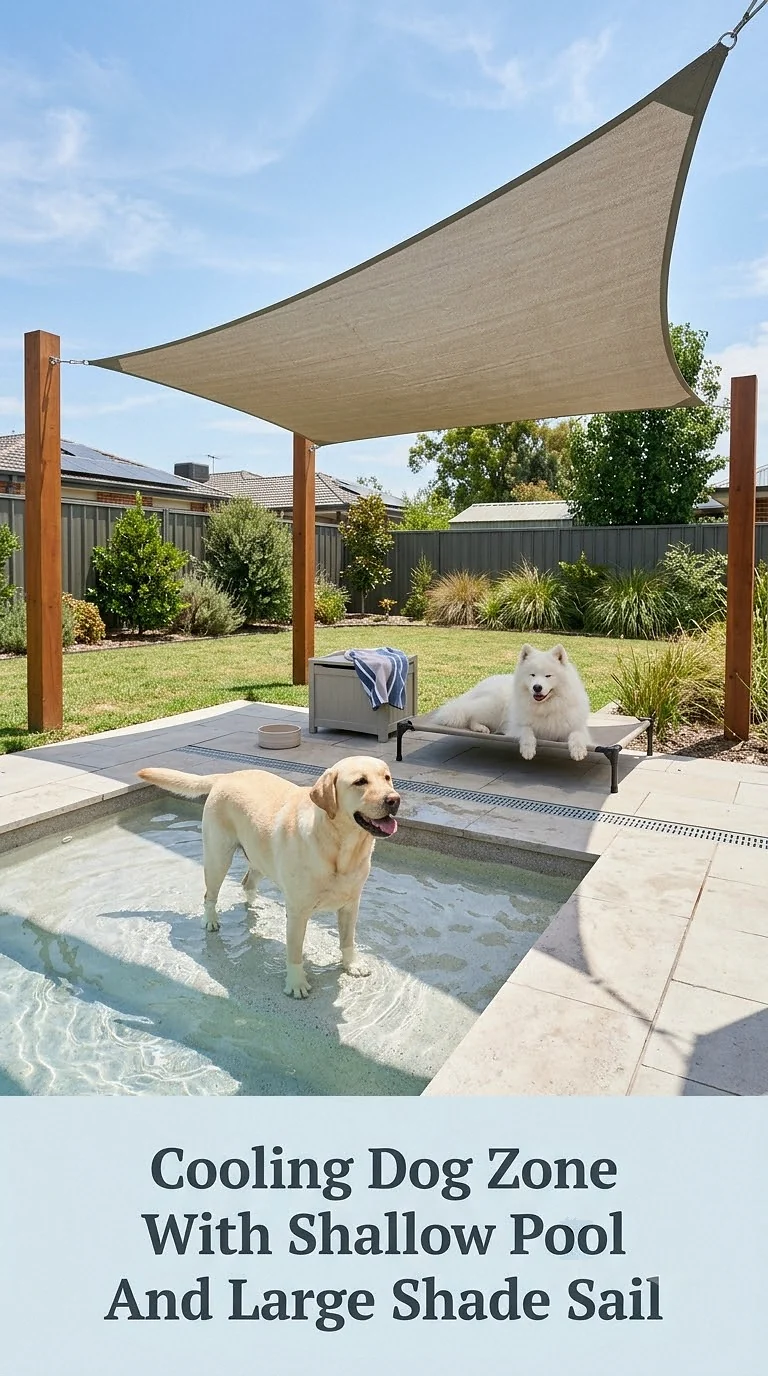
Hot summer afternoons are much more comfortable when your dog has access to a shaded cooling area.
Stretch a large UV-resistant shade sail over part of the yard and place a shallow dog pool beneath it. Surround the pool with a non-slip, easy-to-clean surface so muddy water does not immediately turn the area into a mess.
A raised outdoor cot nearby gives your dog somewhere dry to rest after splashing.
Keep fresh drinking water available separately rather than relying on pool water. Empty and clean small pools regularly, and supervise your dog around any water feature.
For a cheerful summer aesthetic, combine a sand-colored shade sail with natural timber fencing, pale pavers, and just a few colorful dog toys.
Pet-Safe Garden Dog Area With Raised Beds And Winding Path
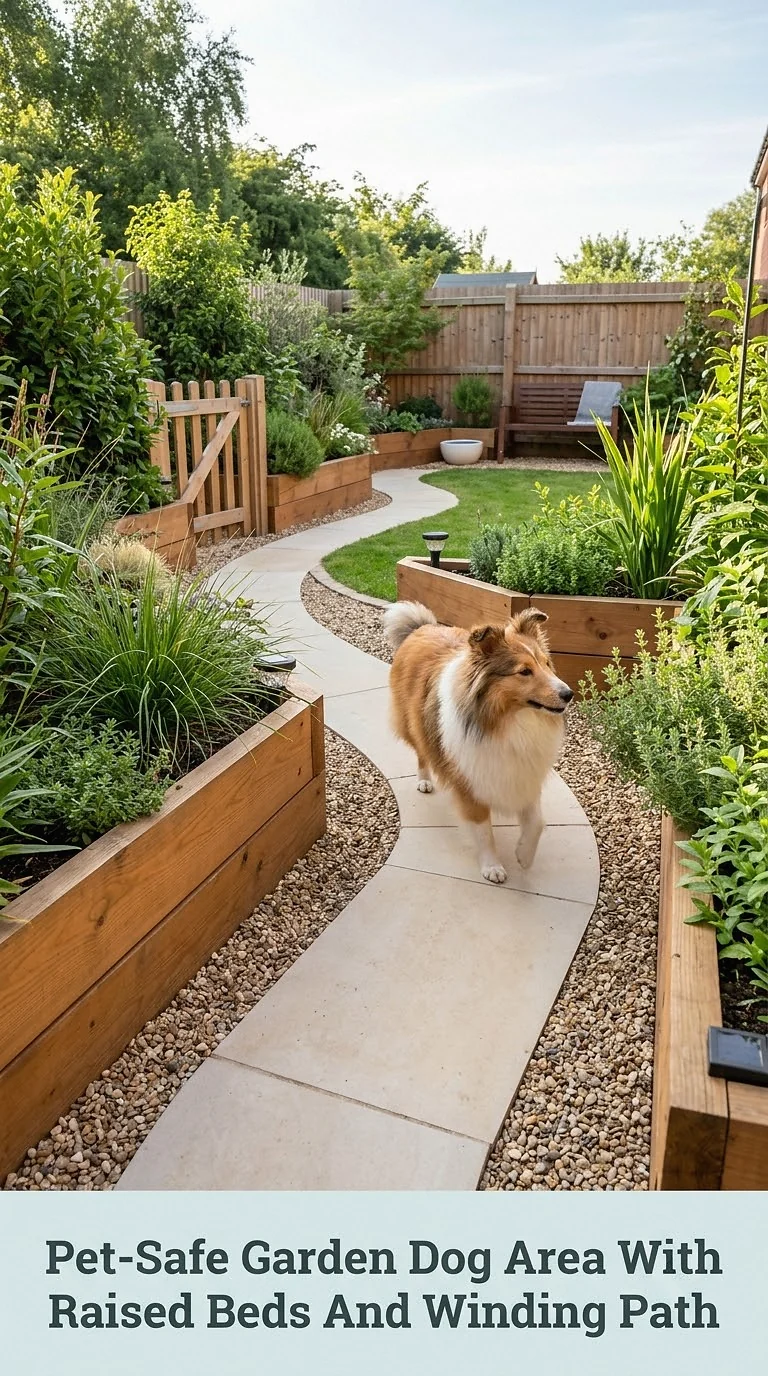
A beautiful garden and an active dog can coexist when the landscape is designed strategically.
Keep delicate planting inside raised beds and give your dog an obvious pathway through the space. Dogs often create their own routes eventually, so deliberately incorporating a winding path can help protect the rest of the garden.
Use large pavers, smooth gravel, or another easy-maintenance surface rather than relying entirely on ornamental mulch.
Before adding new flowers, shrubs, or trees, check whether they are appropriate around dogs. Even attractive garden favorites can cause problems when chewed or swallowed.
A few sturdy raised planters can also create gentle visual barriers, helping guide movement through the yard without needing fencing everywhere.
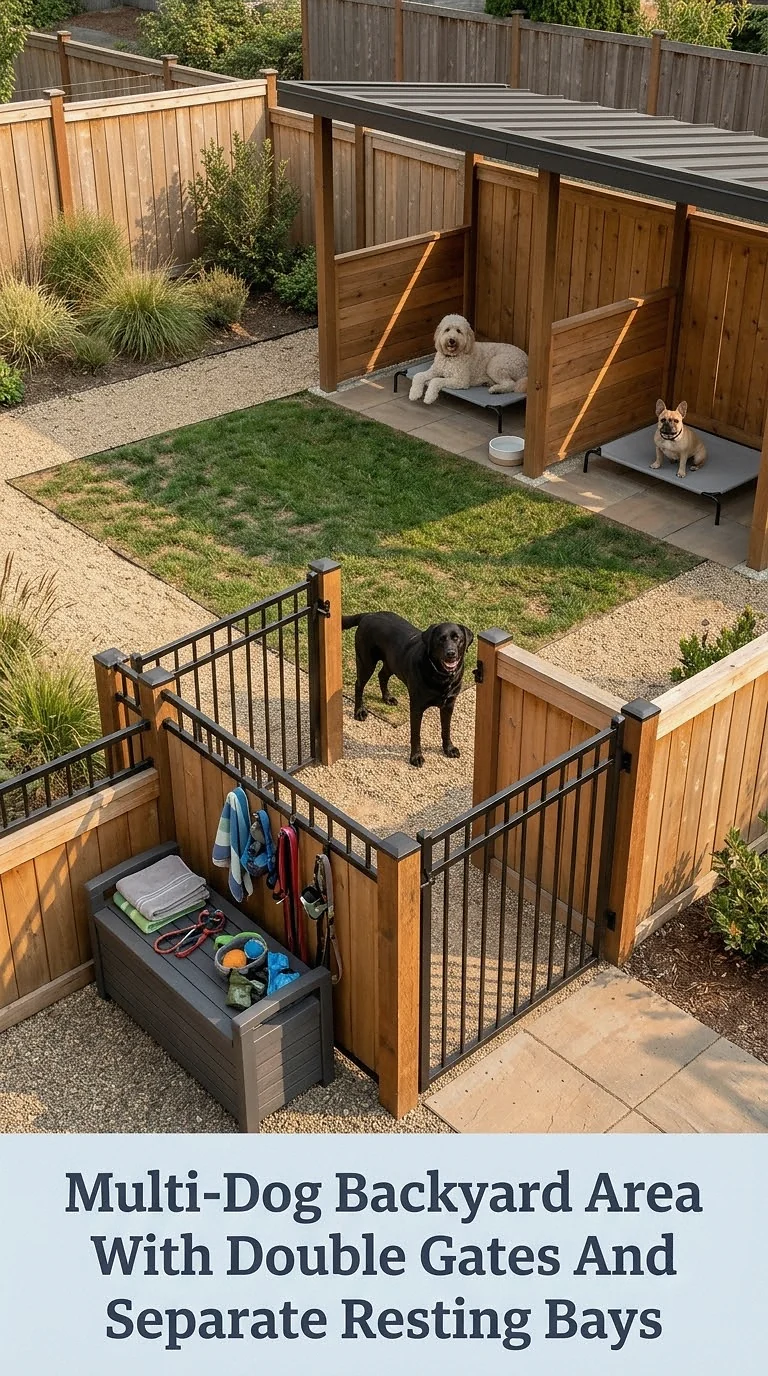
Multi-Dog Backyard Area With Double Gates And Separate Resting Bays
Read more : Can A Diabetic Dog Eat Chicken Breast?
Homes with several dogs can benefit from a little more structure outdoors.
Create one larger shared exercise zone with a secure double-gate entrance, then provide multiple separate resting areas around the perimeter. Each dog can have its own shaded bed or sheltered bay without losing access to the communal yard.
This setup can be especially helpful when dogs enjoy different levels of activity. One may want to lounge while another is still playing.
Use matching raised cots and simple name plaques if you want the space to feel personalized.
Keep high-value toys or food items managed carefully if your dogs tend to compete over resources. Designing generous circulation space around beds, gates, and water bowls also prevents everyone from becoming crowded into one small corner.
Budget-Friendly Mesh Panel Dog Run With Compacted Gravel Floor
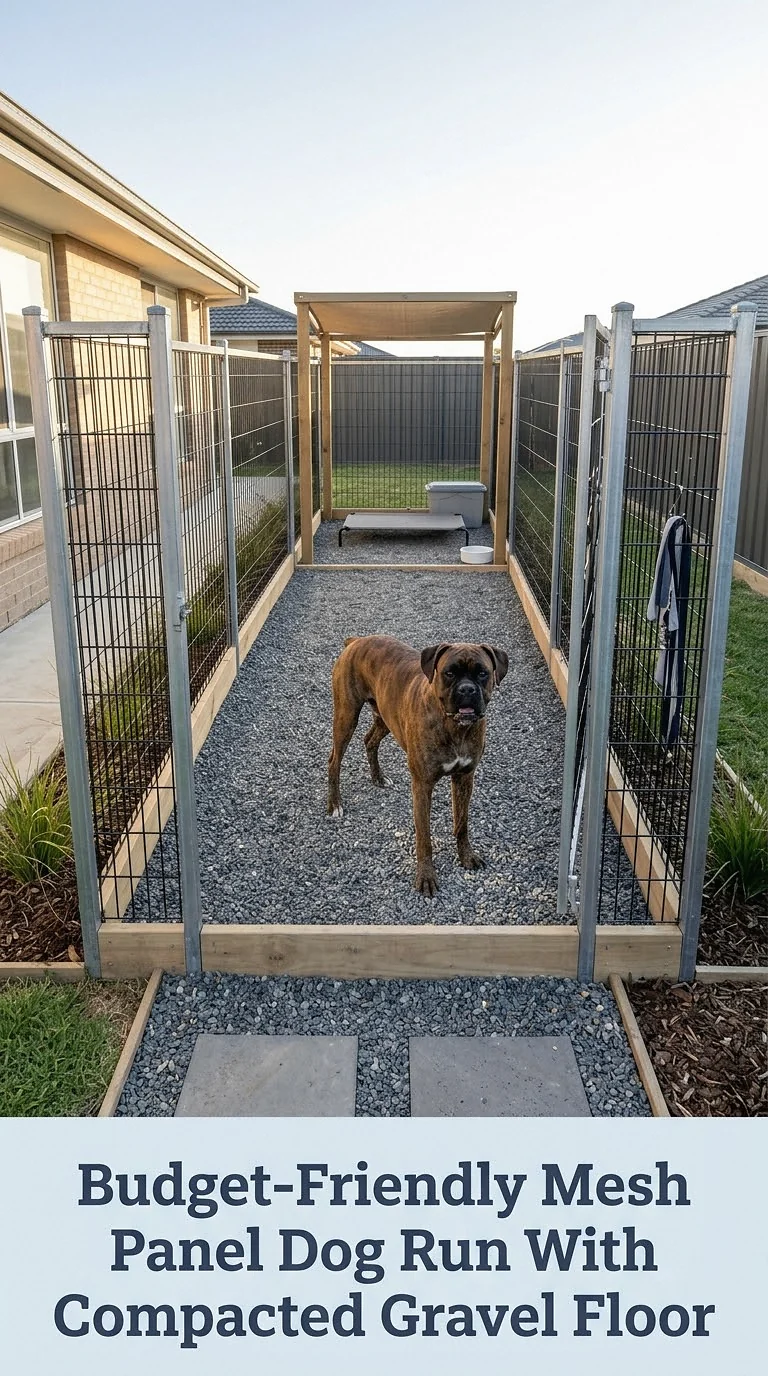
A practical dog run does not require custom masonry or expensive landscaping.
Pre-made outdoor fence panels can create an attractive enclosure relatively quickly, particularly when paired with simple timber posts or black metal framing.
For the floor, compacted gravel offers drainage and can be easier to maintain than a constantly worn patch of grass. Choose an appropriate size and texture for your dog’s paws rather than extremely sharp stone.
Add a simple shade canopy and raised outdoor bed to complete the space.
This is also a design you can improve gradually. Begin with secure containment, shade, water, and comfortable footing, then add decorative screening, planters outside the fence, storage, or better lighting as the budget allows.
Elevated Deck Dog Lounge With Railing Screen And Storage Bench
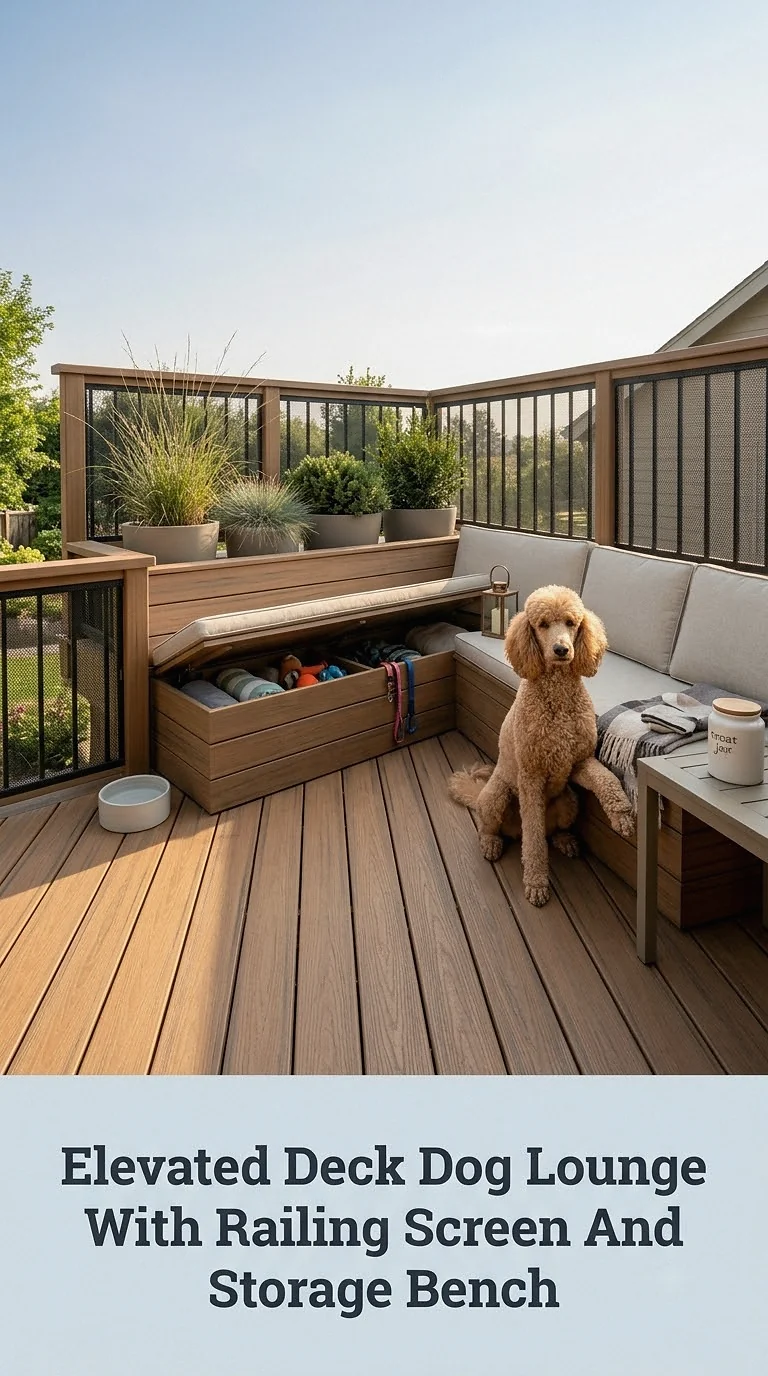
If your backyard includes a deck, dedicate one end to a comfortable dog lounge.
Start by checking the railing carefully. Small dogs in particular may need additional secure screening if the existing gaps are large.
Position a storage bench along one wall and keep waterproof boxes inside for toys, towels, grooming brushes, and outdoor accessories. Beside it, place a raised bed where your dog can enjoy the breeze while remaining close to the family.
An outdoor rug can make the space feel softer, provided it is easy to wash and dries quickly.
Shade is essential on exposed decks because boards can heat up significantly. A retractable awning, umbrella, or pergola can transform an otherwise sunny platform into a much more comfortable resting area.
Backyard Dog Wash Station With Pavers And Towel Cabinet
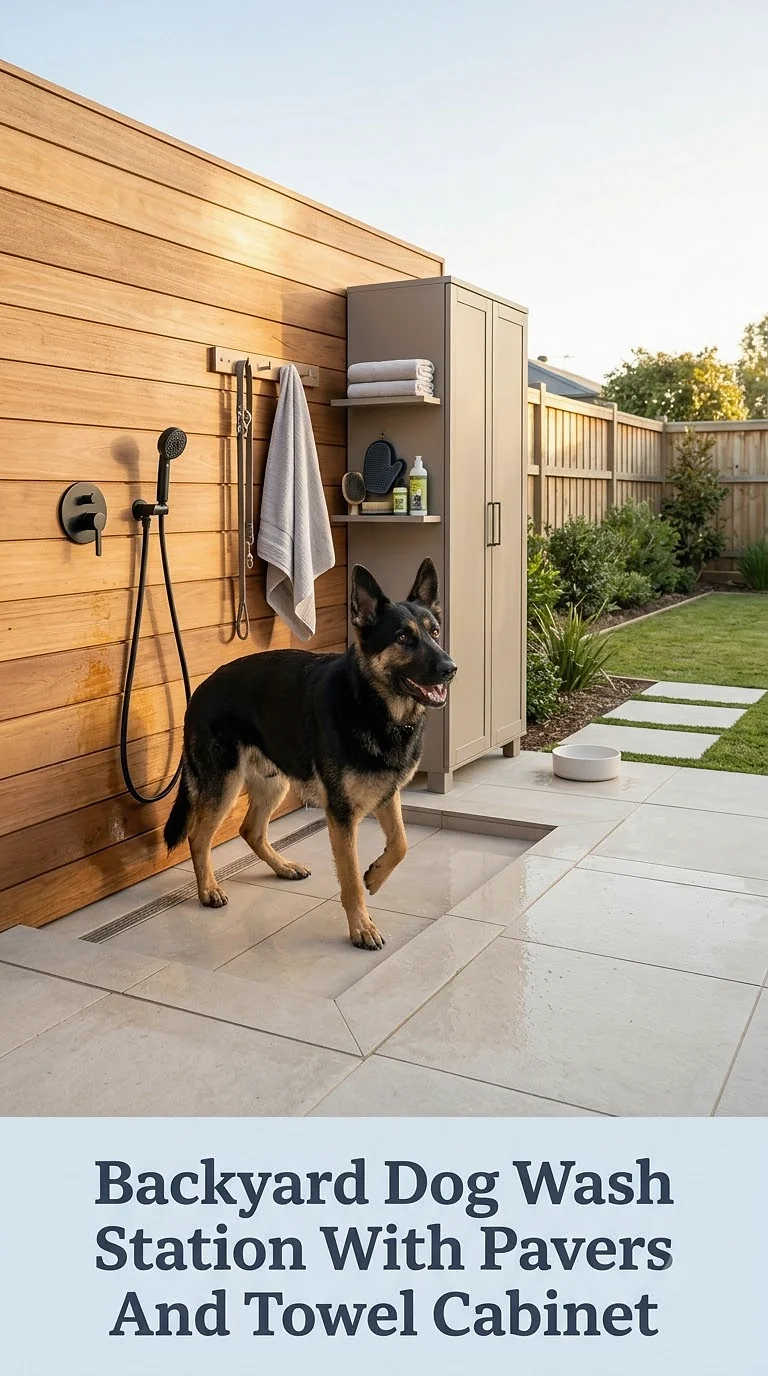
A dedicated outdoor wash station is a dream for dogs that love mud, puddles, beaches, or messy garden adventures.
Position the washing area close to an outdoor water connection and create a stable base using textured, slip-resistant pavers. A handheld sprayer makes rinsing paws and coats easier than relying on a standard garden hose nozzle.
Mount a small weather-protected cabinet nearby for dog shampoo, towels, brushes, and cleaning supplies.
Add hooks for leads and a low bench where you can sit while drying paws.
A narrow drain channel or thoughtfully sloped surface can help prevent water from pooling around the station. Keep water temperature comfortable and turn the setup into a calm routine rather than an overwhelming blast of cold water.
Natural Dog Exploration Trail With Logs, Stones And Native Planting
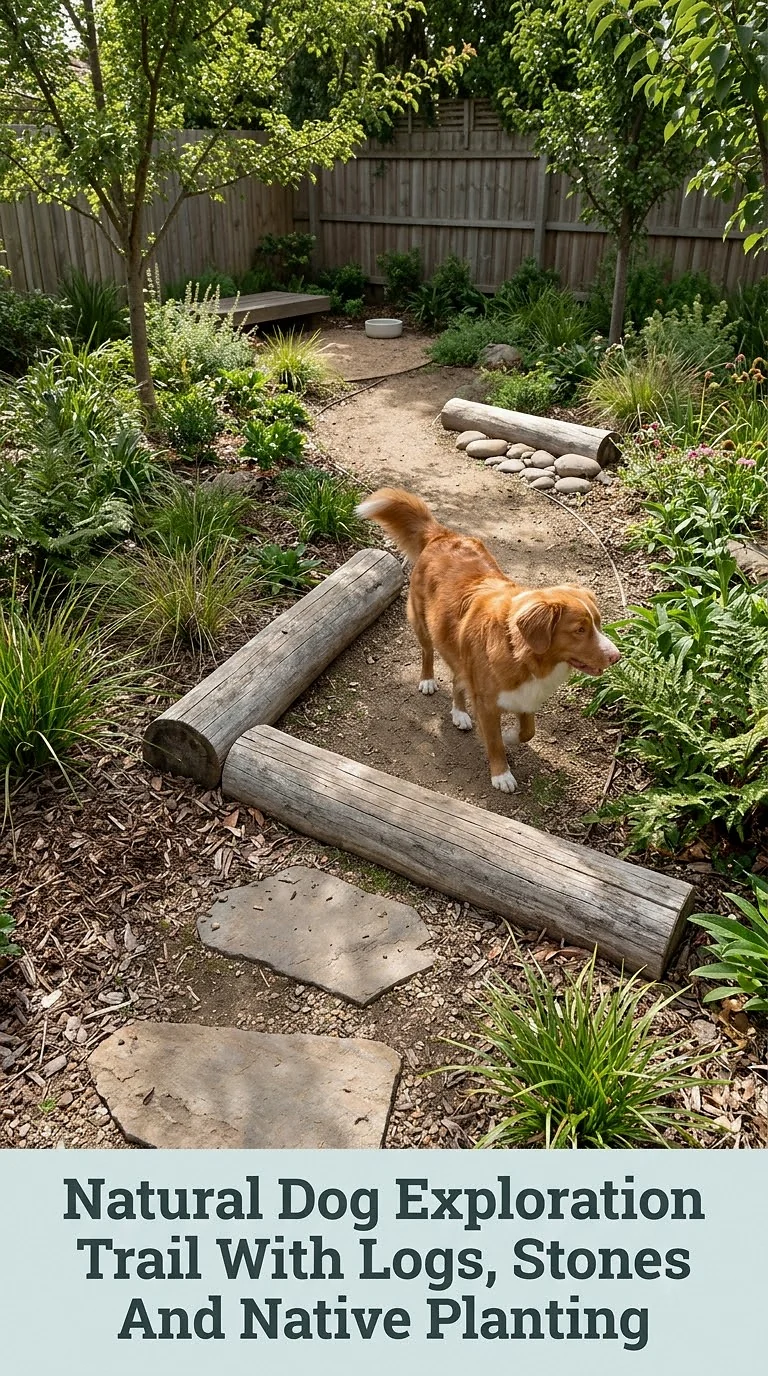
For a less structured outdoor space, create a natural exploration trail around the perimeter of your yard.
Arrange sections of flat stone, sturdy logs, patches of grass, and different safe textures along a gently winding route. The variety encourages sniffing and slower exploration rather than simply racing back and forth across the lawn.
Keep logs stable and low enough that they cannot roll or create an awkward fall. Avoid sharp rocks, splintered timber, or thorny vegetation.
Dog-appropriate native planting can help the area blend naturally into the landscape, but plant safety still needs to be checked species by species.
This style is particularly beautiful in woodland-inspired or cottage gardens where highly polished agility equipment would feel visually out of place.
Four-Season Covered Dog Area With Roof Panels And Wind Screens
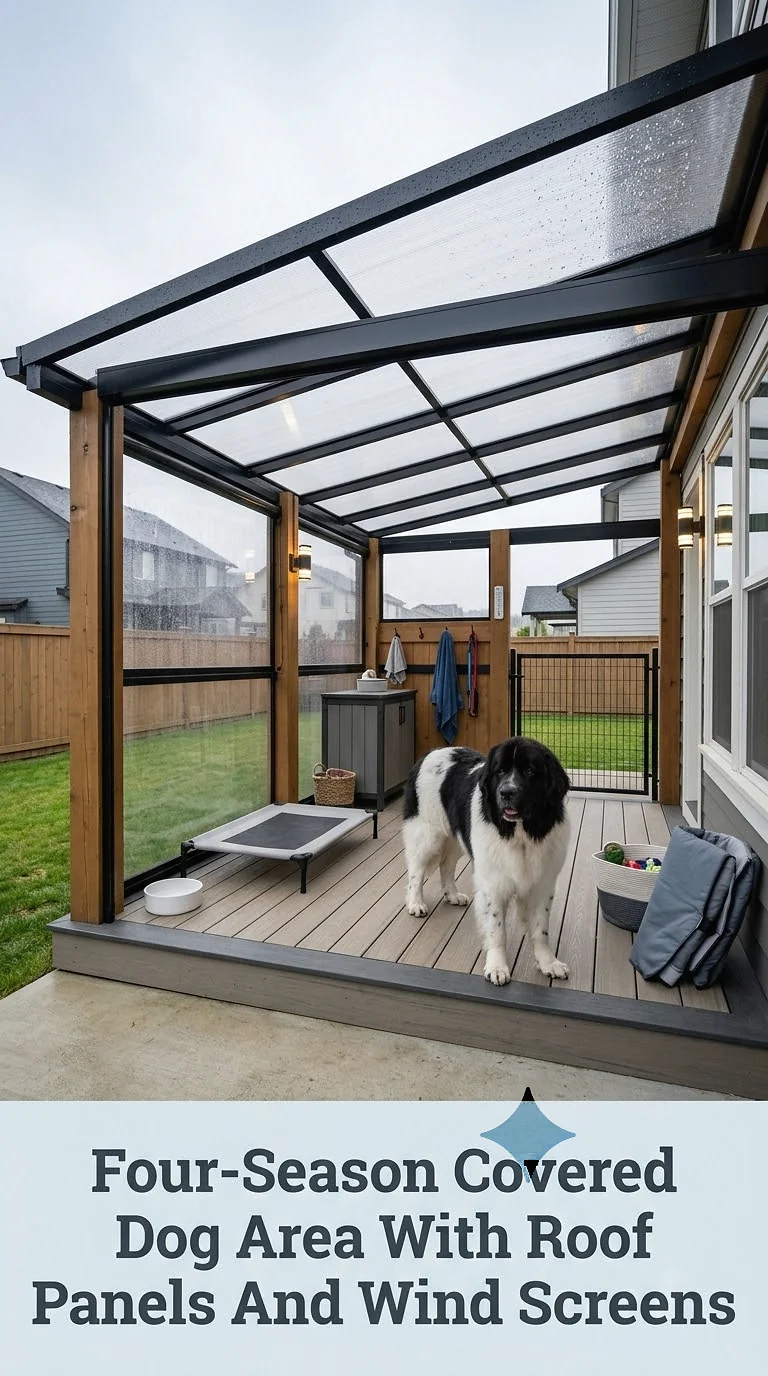
For households that experience frequent rain, strong sun, or chilly weather, a covered dog area can make outdoor time more comfortable throughout the year.
Build a simple roofed structure beside the house using timber posts and translucent roof panels. The panels can provide weather protection while still allowing daylight into the space.
Add removable side screens on the most exposed direction to reduce wind and rain without closing the area completely.
Use a raised bed, washable mat, and dry storage container for blankets and toys. Keep bedding appropriate for current temperatures rather than leaving thick fabrics outdoors year-round.
Good ventilation remains important even in colder conditions. The goal is a protected outdoor resting area, not a sealed structure that traps heat, moisture, or stale air.
Creating Outdoor Dog Area Ideas That Work For Your Home
The most successful outdoor dog area is not necessarily the biggest or most expensive one. It is the space that fits naturally into your home while meeting your dog’s everyday needs.
For one family, that might mean turning an unused side yard into a simple fenced run. For another, it could be a beautifully styled pergola with a washable bed beside the patio. A small apartment may only have room for a tidy potty corner, while a larger backyard can include separate areas for running, digging, cooling off, and relaxing.
Start with the essentials: secure boundaries, comfortable footing, dependable shade, fresh water, safe landscaping, and easy maintenance. Once those basics are covered, you can layer in the details that make the area feel special, from cedar fencing and cozy beds to enrichment features and hidden storage.
Choose the ideas that suit your dog’s habits and your own lifestyle, then adapt them to the space you already have. With a little thoughtful planning, even an ordinary outdoor corner can become a beautiful place your dog genuinely loves spending time in.
Source: https://petstutorial.com
Category: DOGS